
A valve cover leak can occur well before you ever know it is there. It typically starts as a small leak that does not allow much oil to leave the engine. If you do not service your vehicle yourself or inspect it often, you may never notice it. Over time, the leak will start to increase until it is noticed during an inspection, or once you start to see the signs on your own. You may notice drops of oil on the ground, smoke coming from under the hood once the engine is warm, or even get a strong smell of burning oil which can engulf the interior of your vehicle.
Knowing what to look for when your hood is open can help you to identify the leak well before it becomes more serious.
Part 1 of 3: Understanding the purpose of the valve cover
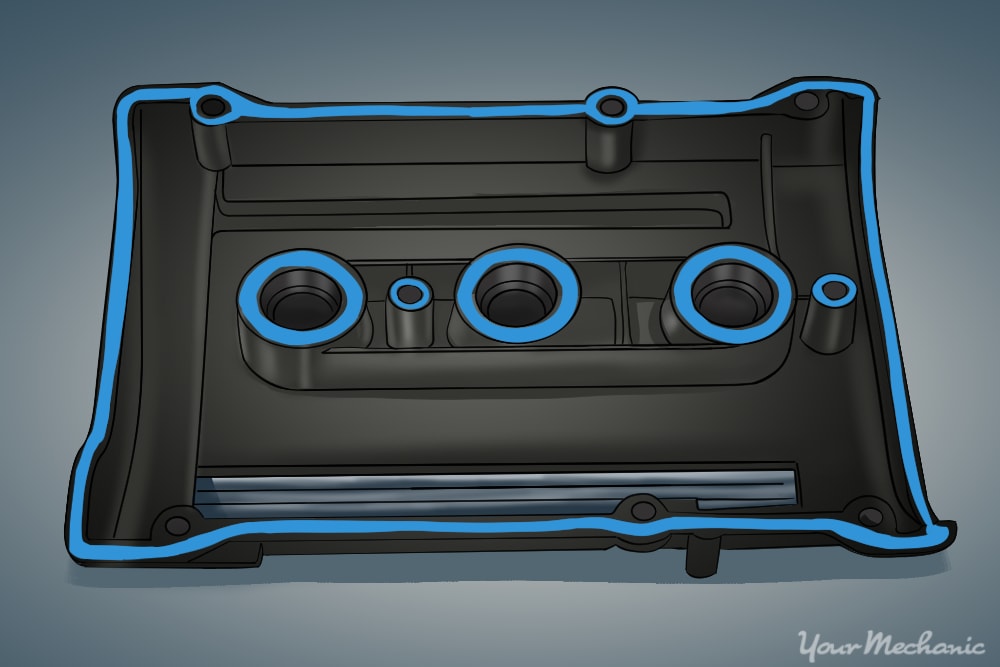
The valve cover is typically located on the top of the engine. Some engines will have the valve covers mounted to the side or in a “V” configuration. No matter how it is mounted to the vehicle, it has the same purpose, to cover the cylinder head.
The valve cover, or head cover, as it is referred to on some engines, is mounted to the top of the cylinder head to cover the moving parts of the valve train. This typically includes the valves, the valve springs, and even the camshafts. These parts are continuously lubricated with oil to reduce friction. This oil is constantly splashed around within this system and the valve cover keeps the oil inside of the engine.
The valve cover is also the access point to perform valve adjustments on many engines. The valve cover is typically mounted to the cylinder head through a series of bolts and a rubber gasket. Some engines do not use a gasket, but instead, they use silicone sealant. If the valve cover becomes loose or if the gasket material fails, the oil will begin to leak. Most valve covers will start leaking slowly without any effect on the engine. Over time, the leak will become larger and the engine oil will begin to coat different parts on the outside of the engine. If the leak continues for a long period of time, it may start to affect the way the engine runs. A leak can cause the engine to have a very strong smell of burning oil, and in some serious cases, it can even cause a fire if enough oil gets onto the exhaust system.
Part 2 of 3: Check for a leaking valve cover gasket
In the early stages of a valve cover leak, the problem may not be noticed at all. Over time, the leak will become more evident. Catching a leak early on can help you keep your vehicle running as good as possible.
Familiarize yourself with the signs of a leaking valve cover gasket so that you can find a leak at the earliest.
Visual Inspection: A visual inspection of the valve cover can be done at any time. It is a good idea to inspect the valve cover for signs of leakage at every oil change.
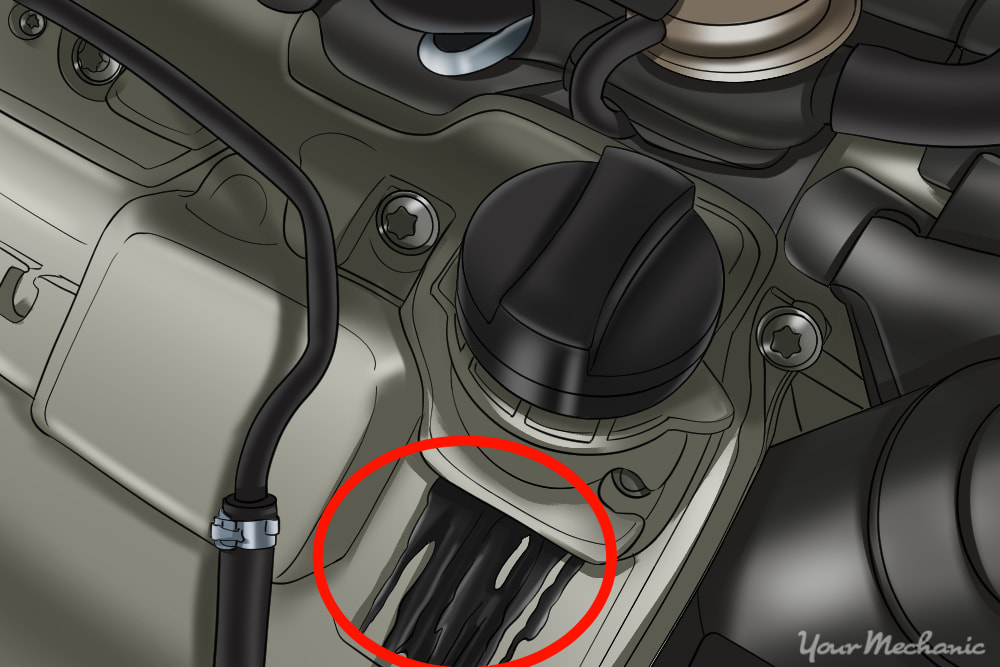
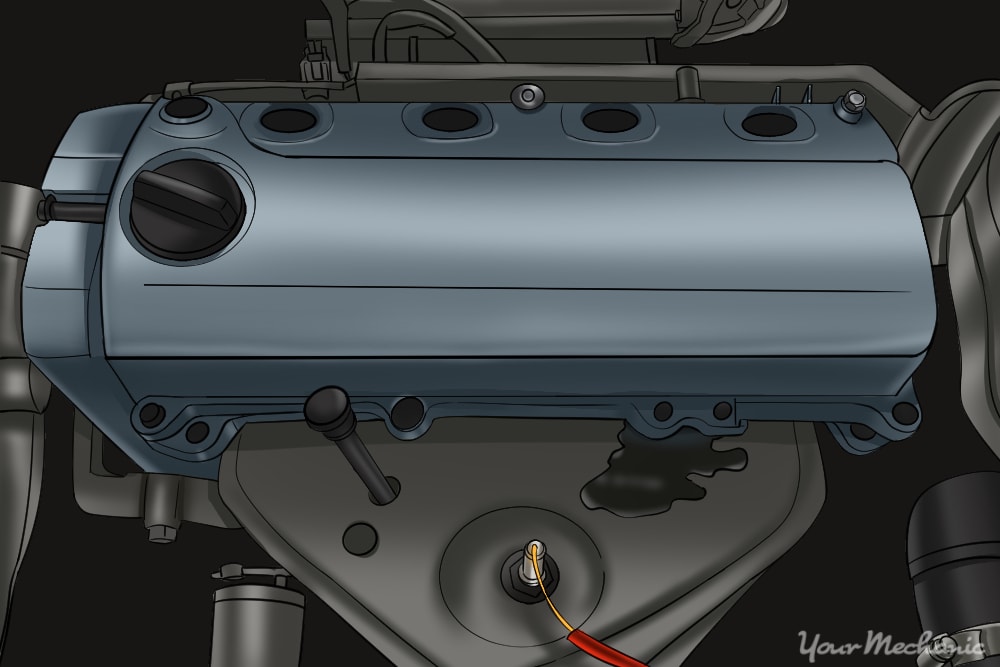
With the hood open, look for signs of oily residue around the outer perimeter of the valve cover. If there is any oil present, it indicates a leak in the valve cover. Any dirt accumulated around the outside of the valve cover is also a sign of leakage. As oil begins to leak, dirt will stick to it and absorb the oil. In most cases, small amounts of dirt accumulation around the valve cover is an indication that it is just starting to leak.
Leaking oil: If your car leaves oil spots on the ground, that is a sign that there is an oil leak on the engine. Since most valve covers are located on the top of the engine, it takes a fairly large leak to drip oil onto the ground. Though there are many places that an engine can leak oil, the valve cover is one of the most common spots.
Smoke coming from under the hood: Most valve cover gaskets are located at or near the top of the engine. As the valve cover leaks, the oil will end up running down the side of the engine and it will get onto the exhaust. As the engine and the exhaust get heated up, the oil from the valve cover will begin to burn off and smoke. When this occurs, you will see smoke coming from under the hood.
The smell of burning oil: When a valve cover gasket leaks oil onto the engine, the oil will burn off when the engine is hot. When this occurs, the smell of burning oil can become overwhelming. Most of the time, this smell will fill the inside of the car and it can make you sick.
Engine misfire: Most valve covers not only mount to the top of the cylinder head, but they also have the spark plug tubes in the middle of them. These tubes allow the spark plug wire or the ignition coil to reach the spark plug.
The spark plug tubes must remain clean and dry to allow the best possible ignition spark to occur. When a valve cover leaks, this tube will fill with engine oil and the oil will then get into the spark plug wire or ignition coil and short it out. The spark will then not make its way to the spark plug causing an engine misfire. If this occurs, you will need to replace the valve cover gasket and tube seals. Once the leak is fixed, you will also need to replace the spark plug wire or coil boot as the oil would have softened the rubber.
Part 3 of 3: Replace a valve cover gasket
If the valve cover is leaking, you will need to replace it. Failure to replace the gasket can result in issues ranging from burning smells to engine misfires and can even cause a fire to occur.
Materials Needed
- Brake cleaner
- Gasket scraper
- Flat-head screwdriver
- Ratchet w/sockets and extensions
- Silicone RTV sealant
- Torque wrench
- Valve cover gasket
Step 1: Park your vehicle. Park your vehicle on a flat, hard surface and apply the parking brake.
Step 2: Let the engine cool. Open the hood and allow the engine to cool off.
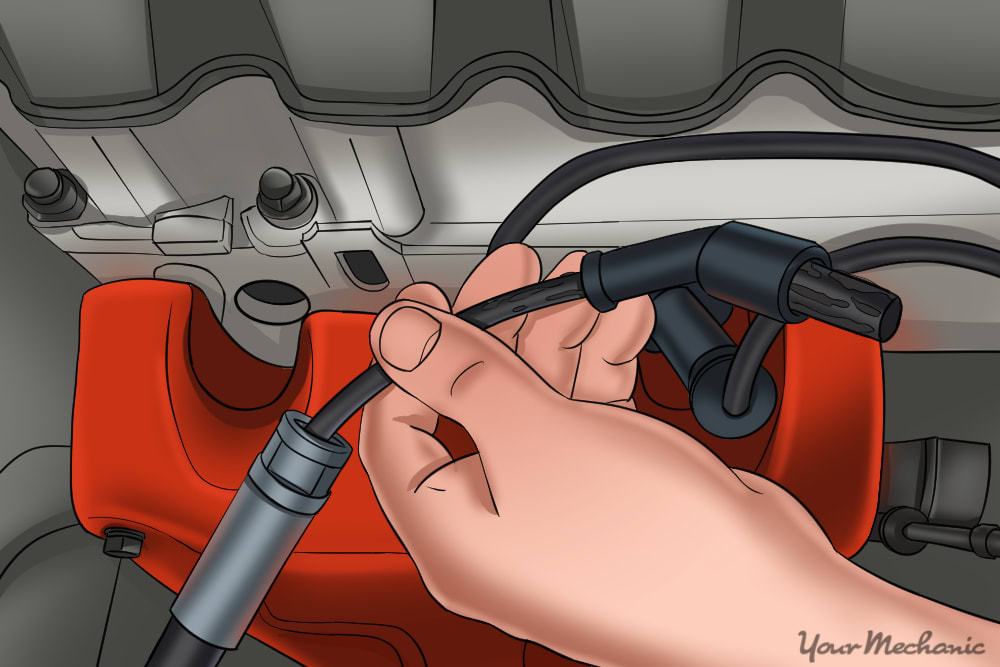
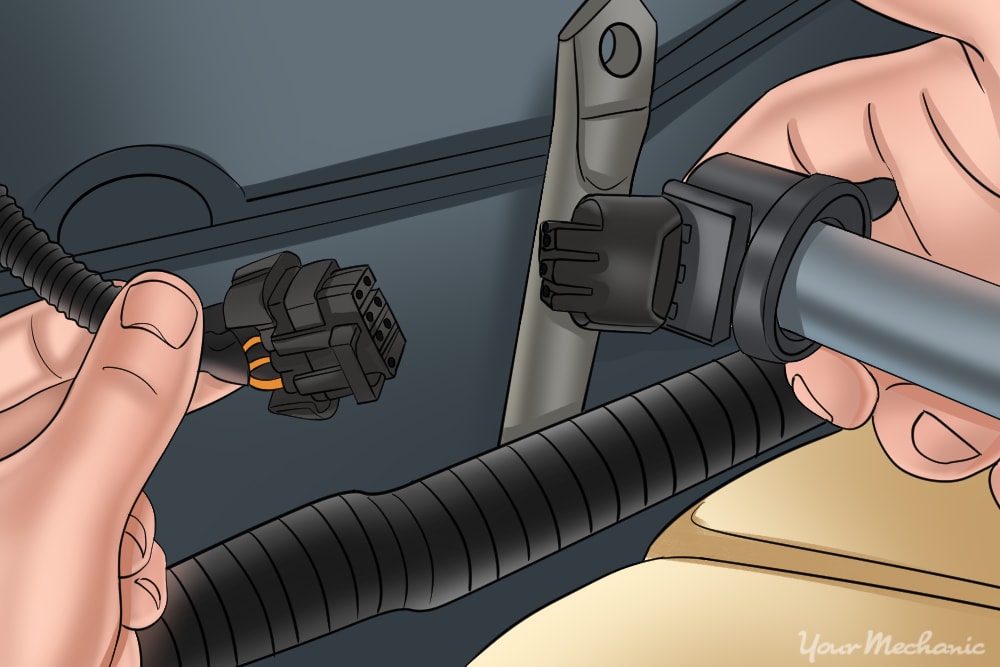
Step 3: Disconnect the connectors. Disconnect the connectors from the ignition coils by pressing on the locking tabs and pulling the connector from the coil.
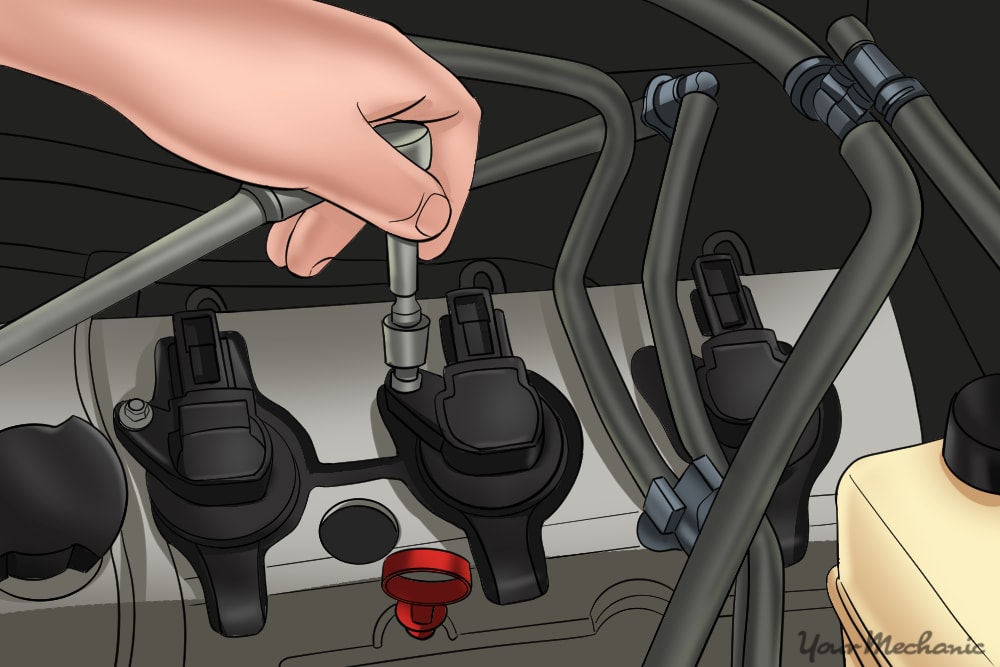
Step 4: Remove the mounting bolts. Use the ratchet and the appropriate socket to remove the ignition coil mounting bolts.
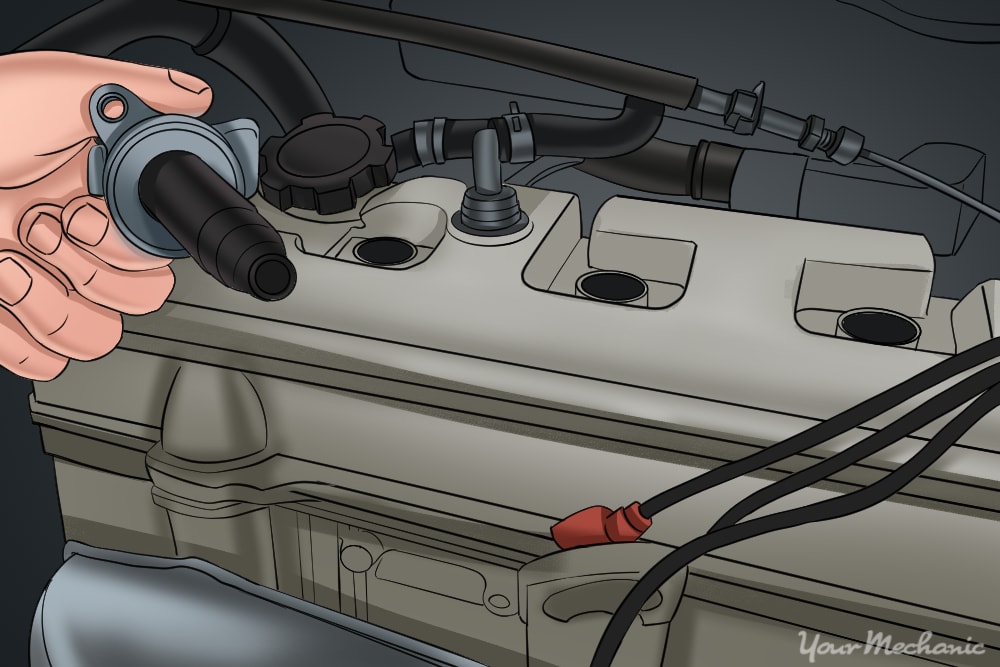
Step 5: Remove the ignition coils. Remove the ignition coils by pulling them out of the valve cover.
- Tip: You may need to twist the coil slightly for it to release from the valve cover.
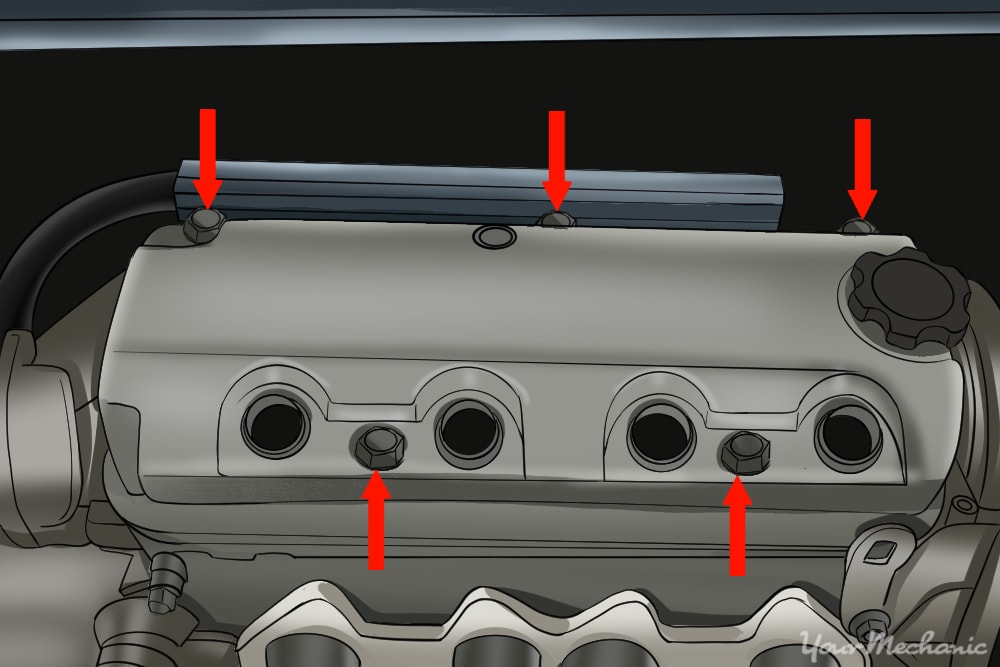
Step 6: Remove the valve cover mounting bolts. Use the ratchet and the appropriate socket to remove all the valve cover mounting bolts.
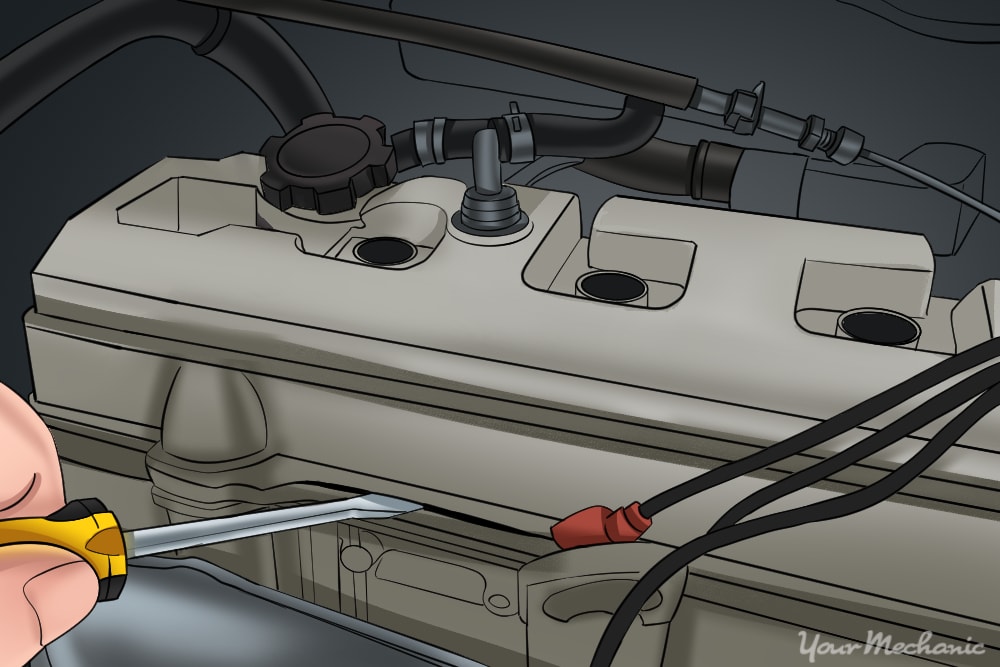
Step 7: Take off the valve cover. Remove the valve cover from the cylinder head by using the screwdriver to pry it off.
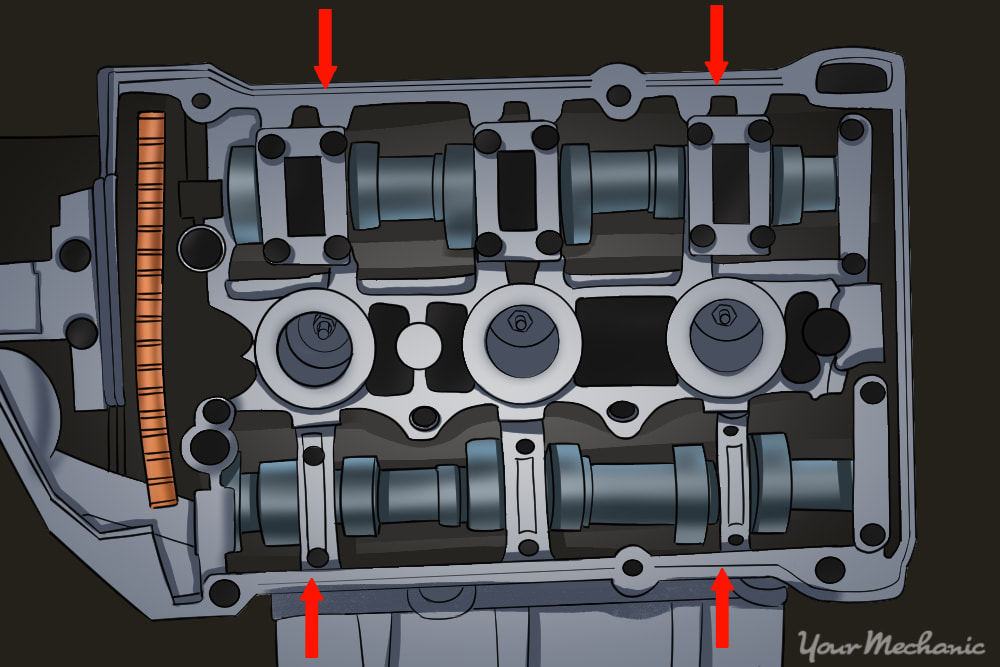
Step 8: Clean the valve cover. Using the gasket scraper, clean the valve cover and remove any gasket material on it. Clean the cylinder head surface to remove any sealant or any other gasket material present.
Use the brake cleaner to remove any oily residue from the surface.
Step 9: Install the new valve cover gasket. Install the new valve cover gasket and spark plug tube seals into the valve cover.
Step 10: Add silicone sealant. Apply a thin layer of the silicone sealant to the cylinder head where it seals to the valve cover.
Step 11: Put back the valve cover. Install the valve cover onto the cylinder head and install all the bolts starting them by hand until they are snug.
Step 12: Tighten the valve cover bolts. Torque down all the valve cover bolts to manufacturer's specifications using your torque wrench.
Step 13: Put back the ignition coils. Install the ignition coils back into the spark plug tubes.
- Tip: If the ignition coils have oil contamination on them then you should replace the coil boots at this time.
Step 14: Tighten the ignition coil mounting bolts. Install the ignition coil mounting bolts by hand until they are snug. Using your torque wrench, torque the ignition coil mounting bolts to manufacturer’s specifications.
Step 15: Reinstall the electrical connectors. Install the electrical connectors onto the ignition coils by pressing them into place until you hear them snap and lock.
Step 16: Check the engine oil level. Check the engine oil level and add more, if needed.
Step 17: Inspect the valve cover. Start the engine and allow it to warm up. Inspect the valve cover for any signs of oil leakage.
Whether your first sign of a valve cover leak is a puddle of oil on the ground, the smell of burning oil, or an ignition misfire, you should replace the gasket when you first notice that it is leaking. In some rare cases, the valve cover can be tightened to stop the leak, but typically, once the leak occurs, it is too late and the gasket must be replaced. Fixing a small leak before it becomes large can also help you to diagnose other leaks in the future as it prevents excessive oil from building up on the engine.
If you are uncomfortable with performing this process on your own, get a certified mechanic from YourMechanic to change the valve cover gasket for you.


