It is very important to replace axle seals because major damage, such as saturated brake pads and shoes and brake failure. An axle leak could also cause major damage to the differential ring and pinion and bearing assemblies, ruining the entire rear axle in severe cases.
When it comes to replacing axle seals, it is always best to replace both seals in the rear axle, since in the rear axle you must access the differential housing in order to release the axle shafts to remove. When releasing the axle shafts, you can release both in that single process.
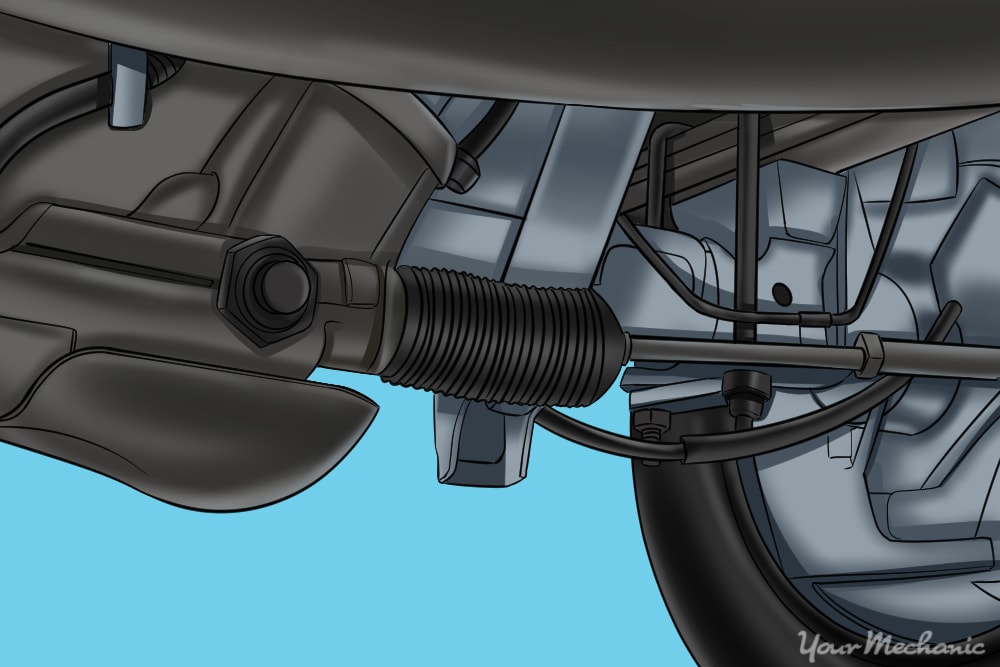
Common signs of a failing axle shaft seal include leakage around the seal and puddles of fluid if there is a serious leak. The axle may also pop out entirely, since the axle shaft seal may act not only to keep flow in but also as a support for the axle itself.
Part 1 of 9: Raising and securing the vehicle
Materials Needed
- Hydraulic jack
- Jack stands
- Tire iron
- Wheel chocks
Step 1: Place your wheel chocks in front and back of one of your front wheels. This will keep the vehicle from moving.
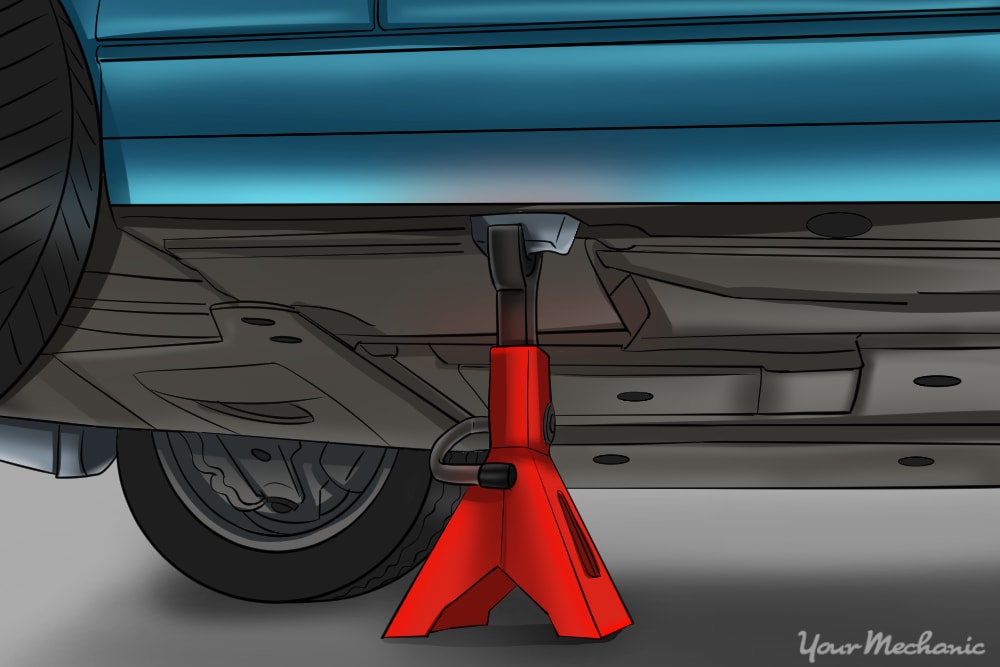
Step 2: Lift the vehicle. Place your hydraulic jack at the appropriate lifting points specified in the vehicle's owner’s manual.
After you get the jack placed at the lifting point, get the jack started by lifting it up to the proper position. This will make it easier to remove when the axle is supported on jack stands.
Step 3: Set jack stands. Lift the axle high enough that the wheel is off the surface and you are able to set a jack stand underneath the axle.
Do this for both sides.
Step 4: Remove wheel nuts and wheel. After placing both jack stands underneath the car, remove the wheel nuts completely and remove the wheel.
Step 5: Put the vehicle in neutral. After the vehicle is secure, put the vehicle in neutral.
Part 2 of 9: Removing the brake rotor or brake drum
Materials Needed
- 3/8” ratchet with metric and standard socket set
- 1/2” ratchet with metric and standard socket set
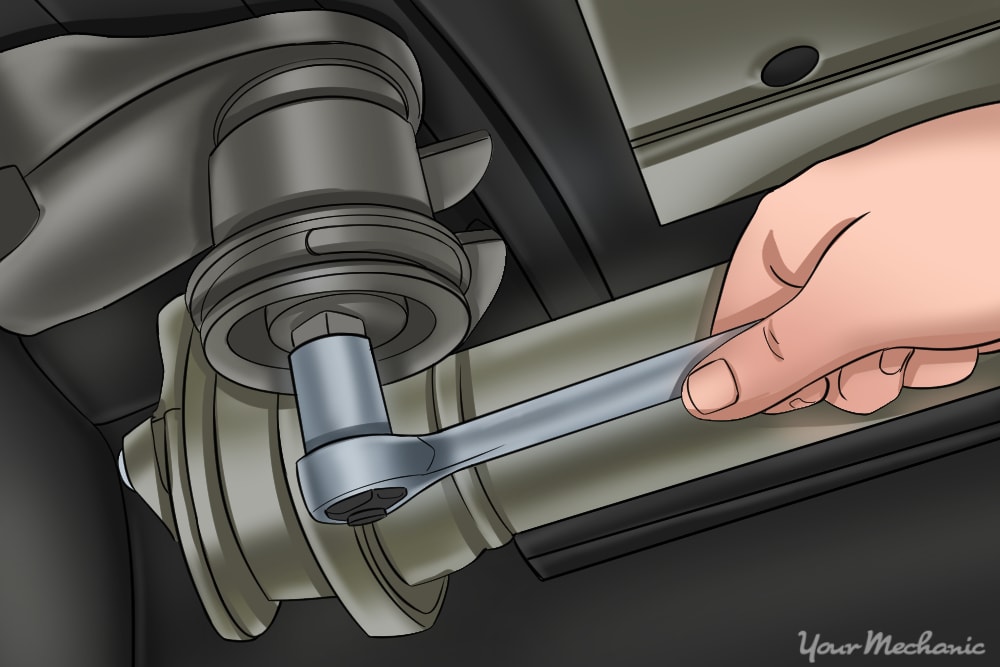
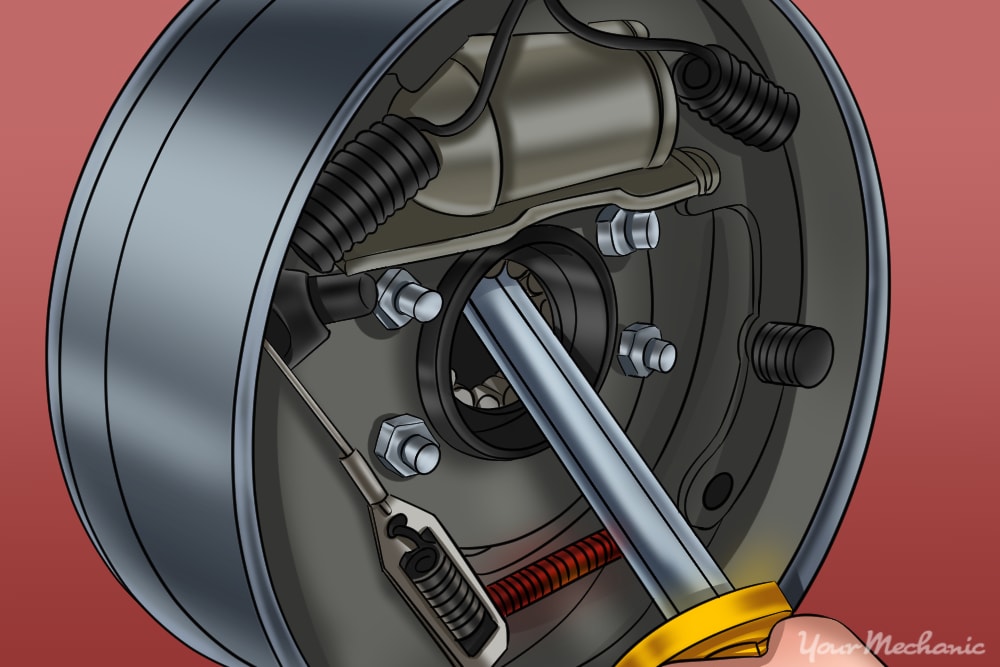
Step 1: Remove the brake caliper. After removing the wheels, remove the brake caliper using a ratchet.
The brake caliper retains the brake pads; the caliper is the part that applies pressure and stops the vehicle.
Step 2: Remove the brake caliper bracket. After removing the brake caliper, depending on the vehicle, there might be a brake caliper bracket.
If you don’t have a brake caliper bracket, your brake rotor should slide right off the axle flange (the mounting surface your wheel mounts to) and expose the entire flange.
If your vehicle does have a brake caliper bracket, remove the two mounting bolts that secure it. This may require a longer ½” ratchet to remove.
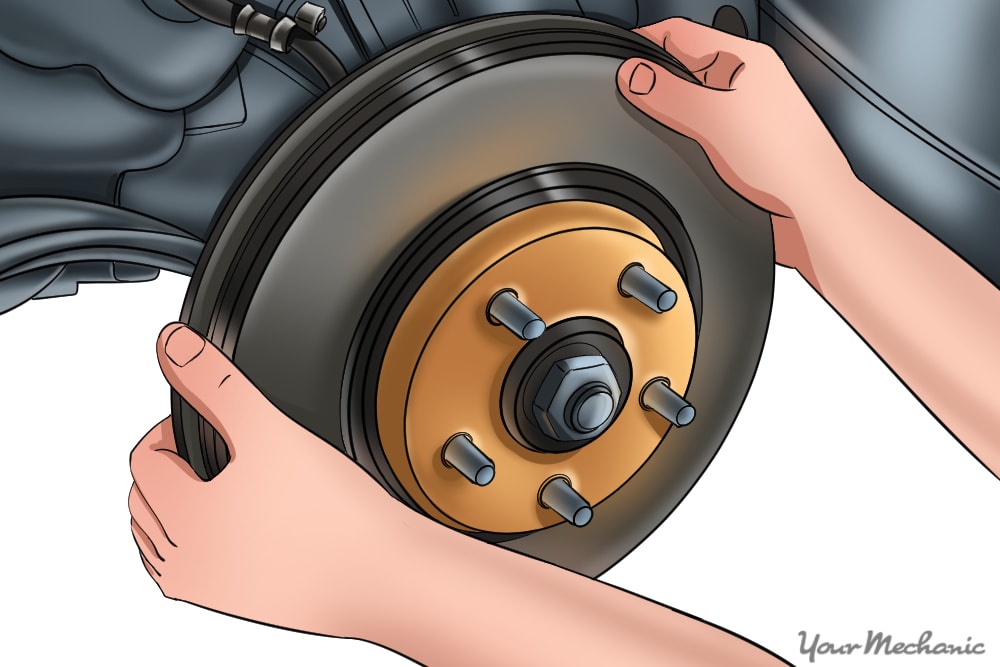
Step 3: Remove the brake rotor. After removing the brake caliper mounting bracket, you will then be able to remove the brake rotor.
Removing the brake rotor will expose the axle flange.
Part 3 of 9: Draining the differential
Materials Needed
- 1/2” Torque wrench
- Drain pan
- Hammer
- Metal scraper
Step 1: Remove mounting bolts. To drain the differential, remove all the mounting bolts except one for one at the top of the differential cover.
Step 2: Get drain pan ready. Place your drain pan underneath the differential.
Step 3: Drain the fluid. Take your scraper and place it in between the differential cover and the axle house.
With the scraper in that position, slightly tap the scraper handle, increasing the force as needed to cut through the silicone seal. This will release differential fluid, so be sure the drain pan is placed in the correct position to catch the fluid that is leaking.
Step 4: Remove the differential cover. Remove the remaining bolt and set the cover aside with the mounting bolts.
Part 4 of 9: Removing the axle retaining clips
Materials Needed
- Drain pan
- Flashlight
- Telescoping magnet
- Towels or rags
Step 1: Locate and remove the pin. Rotate the axle by rotating the driveline that goes into the differential.
Rotate the driveline and watch the differential ring and pinion as it rotates until you see a small retaining bolt retaining a long pin in the center of the spider gears. This pin holds the small gears inside of the ring and pinion carrier all together and in line.
When you find that small retaining bolt, try to position the carrier in a way that you can remove the large pin and not have to rotate the axle.
Once you get it position, remove the retaining bolt and slide the large pin out of the axle. If needed, use a magnet to get it to slide out. Set the retaining bolt and pin aside.
Step 2: Remove the retaining clip. Push your axle towards the differential opening; you will notice the slop or movement of the axle.
This will allow you to take a magnet and remove the axle retaining clip, shimmying it if necessary. If you are having a hard time, make sure the clip is free by looking it over with a flashlight and feeling for it with your fingers.
You should be able to move it around and possibly remove it with your fingers. If it isn’t moving freely, be sure to try and get the axle to slide back out and then back in, and retry the second step again.
Step 3: Slightly pull out the axle. Once you removed the axle retaining clip, the axle is free to pull out of the housing.
Before removing you will need to place your second drain container underneath the end of the axle tube. Take a couple of rags and grab the axle flange, slightly pulling the axle out. During the removal, slowly wipe the axle shaft as it comes out of the axle housing.
Part 5 of 9: Removing axles
Materials Needed
- 24” pry bar
- Axle seals (2)
- Brake cleaner
- Differential fluid
- Hammer
- Seal installing/driver kit
- Seal removing tool
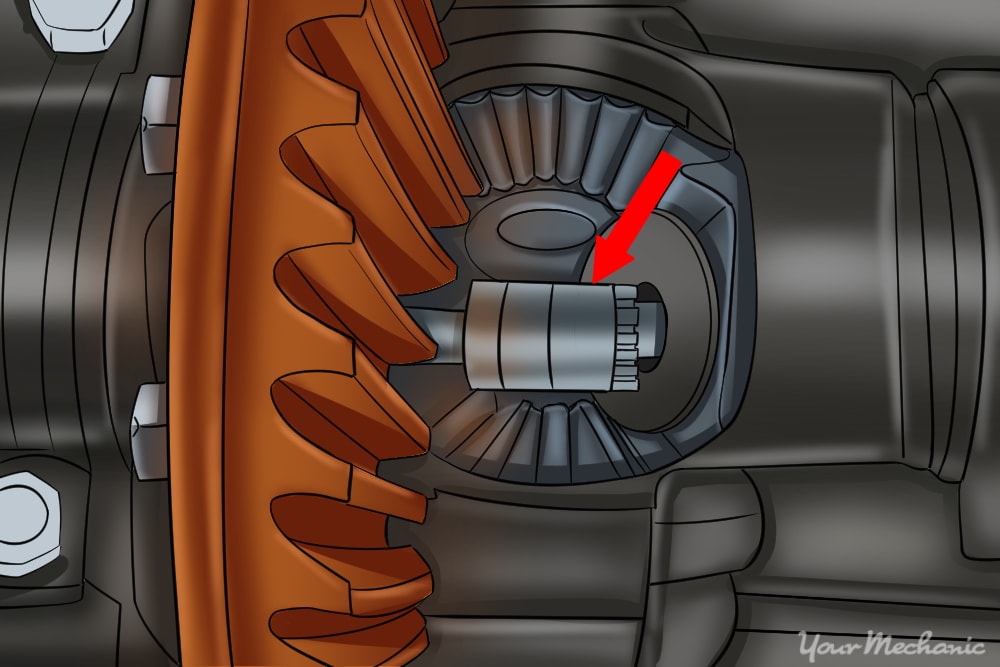
Step 1: Remove the seal. Hook the inside of the seal with the hooked end of the seal puller and pull or push depending on your position.
The tool rolls the old seal out by only pulling up on one edge. In some cases, the seal puller won’t be able to remove the seal. In that event, you can get a long pry bar that is at least 24 inches long.
Using the same technique, put the edge of the pry bar on the inside edge of the seal, and gently push the pry until the seal begins to lift out. Remove the seal completely.
Step 2: Clean the axle tube and seal. Clean the inside of the axle tube with brake cleaner and wipe up where the seal will be installed.
Step 3: Take the new seal and find the appropriate seal installing tool.
Step 4: Get the seal started. With the seal in the right position, gently get the seal started by using a hammer and slightly tapping it into position.
Once in place, set your seal driver flush on the seal face, and use your hammer to drive the seal into place until completely flush and flat on the axle housing.
Step 5: Run fluid around the seal. After installing the seal, take some differential fluid with your fingers and run it around the inside of the seal.
Repeat these steps for the opposite side.
Part 6 of 9: Installing the axles
Step 1: Install the axles. Do this by gently inserting the axle end without pinching the seal.
It will take some shifting and shimmying to get the axle to slide into the carrier and seated into the seal. Once you see the axle is inserted all the way, visually inspect the seal for a proper seat.
You don’t want to the sealed rolled or damaged. If the seal is damaged after installing, you will need to replace the seal again.
Step 2: Secure the retaining clip. Slide the axle retaining clip over the end of the axle slot, and push out the axle shaft to prevent the axle retaining clip from falling off.
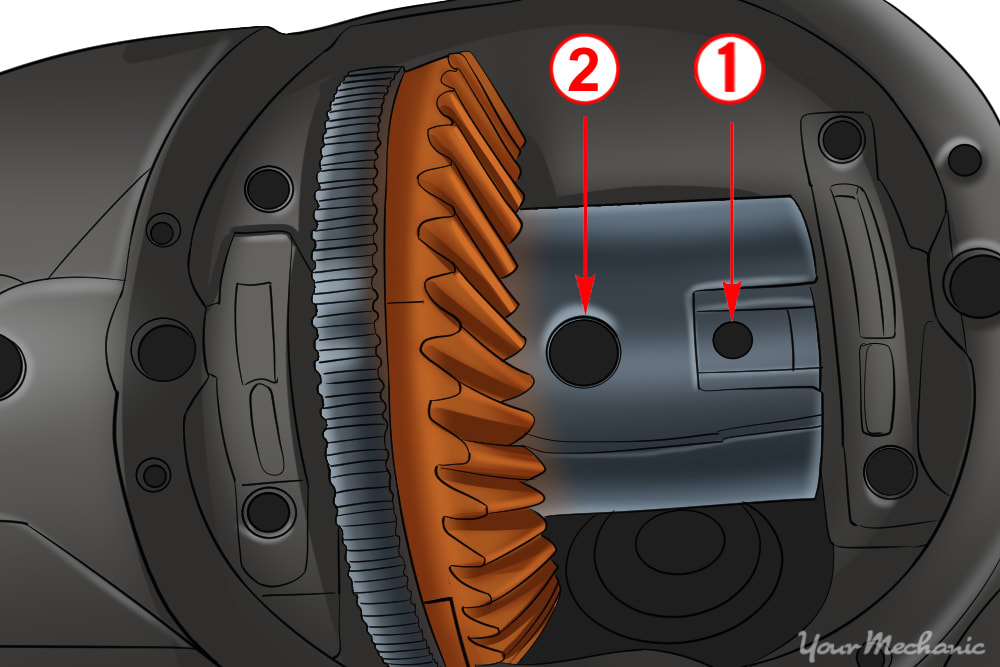
Step 3: Slide the carrier pin into the assembly. Once the axles are installed and retained, you will need to slide the carrier pin (2 on above illustration) into the carrier assembly.
When you put the pin back into the carrier assembly, be sure that you have the threaded hole lined up for the retaining bolt (1 on illustration above) to be installed and torque to specifications.
Part 7 of 9: Installing differential cover
Materials Needed
- 1/2” torque wrench
- Brake cleaner
- Metal scraper
- RTV silicone
Step 1: Scrape off old silicone. Start by taking a scraper and scraping off any old silicone on the cover and the differential housing.
You want to get the surface free of any debris or old silicone. Take your brake cleaner and spray off any debris, and wipe the mating surfaces of the differential cover and the axle housing.
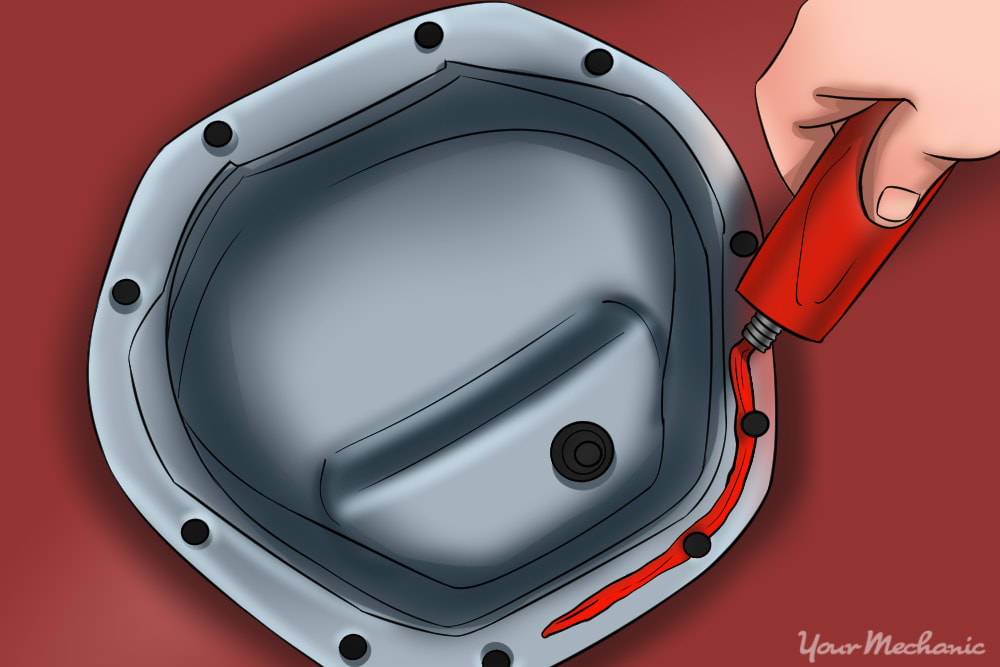
Step 2: Apply new silicone. Put about a quarter inch bead of RTV silicone on the differential cover.
The bead of silicone should run along the center of the mating surface. Swoop towards inside cover around the mounting holes.
Step 3: Reinstall differential cover. Having your mounting bolts ready and easy to reach, put your differential cover on to the axle housing.
Hold the cover in one hand thread the bolts with the other.
Step 4: Torque mounting bolts. Follow the recommended manufacturer's torque specifications for your vehicle.
Part 8 of 9: Adding differential fluid
Materials Needed
- ½” torque wrench
- C-clamp
- Differential fluid
Step 1: Remove fill plug. Remove the fill plug that is located on either the right side or left side of a differential housing.
In some cases it will be hard to find; you may have to scrape off old grease or mud in order to see it. In most cases, you'll be able to use a ⅜” ratchet to remove the plug; in rare cases, you may need a hex head socket.
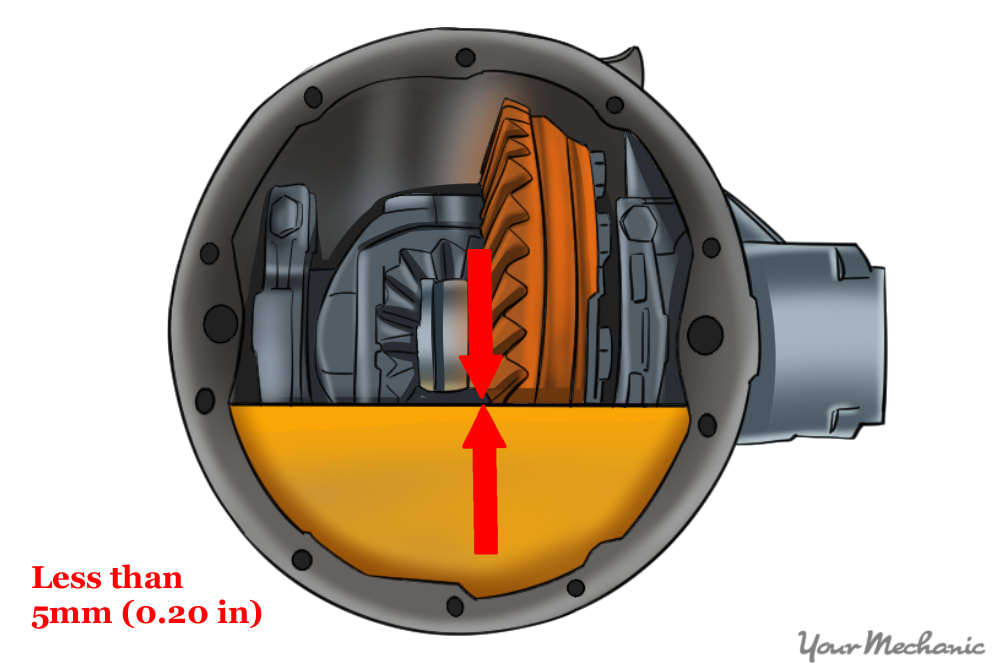
Step 2: Know the fluid capacity. When filling the differential housing with differential fluid, it is always best to find the fluid capacity in your owner's manual.
When filling the differential with fluid, you want to be able to feel it just below the fill hole. The best way to check will be to use your finger to find out the level of the oil.
- Warning: Do not overfill as this may cause leakage.
Step 3: Reinstall brake parts. Reinstall the rotors, the brake caliper bracket ,and mounting bolts, tightening to the manufacturer's torque specification.
You may have to use a C-clamp to compress the caliper if it won't go over the rotor when installing the caliper. Tighten the brake caliper mounting bolts to the manufacturer's torque specifications.
Step 4: Install wheels and wheel nuts. Put the vehicle back into park and install the wheels and start wheel nuts.
Set the parking brake on the vehicle to lock the rear wheels. This will let you get your wheel nuts slightly tightened up before setting the vehicle back on the ground.
Step 5: Tighten the lug nuts. After getting the vehicle back onto the ground, tighten up the lug nuts with a torque wrench to the manufacturer's torque specs.
Part 9 of 9: Test drive
Step 1: Test drive your vehicle for a short trip. This helps get the differential fluid working through the axle.
After the short drive, recheck the differential fluid by removing the fill plug on the differential. Use your finger to check the level and, if it is low, add what is needed.
The axle seals serve the purpose of keeping differential fluid in and keeping dirt, dust, and water out. Contamination can quickly ruin fluid which can ruin bearings, seals, and even the major components like the ring and pinion. Keeping an eye on fluid leaks and odd or abnormal noises coming from your axles can help prolong your vehicle’s life. If replacing your axle shaft seal is something you would rather leave to a professional, have one of YourMechanic’s certified technicians perform a replacement.