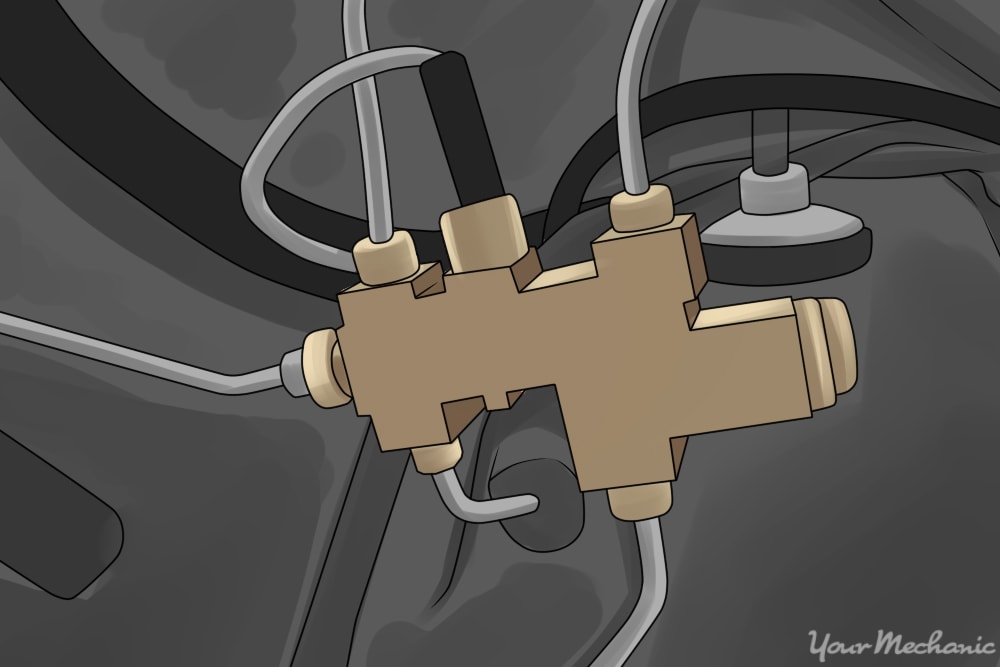
A combination valve provides everything you need to balance your brake system in one compact unit. Combination valves include a metering valve, a proportioning valve, and a pressure differential switch. This valve operates every time you use your brakes and gets a lot of work, which means it may wear out at some point in the life of your vehicle.
If the combination valve has failed, you will notice that the vehicle will do a nose dive when applying the brakes hard, and will be slow to stop. This is because the valve is no longer metering the amount of brake fluid going to the front and rear wheels. If the valve becomes clogged, the brakes may fail altogether if there is no bypass in the system.
Materials needed
- Allen wrench set
- Boxed end wrenches
- Chemical resistant gloves
- Creeper
- Drip pan
- Flashlight
- Flat tip screwdriver
- Floor jack
- Jack stands
- Large bottle of brake fluid
- Line wrench metric and standard set
- Protective clothing
- Ratchet with metric and standard sockets
- Safety glasses
- Scan tool
- Torque bit set
- Torque wrench
- Vampire pump
- Wheel chocks
Part 1 of 4: Preparing the car
Step 1: Park your vehicle on a flat, hard surface. Make sure that the transmission is in park (for automatics) or in 1st gear (for manuals).
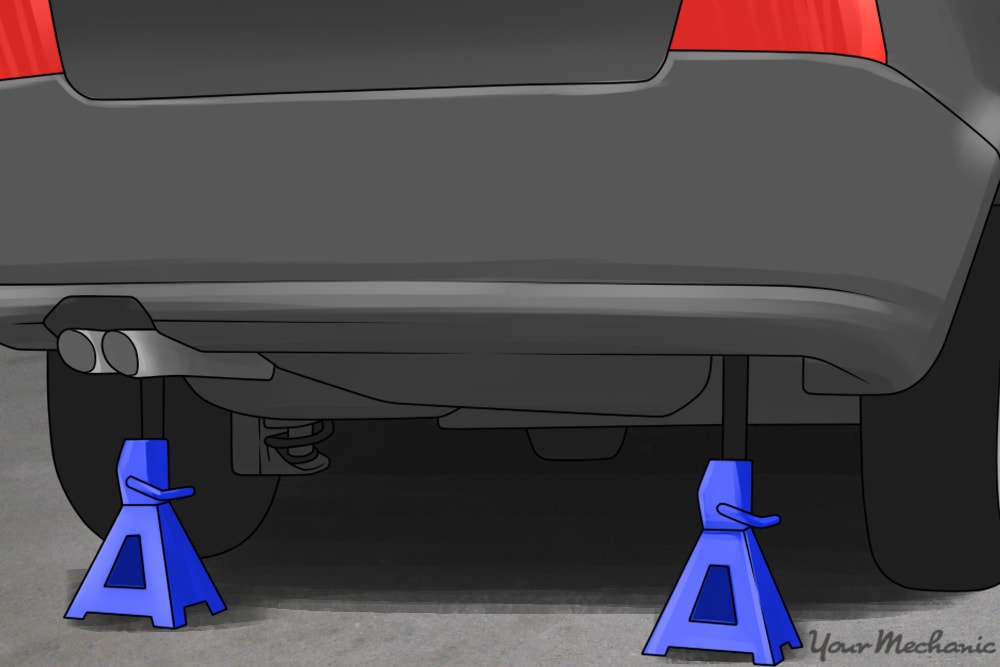
Step 2: Place wheel chocks around the rear tires that will be remaining on the ground. In this case, the wheel chocks will be around the front tires since the rear of the vehicle will be lifted up. Engage the parking brake to the keep the rear tires from moving.
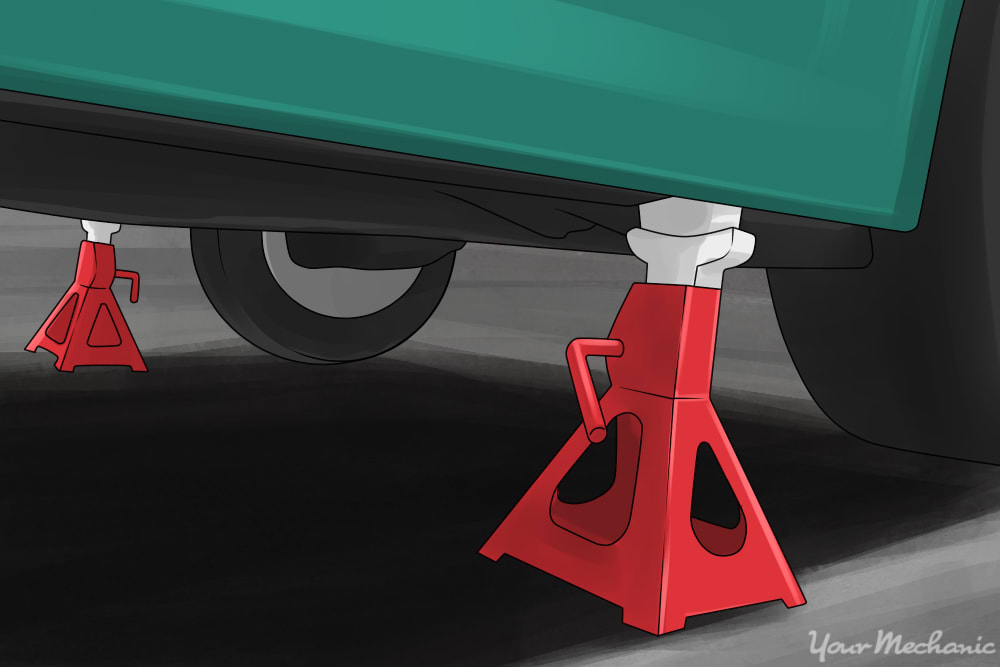
Step 3: Raise the vehicle. Using a floor jack that is recommended for the weight of the vehicle, lift under the vehicle at its specified jacking points until the wheels are completely off the ground.
Step 4: Place the jack stands. The jack stands should go under the jacking point locations. Then lower the vehicle onto the jack stands. For most modern cars, the jacking points for jack stands will be on the pinch weld just under the doors along the bottom of the car.
- Note: It is best to consult the car’s manual for proper jacking locations.
Part 2 of 4: Removing the combination valve
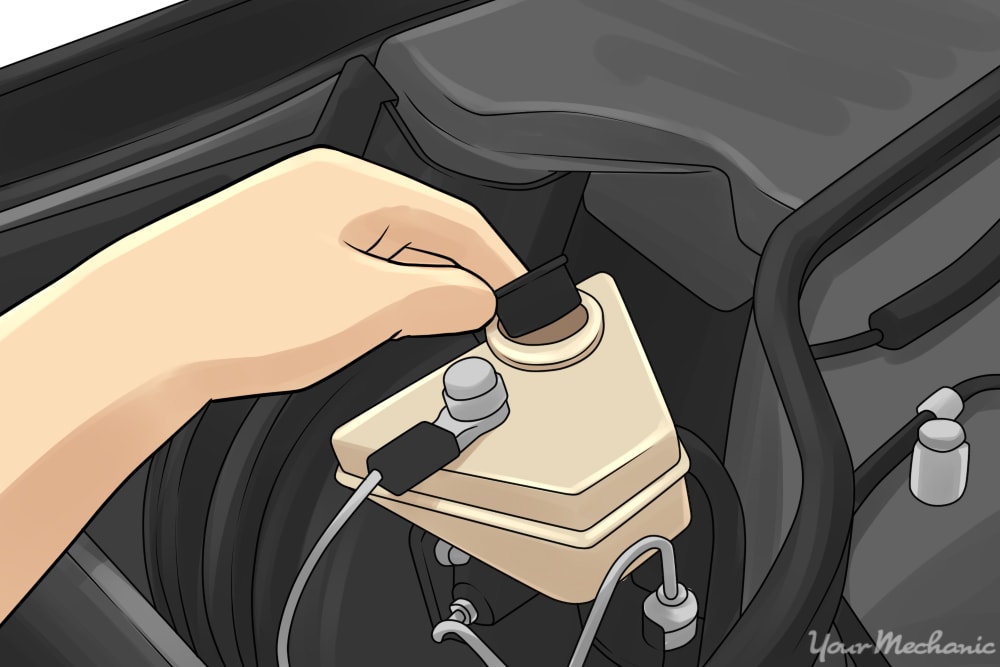
Step 1: Access the master cylinder. Open the hood to the vehicle. Remove the cap to the master cylinder.
- Warning: Before attempting to remove any part of the brake system, put on safety glasses that are chemical resistant. It is best to have safety glasses that cover your eyes from the front and sides.
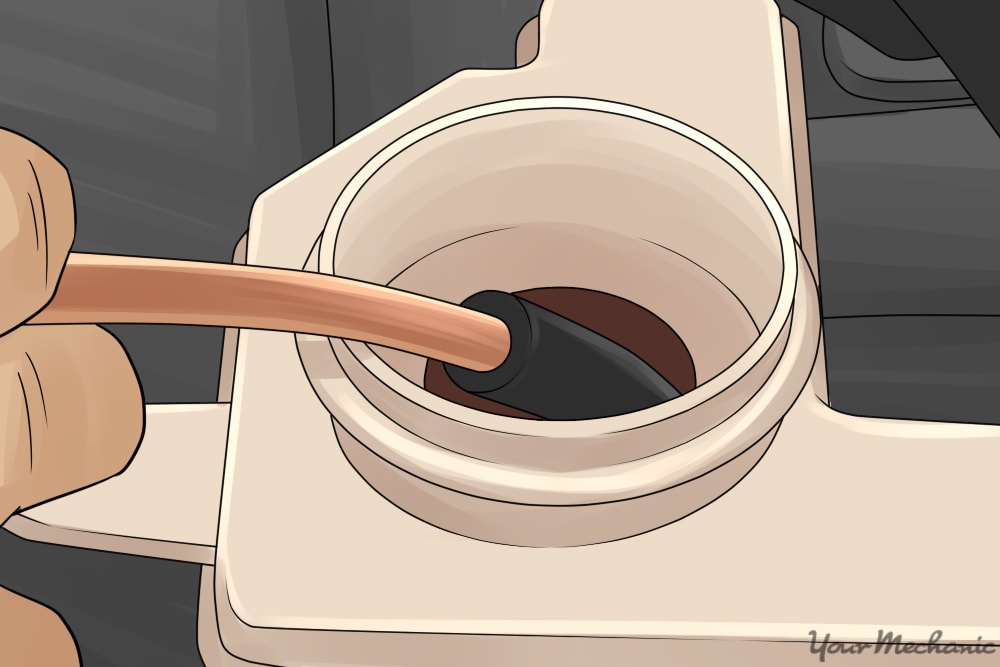
Step 2: Remove the brake fluid. Use a vampire pump to pull out the brake fluid from the master cylinder. This will help prevent any brake fluid from draining out of the master cylinder while the system is open.
Step 3: Find the combination valve. Use your creeper to go under the vehicle. Look for the combination valve. Place a drip pan directly underneath the valve. Put on chemical resistant gloves.
Step 4: Disconnect the lines from the valve. Using line wrenches, remove the intake and exhaust lines from the combination valve. Be sure not to strip the lines for this may result in a major brake repair.
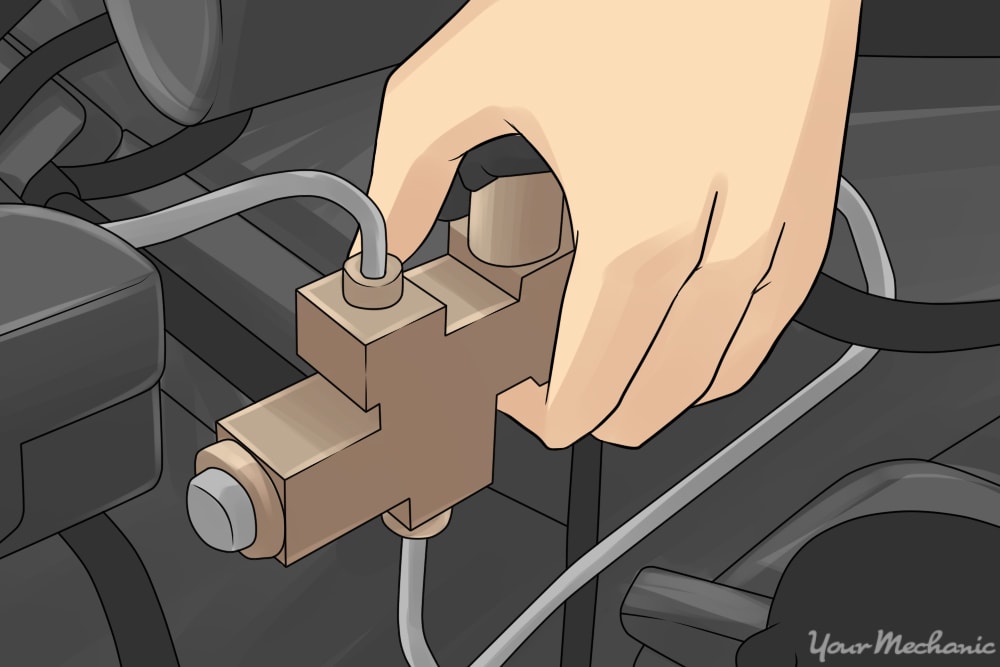
Step 5: Remove the valve. Remove the mounting bolts holding the combination valve in place. Drop the valve down into the pan.
Part 3 of 4: Installing the new combination valve
Step 1: Replace the combination valve. Install it into the location that the old valve was removed from. Install the mounting bolts with blue locktite. Use a torque wrench and torque them to 30 inch pounds.
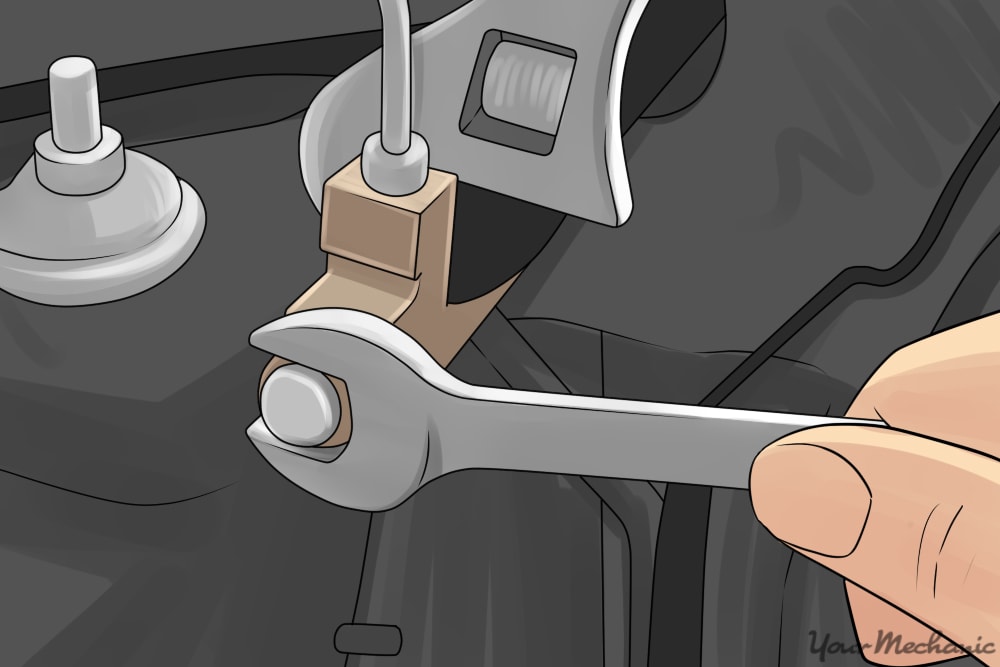
Step 2: Reconnect the lines to the valve. Screw in the lines to the intake and exhaust ports on the valve. Use the line wrench to tighten the line ends up. Do not over tighten them.
- Warning: Do not cross thread the hydraulic line as you install it. Brake fluid will leak out. Do not bend the hydraulic line because it may crack or break.
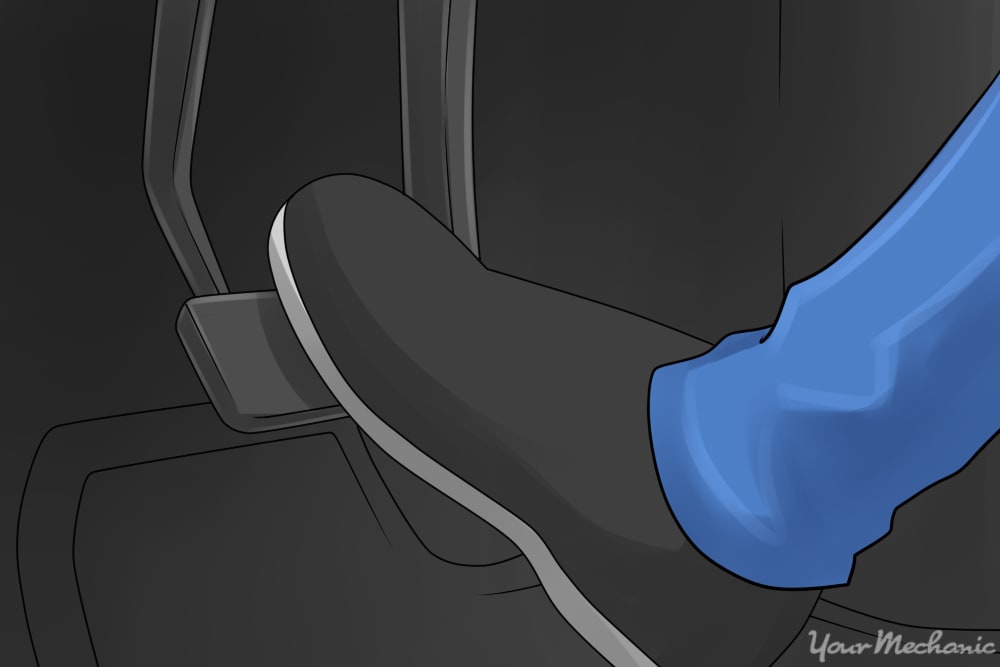
Step 3: With the help of an assistant, bleed the rear brake system. Have the assistant step on the brake pedal. While the brake pedal is down, release the bleeder screw to the left and right rear wheels. Then tighten them.
You will need to bleed the rear brakes at least five to six times to remove the air from the rear brakes.
Step 4: With your assistant, bleed the front brake system. As your assistant steps down on the brake pedal, release the front wheel bleeder screws one at a time. You will need to bleed the rear brakes at least five to six times to remove the air from the front brakes.
- Note: If you have a brake controller on your vehicle, make sure that you bleed the brake controller to remove any air that may have been trapped inside a channel.
Step 5: Bleed the master cylinder. Have your assistant step down on the brake pedal. Loosen the lines to the master cylinder to bleed the air out.

Step 6: Refill the master cylinder. Fill up the master cylinder with brake fluid. Put the cap back onto the master cylinder. Pump the brake pedal until the pedal becomes firm.
- Warning: Do not get brake fluid on any paint. This will cause the paint to peel and chip away.
Step 7: Check the entire brake system for any leaks. Make sure that all of the bleeder screws are tight.
Part 4 of 4: Resetting and testing the brake system
Step 1: Reset your car’s computer. Find your computer digital data reader port. Get a portable engine light tester and set the settings on ABS or brakes. Scan for current codes. When the codes are present, erase them and the ABS light should go out.
Step 2: Drive the vehicle around the block. Use normal stopping to ensure that the brake system is functioning correctly.
Step 3: Take the vehicle onto a road or parking lot without any cars. Drive the vehicle quickly and apply the brakes fast and hard. During this stop, the combination valve should be functioning correctly. The brakes may squeak a little when stopping hard, but should not lock up the rear brakes. The front brakes should respond quickly. If the vehicle has an ABS module, the plungers may apply a pulsing action to the front brakes to prevent the front rotors from locking up.
- Note: During the test, monitor the dashboard to see if the ABS light appears.
If you’re struggling with the combination valve replacement, consider seeking help from one of the certified mechanics at YourMechanic, who can perform the service at a time and place of your choice.