
Electronic cold start injectors, sometimes referred to as cold start valves, have been in use by Bosch and other fuel injection makers since the early 1960s. They are there to provide cold-start enrichment by injecting a small shot of fuel when the ambient temperature is low (usually below about 55 degrees). The details vary by the car and the system, but what they all have in common is that they are located somewhere in the intake manifold, have a pressurized fuel connection, and have an electrical connection.
Cold start valves are relatively trouble free. Most of the time, if there is a failure in the cold start valve, it will be leakage: either at the fuel line connection or at the injector tip. Leakage at the connection will be pretty obvious, but leakage at the tip may go unnoticed until the engine is difficult to start emits lots of black smoke when it finally does.
Cold start valves sometimes fail to operate or stick in the open position, but this is far less common than simple leakage. If you’re experiencing cold start difficulty, and you suspect failure of the valve, it’s more likely that you’ll find the failure in the system that controls the valve.
In most cases, replacing the cold start valve is relatively easy. More often than not, it will be at an easily accessed location high up on the intake manifold. Some makers, however, such as Volvo and BMW, sometimes put it in a difficult to reach location on the bottom side of the manifold. If this is the case, it is wise to contact a certified mechanic to do the job.
- Warning: It’s likely there will be some leakage or even spraying of a small amount of fuel when you do this job, so wear your safety glasses and take appropriate precautions against fire.
Part 1 of 1: Replacing a cold start injector
Materials Needed
- 10 mm or 5 mm socket head bolt remover
- Brake cleaner
- Rag
- Screwdriver, flat or Phillips
Slip joint pliers
Note: The type of screwdriver depends on whatever is appropriate for your type of hose clamps.
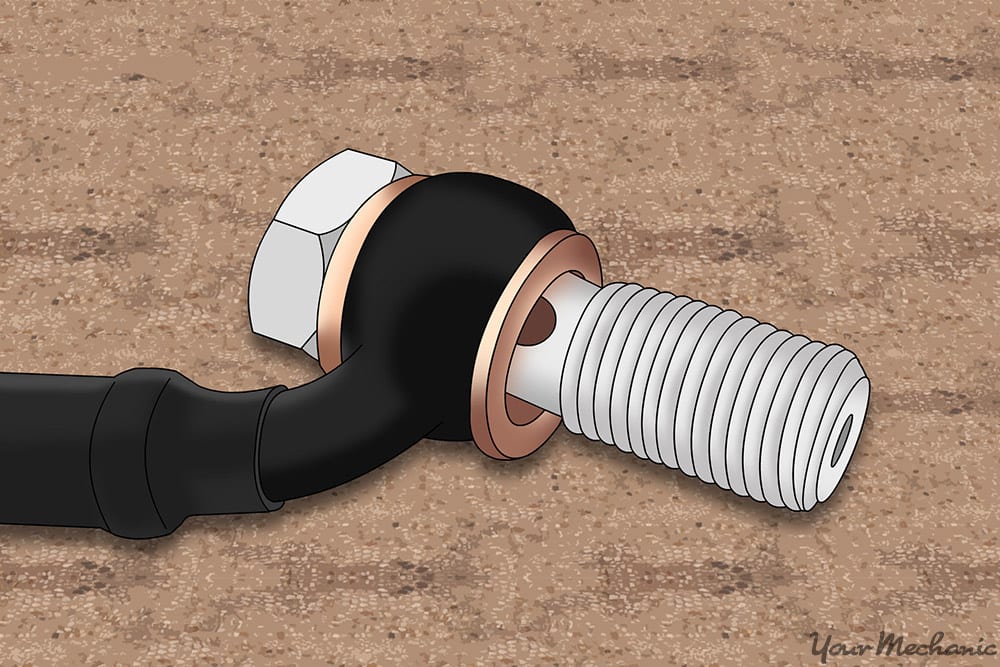
Note: If you drive a Mercedes, you will need an 11, 12 or 13 mm open end wrench to disconnect the hard line that goes to the valve. If the valve has a banjo bolt connector, you’ll want to have two new copper sealing washers for the connection.
Note: You may or may not have to replace a piece of fuel line and the clamps going to the valve depending on their condition. It’s a good idea to have the appropriate sized hose and clamps on hand just in case. Most of the low-pressure systems use 7mm braided fuel hose.
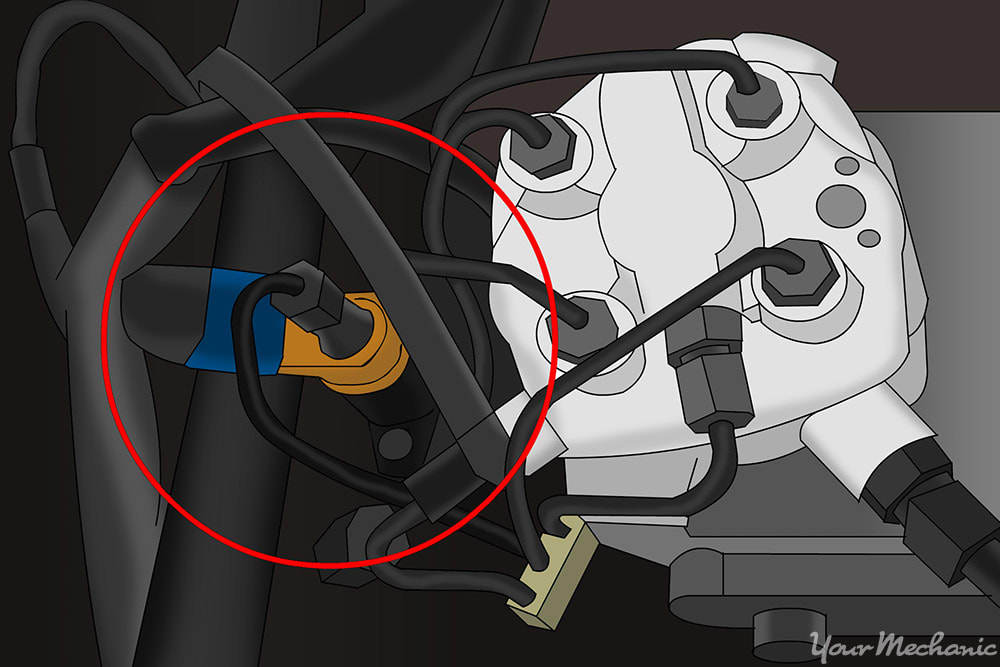
Step 1: Locate the cold start valve. Most cold start valves are in the intake manifold somewhere.
The Mercedes V8s usually have the valve on a separate extension near the left front of the engine along the pipe that carries the idle air. Volkswagen and Audi Cold Start valves usually reside at one end of the manifold.
If you don’t know where it is, you can find it by tracing the fuel lines, the cold start valve will have a separate fuel line all its own somewhere in the manifold. If you find a tubular device about 2 inches long that has a fuel line and an electrical connection, you’ve found what you are looking for. If you don’t find it, that may be because it isn’t there.
In the late 1980’s manufacturers began deleting the cold start valve from their systems without making other obvious changes preferring instead to let the computer handle the cold start enrichment at the injectors. Not all of the repair manuals picked up on this right away, so if you have a car that was made in 1986 or later, make sure to find out if your system even uses one before you worry yourself too much trying to find it.
Step 2: Clean the surrounding area. Once you have found the valve, clean the area around it so you don’t get any debris in the manifold.
This is where you use the brake cleaner. Just hose down the area around the cold start valve with the aerosol can and let all the crud run right off.
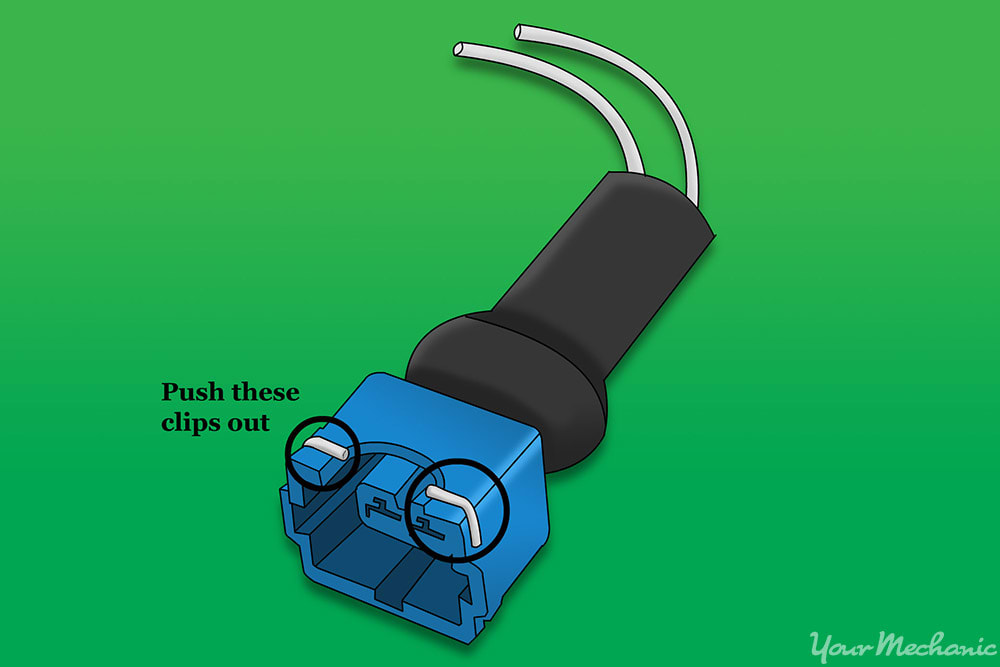
Step 3: Disconnect the electrical connector. The connector may be a simple plastic push on piece, or it might be a square plug that has wire locks at the bottom of it.
In that case, you will have to get those locks pulled back if you want to get the connector off without damaging it.
A right-angled dental pick or the small blade of a pocket knife is the ticket. You will probably be tempted to rock the connector back and forth until it yields, and you could get lucky, but this usually results in a broken connector so be patient.
Step 4: Put on your safety glasses. The fuel injection system is designed to maintain pressure for a long period of time, so you may get some fuel spray when you disconnect.
If you have a high pressure system, that spray may be quite a lot.
Step 5: Disconnect the fuel line. It’s easy to tell the high pressure lines from the low pressure.
The high pressure fuel lines will be made of hard plastic and use either banjo bolts or flare nuts for the connectors. The low pressure systems use hoses with clamps.
Either way, the best is to wrap a rag around the connection with one hand while you disconnect the line with the other. The pressure will relieve itself in a matter of a second or two.
If it’s a high pressure system, take a breath and wait a few more seconds, as there might be a second burst of pressure as the accumulator empties. Then put the gasoline soaked rag someplace safe and get on with the job.
Step 6: Loosen the hose. If the car has fuel hoses, loosen the clamp and try to loosen the hose with a twisting motion.
It may not work because the hoses like to freeze in place. Try gently applying the slip joint pliers to the hose right where the hose meets the pipe. If that doesn’t work, you may have to cut the hose.
Step 7: Attach the new cold start valve. If the hose is in good condition, there may be enough slack in the hose that you can simply attach the remainder to the new cold start valve.
If the hose is too short, or is in bad condition, you’ll get to use that piece of hose you had on standby, and replace the fuel line all the way back to the next junction.
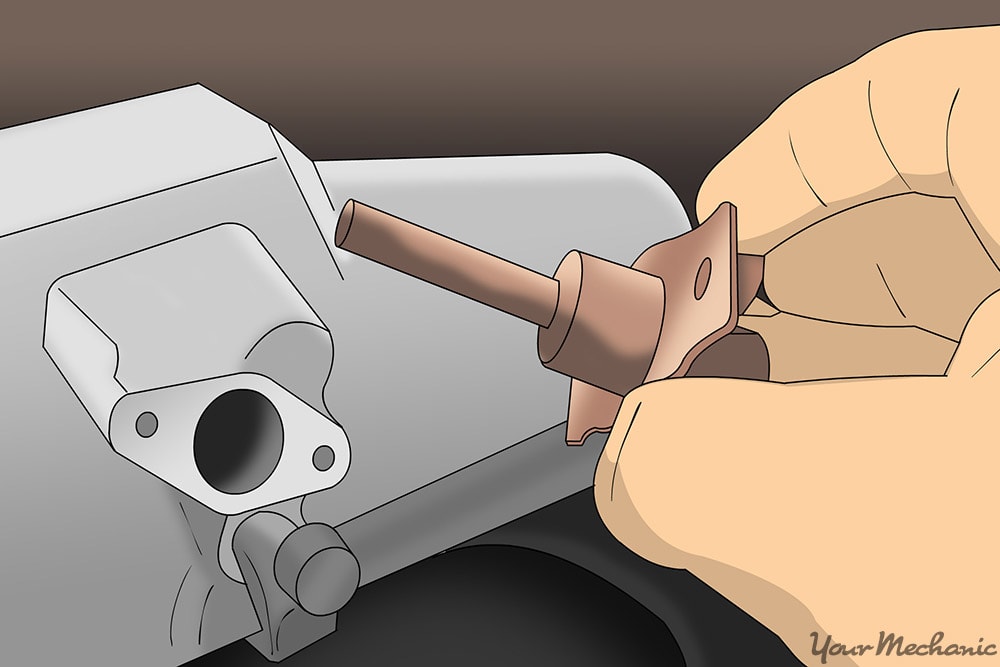
Step 8: Replace the valve. When you unscrew the two fasteners and pull the valve out, you’ll see a gasket or an O-ring that needs to be replaced.
This should be in the box with your new part.
- Warning: Don’t put gasket sealer on there; it won’t be necessary. Just change out the seal and put the part back in the hole.
Step 9: Reconnect the fuel line using a new clamp. If the line had a banjo bolt connector, it’s a good idea to use new copper sealing washers.
Plug in the electrical connector, pick up your tools, and try it out.
Step 10: Check for fuel leaks. Run the engine for a while and keep an eye on your fuel line connection to be sure it isn’t leaking.
Shut the engine off and watch the connection for a few more minutes to be sure. If you don’t see or smell any gas, you’re ready to be on your way.
If you do not feel comfortable doing the job yourself and would like a professional technician, such as one from YourMechanic, to replace your cold start injector for you, one of our certified, mobile mechanics will come to your home or place of business to perform a replacement.


