
Over time, you may have noticed your vehicle not running quite as well as it did when you first bought it. It may have developed a stall, a stumble, or a misfire. It may be running rough at idle or all of the time. When your vehicle starts running like this, many people think about doing a tune-up. Replacing spark plugs and maybe ignition wires or boots can solve the problem - if that's what's causing the problem. If it's not, then you might waste money on parts you didn't need. Knowing how to do some additional diagnostics, such as a compression test, can help you in properly diagnosing your engine, which can save you some money as you won't be purchasing parts that you may not need.
Part 1 of 2: What does a compression test measure?
When diagnosing most engine problems it's important to do a compression test, as it will give you an idea of the overall health of the engine. When your engine is rotating there are four strokes, or up and down movements, that occur:
The intake stroke: this is the first stroke that occurs in the engine. During this stroke, the piston moves down in the cylinder allowing it draw in a mixture of air and fuel. That mixture of air and fuel is what the engine needs to be able to produce power.
The compression stroke: this is the second stroke that occurs in the engine. After pulling in the air and fuel during the intake stroke, the piston is now forced back up in the cylinder, compressing that air and fuel mixture. This mixture must be placed under pressure in order for the engine to create any power. This is the stroke in which you will be performing the compression test.
The power stroke: this is the third stroke that occurs in the engine. Once the engine reaches the top of the compression stroke, the ignition system creates a spark, which ignites the air and fuel mixture that is under pressure. When that mixture is ignited, an explosion occurs in the engine which pushes the piston back down. If there was no pressure or very little pressure built up during the compression, then this ignition process would not occur correctly.
The exhaust stroke: during the fourth and final stroke, the piston now moves back up in the cylinder and forces all of the used fuel and air out of the engine and through the exhaust, so that it can then start the process all over again.
Though all of these strokes need to occur with efficiency, the most important is the compression stroke. In order for there to be a good, powerful, and controlled explosion in that cylinder, the air and fuel mixture needs to be placed under the pressure that the engine was designed for. If the compression test shows that the internal pressure of the cylinder is well below the manufacturer’s specifications, then there is an internal engine problem.
Part 2 of 2: Performing the compression test
Materials Needed:
- Compression tester
- Computer scan tool (code reader)
- Ratchet w/various sockets and extensions
- Repair manual (paper or electronic for vehicle specifications)
- Spark plug socket
Step 1: Safely situate your vehicle for the test. Park your vehicle on a flat, level surface and apply the parking brake.
Step 2: Open the hood and allow the engine to cool for a short period of time. You want to do the test on a slightly warm engine.
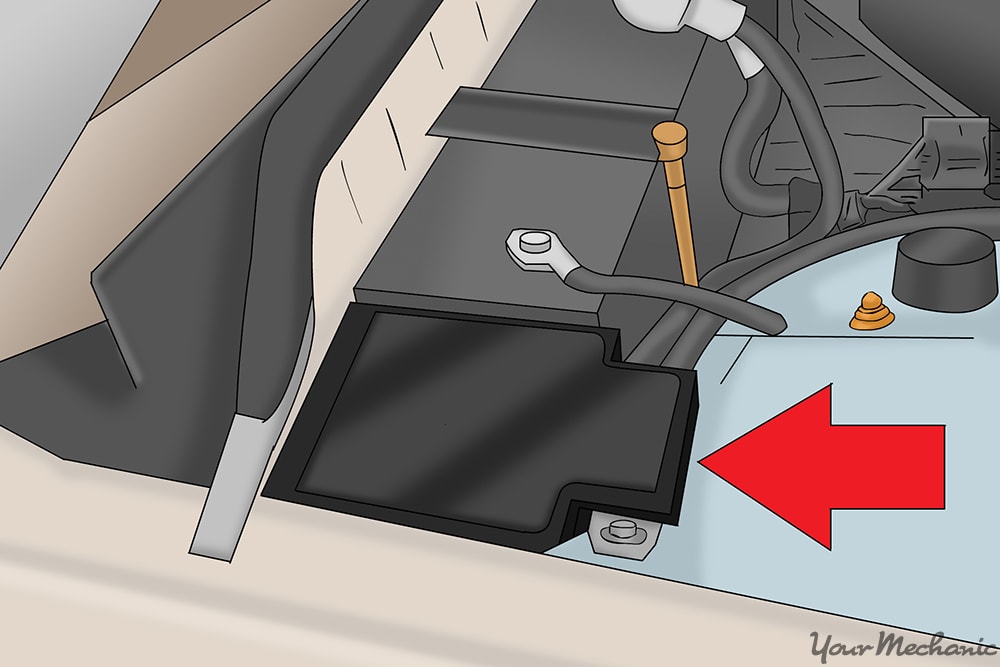
Step 3: Locate the main fuse box under the hood. It will usually look like a large, black plastic box.
In some cases it will also have writing on top of it showing the schematic of the box.
Step 4: Remove the fuse box cover. Do this by unhooking the clips and pulling the cover off.
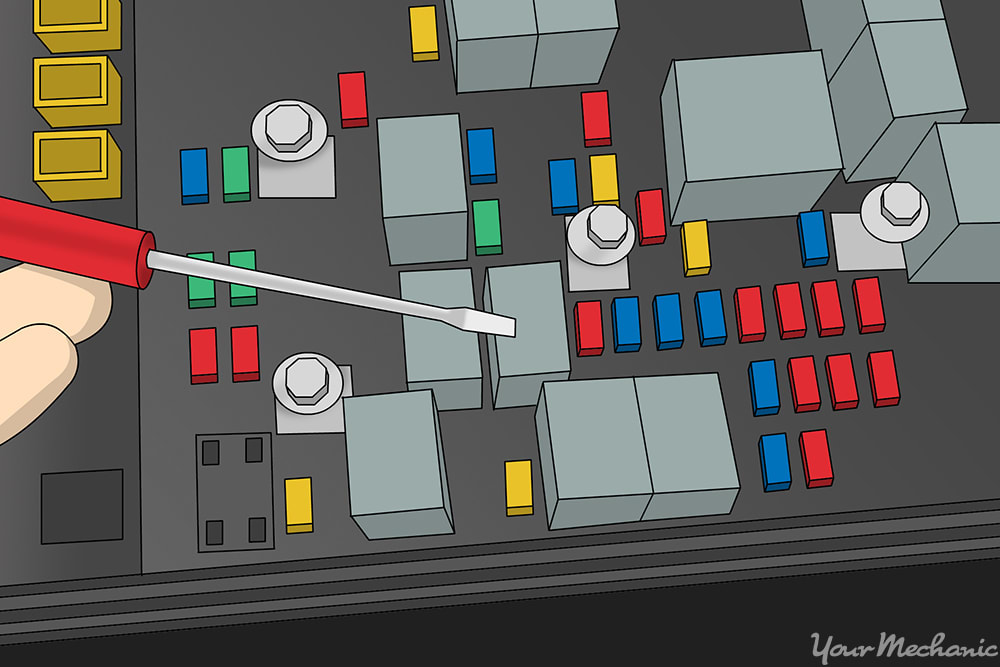
Step 5: Locate the fuel pump relay and remove it. This is done by grabbing it and pulling it straight up and out of the fuse box.
- Tip: In order to locate the proper relay for the fuel pump, use your repair manual or the schematic on the fuse box cover.
Step 6: Start the engine and allow it to run until it turns itself off. This will indicate that the engine has run out of fuel.
- Warning: If you do not disable the fuel system then fuel will continue to be sprayed into the cylinder during the compression test. This can cause lubrication to get washed from the cylinder walls, which can cause an improper reading and even engine damage.
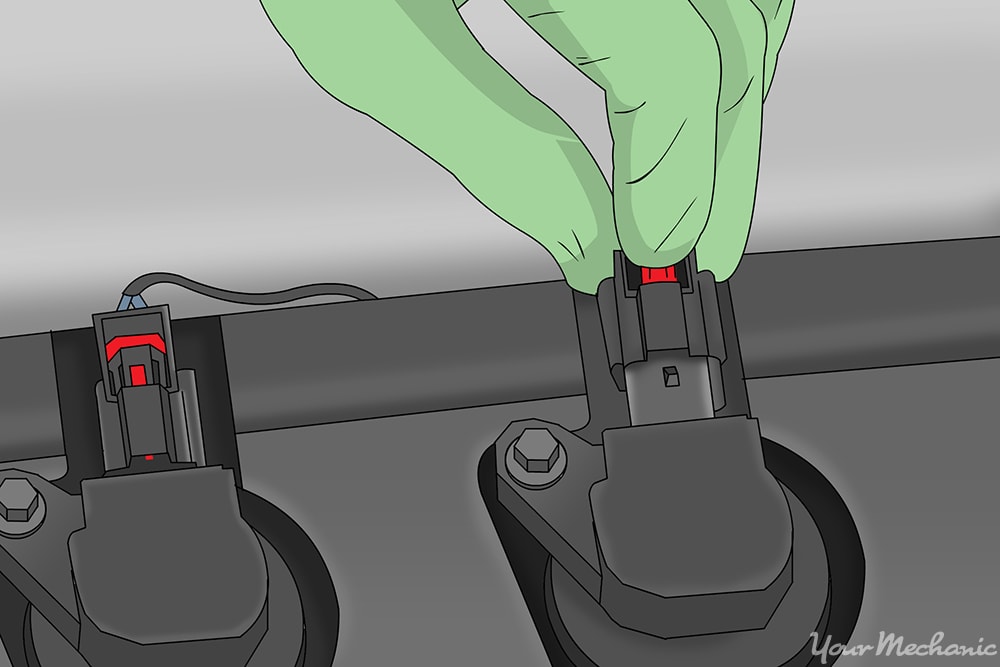
Step 7: Remove the electrical connectors from the ignition coils. Press on the locking tab with your finger and pulling the connector off.
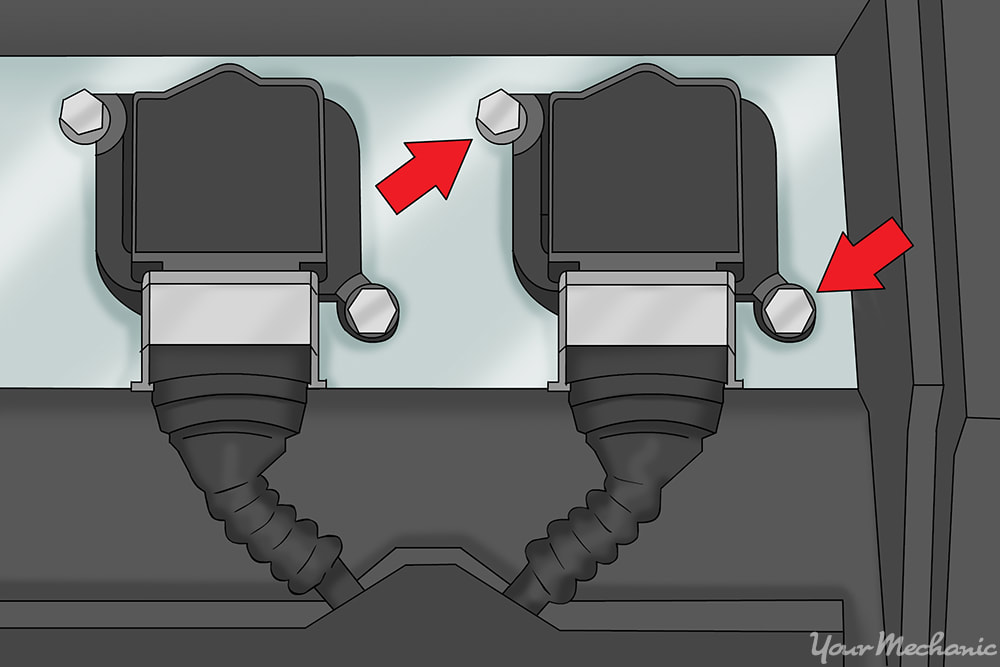
Step 8: Loosen the ignition coils. Using your ratchet and the appropriate size socket, remove the small bolts that hold the ignition coils to the valve covers.
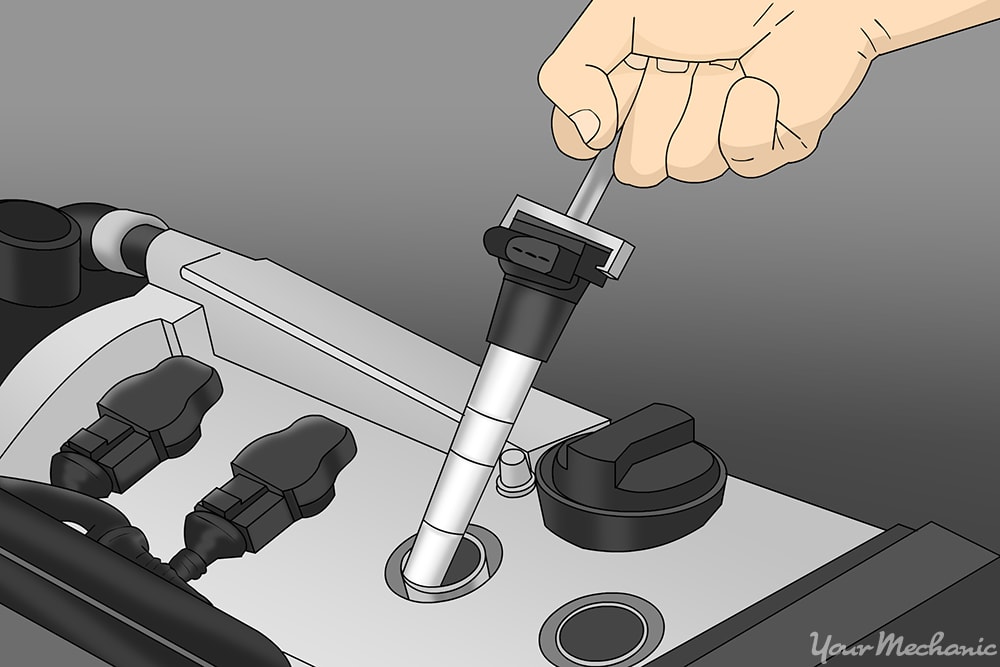
Step 9: Remove the ignition coils by pulling them straight out of the valve cover.
Step 10: Remove the spark plugs. Using your ratchet with an extension and the spark plug socket remove all of the spark plugs from the engine.
- Tip: If the spark plugs have not been changed for quite some time, this is a good time to change them.
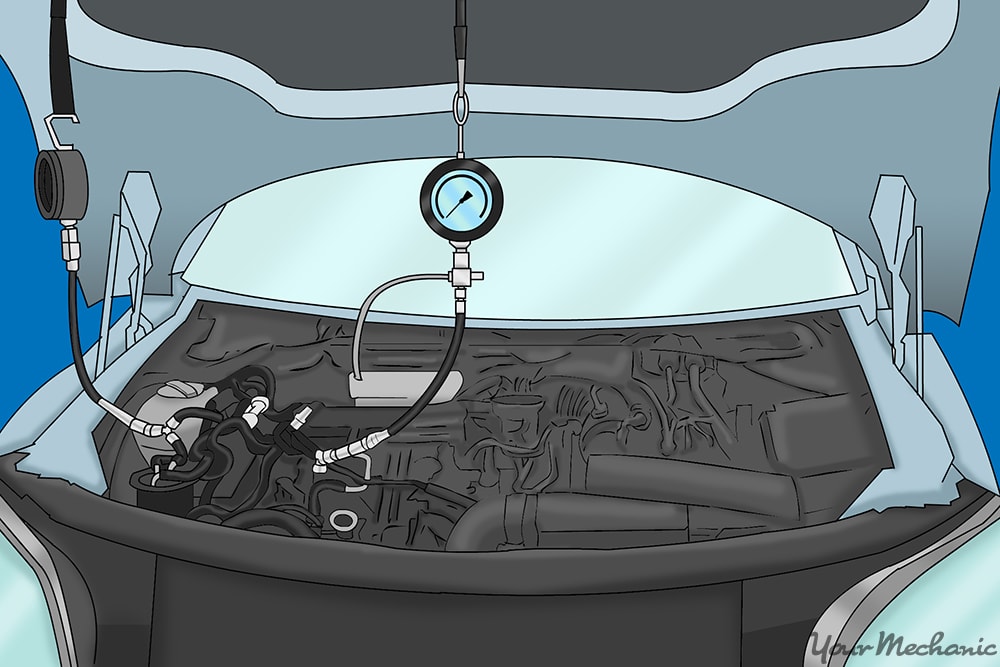
Step 11: Install your compression gauge into one of the spark plug ports. Thread it into the hole and tightening it by hand until it is snug.
Step 12: Crank over the engine. You should allow it to spin over about five times.
Step 13: Check the reading on the compression gauge and record it.
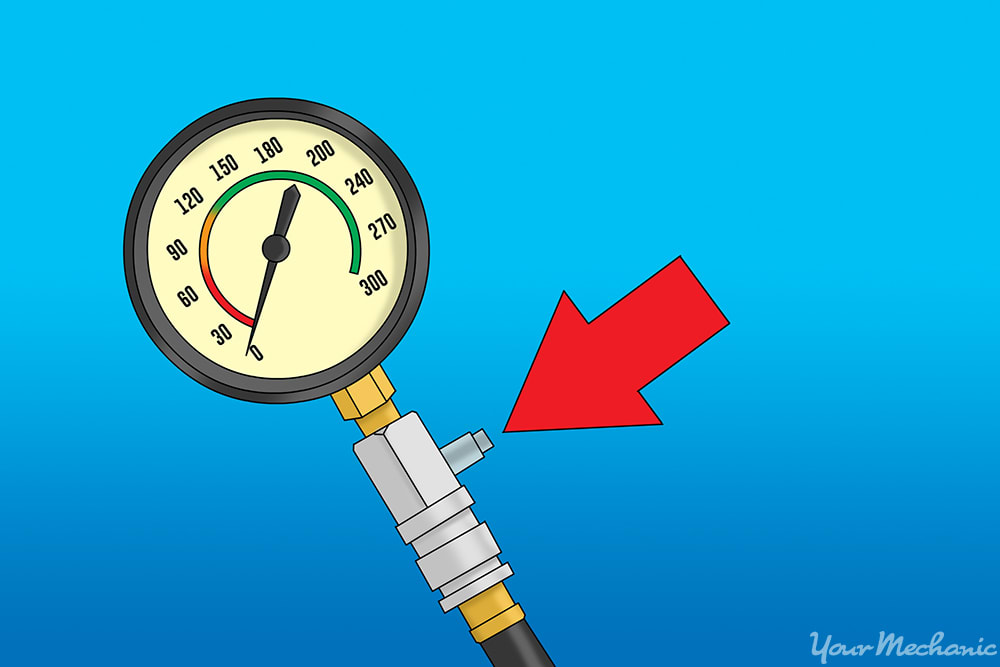
Step 14: Release the pressure in the compression gauge. Press on the relief valve on the side of the gauge.
Step 15: Remove the compression gauge from that cylinder by unthreading it by hand.
Step 16: Repeat steps 11-15 until all of the cylinders have been checked. Make sure the readings are recorded.
Step 17: Install your spark plugs using your ratchet and spark plug socket. Tighten them until they are snug.
Step 18: Install the ignition coils back into the engine. Make sure that their mounting holes line up with the holes in the valve cover.
Step 19: Install the coil mounting bolts by hand. Then tighten them down with your ratchet and socket until they are snug.
Step 20: Install the electrical connectors onto the ignition coils. Do this by pressing them into place until they make a clicking noise indicating that they have locked into place.
Step 21: Install the fuel pump relay into the fuse box by pressing it back into its mounting holes.
- Tip: When installing the relay, make sure that the metal prongs on the relay line up with the fuse box and that you gently push it in until it bottoms out in the fuse box.
Step 22: Turn your key on to the run position and leave it there for 30 seconds. Turn the key back off and back on for 30 more seconds.
Repeat this four times. This will prime the fuel system prior to starting the engine.
Step 23: Start your engine. Make sure that it is running as it was prior to the compression test.
Once you have finished the compression test, you can compare your results to what the manufacturer recommends. If your compression is lower than specifications, then you may have one of the following issues:
Blown head gasket: A blown head gasket can cause low compression and a series of other issues within the engine. Repairing a blown head gasket requires that the top end of the engine be disassembled.
Worn out valve seat: When a valve seat wears out, the valve can no longer seat properly and seal. This will allow compression pressure to leak out. This would require that the cylinder head be rebuilt or replaced.
Worn piston rings: If the piston rings are not sealing in the cylinder, then the compression will be low. If this occurs then the engine will need to be rebuilt.
Cracked components: If you have a crack in the block or in the cylinder head, then this will cause low compression. Any part that is cracked will need to be replaced.
Though there are some other causes of low compression, these are by far the most common and will require further diagnostics. If low compression is found then a cylinder leakdown test needs to be performed. This will assist in diagnosing what is going on inside of the engine. If you do not think that you can perform this test yourself, then you should seek the assistance of a certified mechanic, like one from YourMechanic, who can perform a compression test for you.


