Before it can enter the engine, the engine air filter traps any dust and debris by acting as a shield, blocking its path. Over time, however, these filters can accumulate a lot of dirt and get clogged up, needing to be replaced so they can continue to perform adequately. A dirty air filter makes it harder for the engine to breathe and this can affect the vehicle's overall performance. The engine filter is typically inspected at every oil change or every 6 months. If you do a lot of driving, especially in dusty areas, it is recommended to check your air filter monthly.
Changing an air filter is something anyone can do and in most cases without the use of any tools. The first attempt may take extra time, but once you get the motions down, most air filters can be changed in as little as 5 minutes.
Part 1 of 2: Gather the required materials
The required materials will ultimately be based on what make of vehicle you are working on but the following are common for most vehicles:
- 6-inch extension
- Air filter (new)
- Gloves
- Ratchet
- Safety glasses
- Screwdriver
- Sockets - 8mm and 10mm (specific to Toyota, Honda, Volvo, Chevy, etc)
- T25 torx socket (specific to most Mercedes, Volkswagen, and Audi vehicles)
Part 2 of 2: Change the air filter
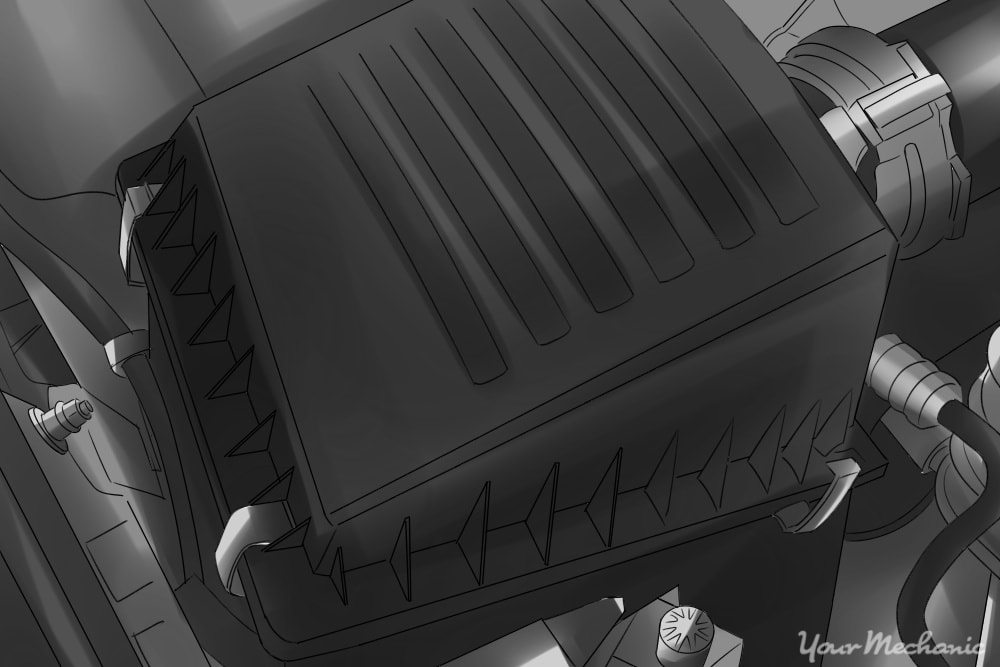
Step 1: Find the air cleaner box. Open the hood and locate the air cleaner box. The air cleaner box can vary in size and shape depending on the make of the vehicle. Two traits that all air cleaner boxes have in common are that they are all black and plastic and that they are typically located toward the front of the vehicle, beside the engine. There is also a black accordion-like hose that connects it and the throttle body, making it more recognizable.
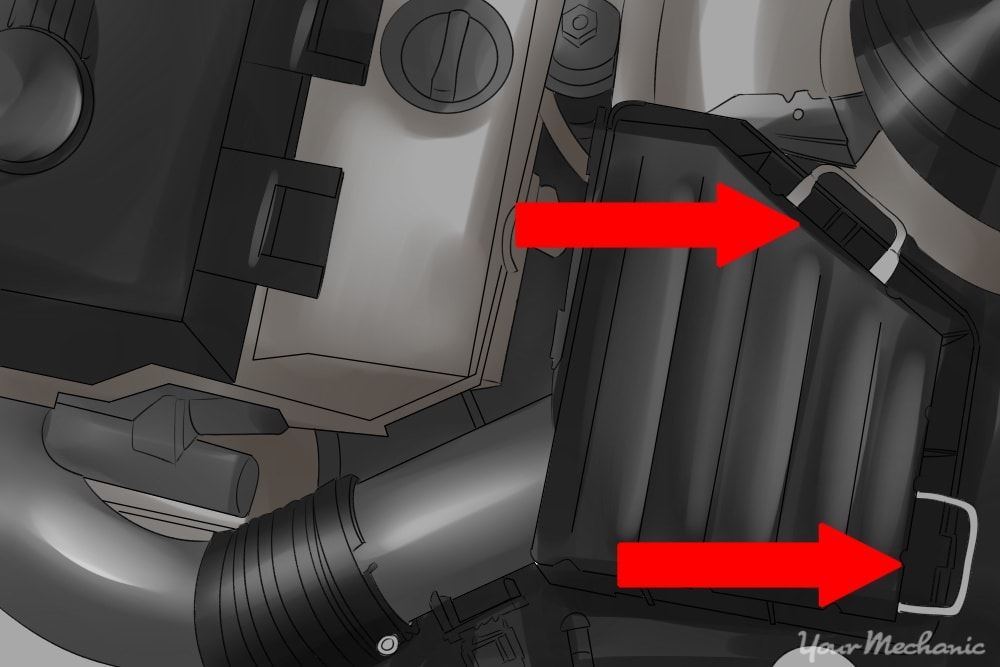
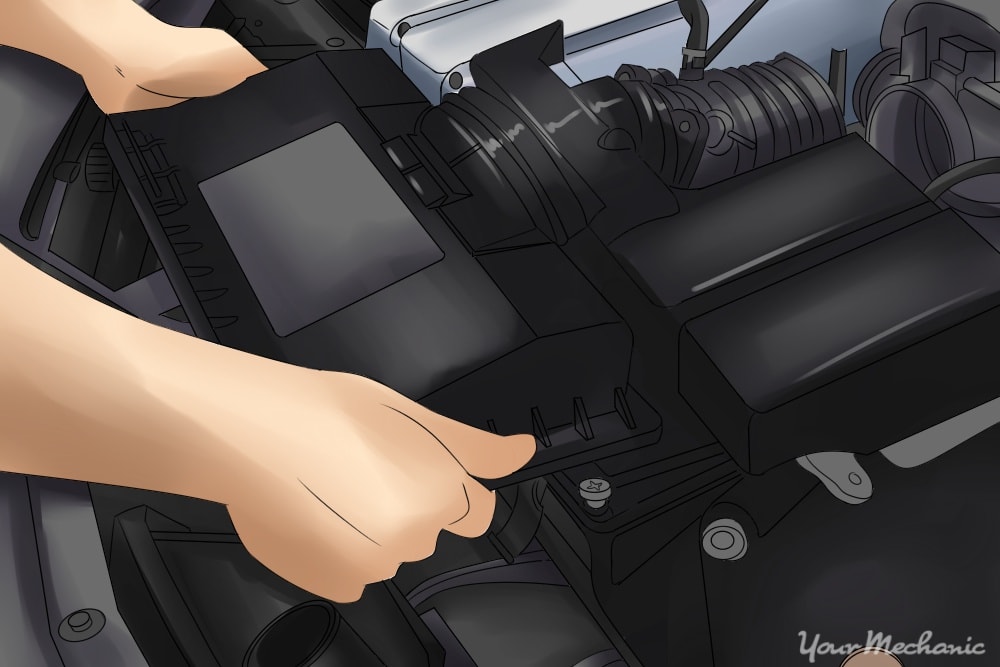
Step 2: Open the air cleaner box. Once located, take note of the type of fasteners that are being used to keep the box closed. In most cases, these fasteners are clips that can be undone by hand. If this is the case, release the clips to open the air cleaner box so the air filter can be removed.
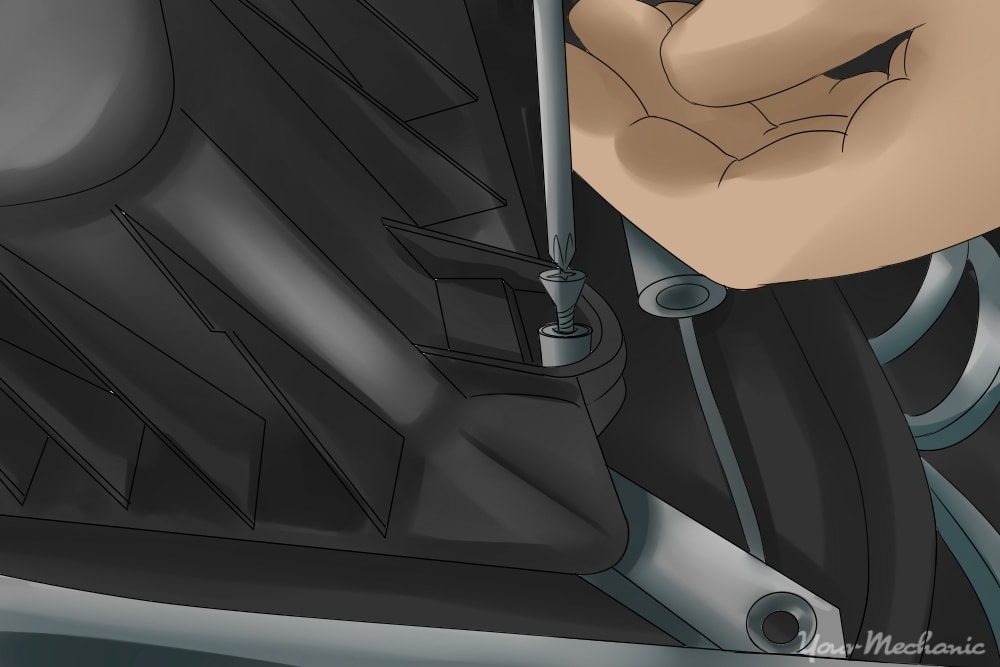
Step 3: Access the air cleaner box. For air cleaner boxes that are fastened with screws or bolts, locate the appropriate socket and ratchet or locate a screwdriver and loosen the fasteners. This will allow you to gain access to the air filter.
Step 4: Remove the engine beautification panels. Some Mercedes, Audi, and Volkswagen air cleaner boxes also double as engine beautification panels. Firmly yet gently lift off the locking panel from the posts. Once it has been removed, flip it over and use the appropriate size torx bit and ratchet to loosen the fasteners there. Doing this will allow you to gain access to the air filter
- Tip: Some vehicles that have V6 or V8 engines may have two air filters to be removed and replaced.
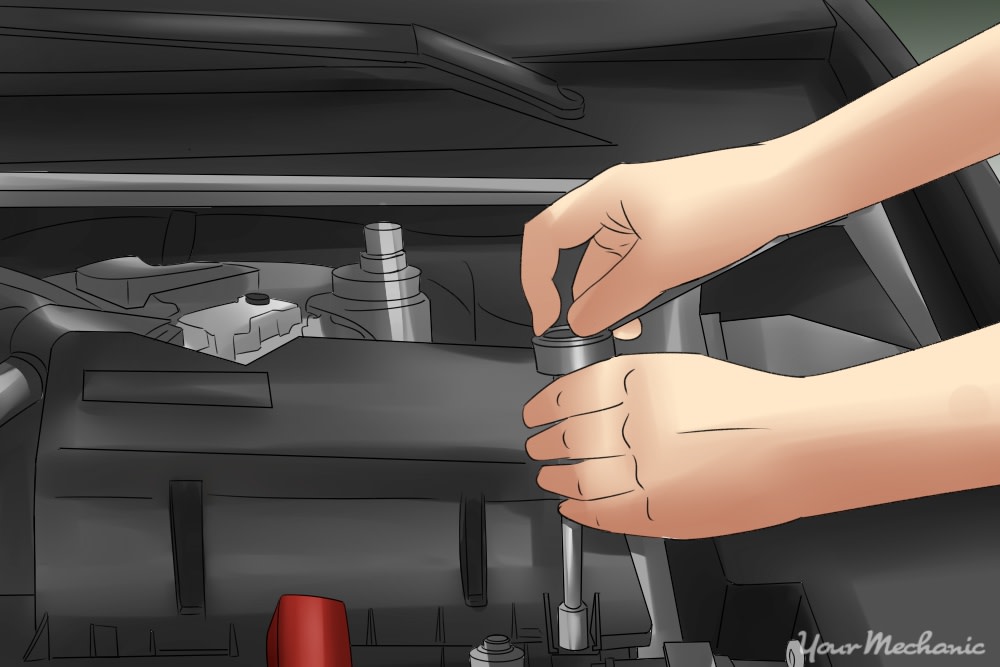
- Tip: When working with a Toyota or Honda, it may be necessary to use a 6-inch extension, along with the appropriate sized socket and ratchet, to reach and loosen the fasteners.
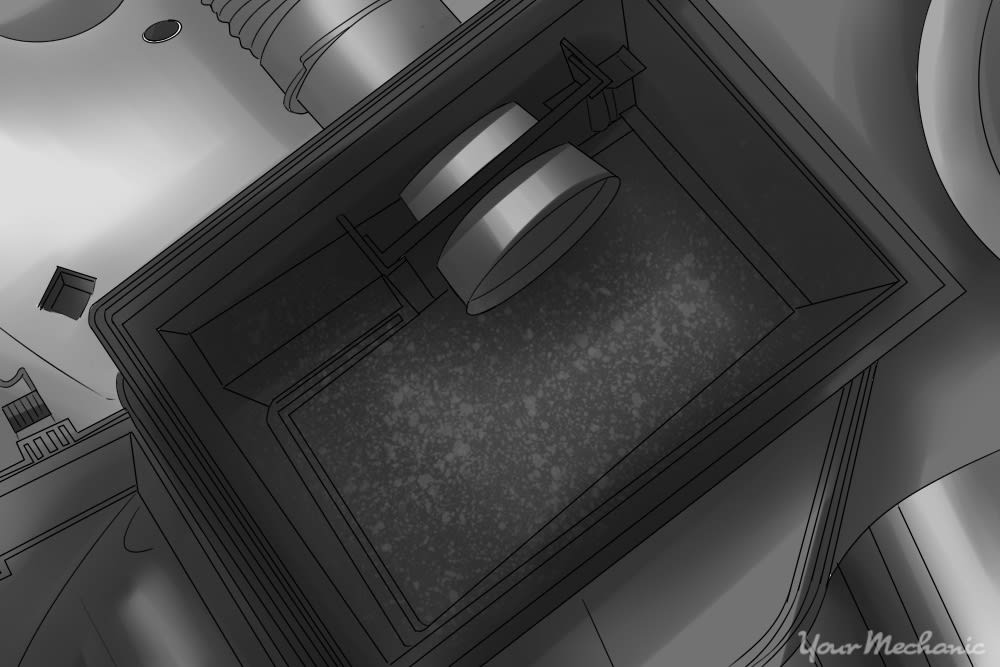
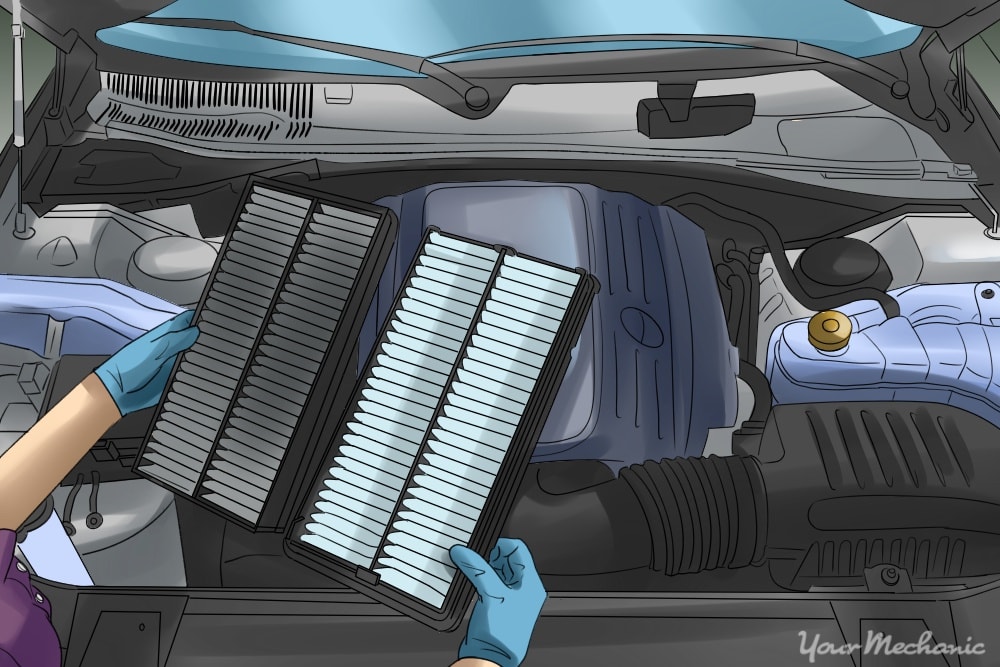
Step 5: Discard the dirty air filter. Remove the dirty air filter from the air cleaner box and toss it in the trash. Take a peek inside the air cleaner box. If there is any debris present be sure to take the time to remove it. Use of a vacuum may be helpful to remove any dirt or other particles that should not be there.
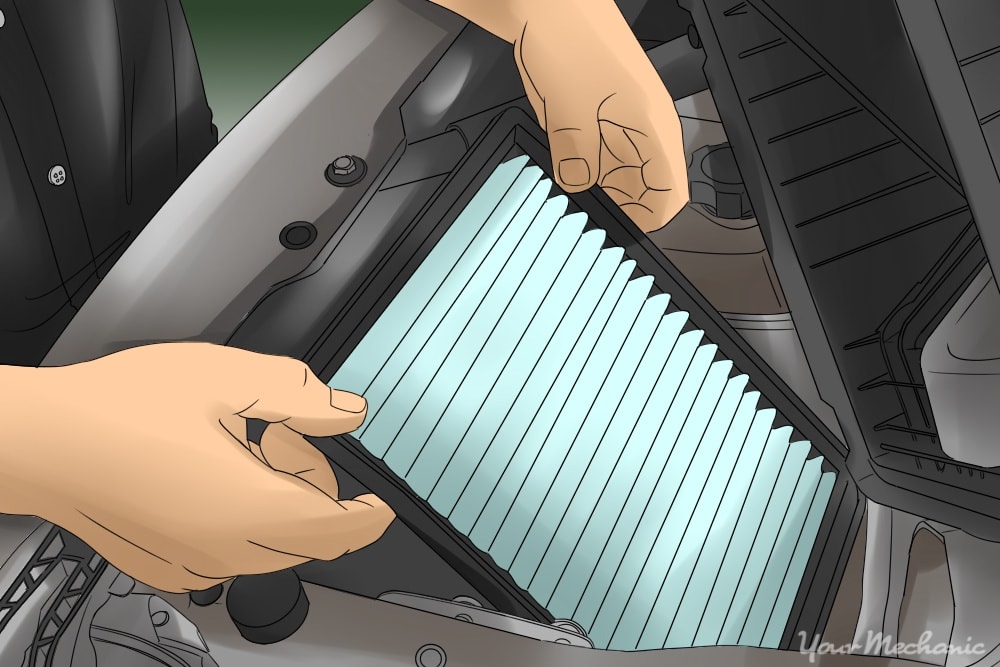
Step 4: Install the new air filter. Once the air cleaner box has been cleaned, we can now install the new air filter by placing it just as the previous air filter was inserted and closing the air cleaner box.
Step 5: Secure the fasteners. Depending on the type of fasteners being used, either secure the clamps that were loosened earlier or use the appropriate tool to tighten down the fasteners securely.
Congratulations! You have successfully changed your engine air filter. Performing this task yourself will definitely save you money every time you change your air filter. It will also bring you one step closer to being in tune with your vehicle - a vehicle will only perform as well as the owner maintains it. If you run into any problems be sure to ask a certified mechanic, such as one from YourMechanic, to change the air filter for you.
