
Your brakes are the most important system in your car for keeping you safe. Being able to stop the car quickly and safely will help keep you from getting into any collisions. Unfortunately, the environment we live in can be detrimental to your brake lines and can cause them to fail and leak.
Typically, the metal brake lines on your car are made from steel to keep costs down, but steel is susceptible to corrosion, especially during winter when there is often salt on the ground. If you have to replace a brake line, you should consider upgrading the line to a copper-nickel line that is much more resistant to rust and corrosion.
Part 1 of 3: Removing old line
Materials Needed
- Flathead screwdriver
- Gloves
- Jack
- Jack stands
- Line wrench
- Pliers
Rags
Note: If you are only replacing one line, it may be cheaper and easier to buy a pre-shaped line instead of buying all the tools to make your own. Do some pricing and see which option makes more sense.
Step 1: Go over the brake line that you are replacing. Inspect every part of the line that you are replacing so you can see how and where it is secured.
Remove any panels that are in the way. Be sure to loosen lug nuts before you jack the car up if you have to remove a wheel.
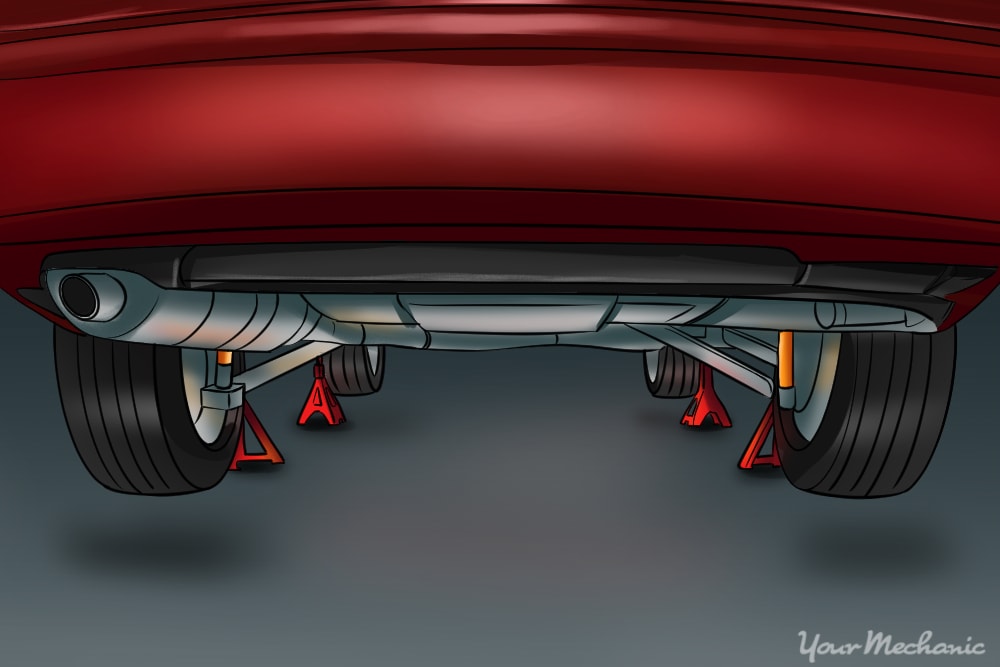
Step 2: Jack up the car. On a flat, level surface, jack the car up and lower it onto some jack stands to work underneath.
Block off any wheels that are still on the ground so the car can’t roll.
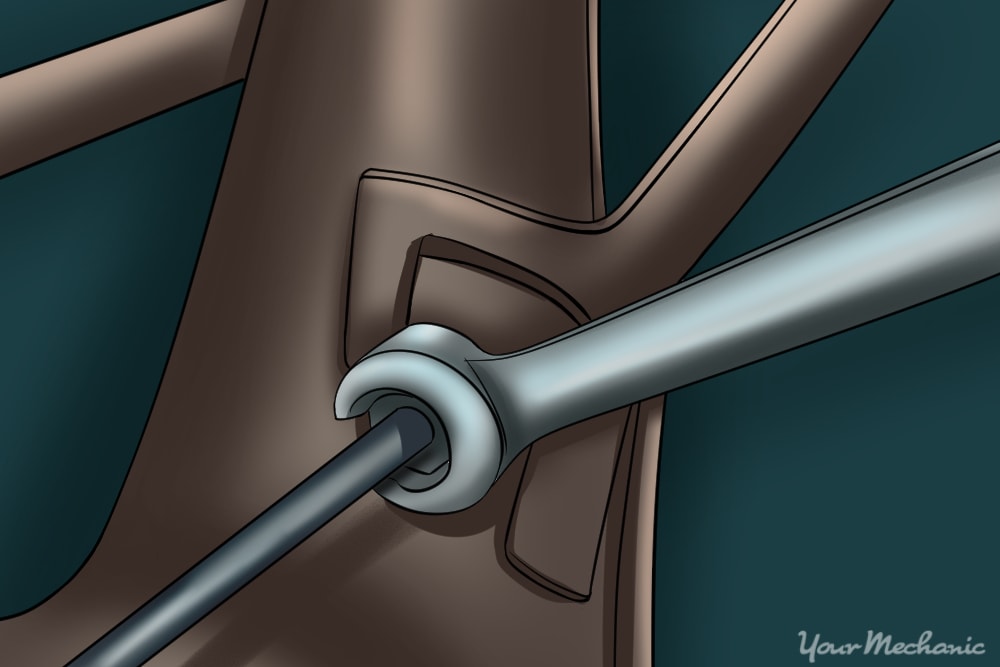
Step 3: Unscrew the brake line at both ends. If the fittings are covered in rust, you should spray some penetrating oil on them so it is easier to take them off.
Always use a line wrench on these fittings so you don’t round them off. Have your rags ready to clean up any spilled fluid.
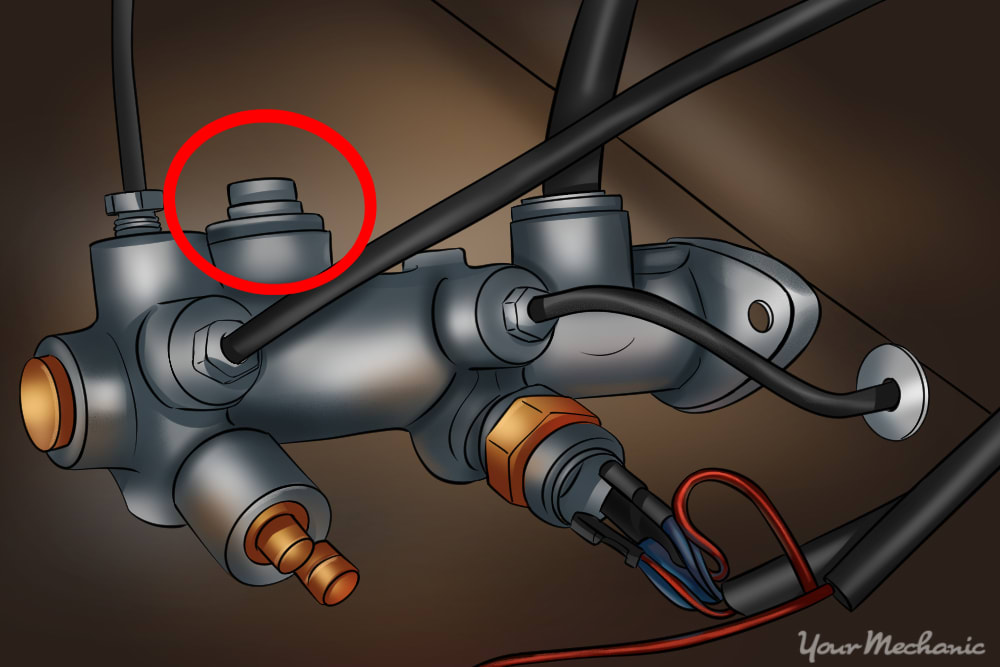
Step 4: Plug up the end that goes to the master cylinder. You don’t want the master cylinder to leak all of the fluid out while we make our new brake line.
If it runs out of fluid, you’ll have to bleed the whole system as opposed to just one or two wheels. Make your own plug with a short section of tubing and an extra fitting.
Pinch one end of the tube flat with the pliers and fold it over itself to make a seal. Put the fitting on and flare the other end. Now you can screw this onto any piece in your brake line to stop fluid leaking out. More information on flaring the tubing in the next part.
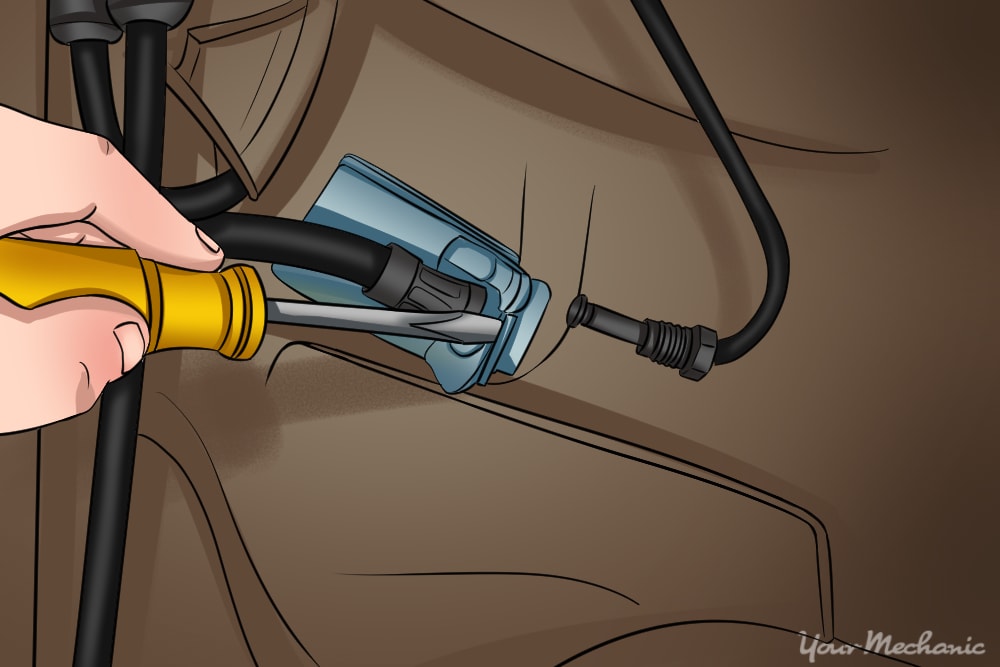
Step 5: Pull the brake line out of any mounting brackets. You can use a flathead screwdriver to pry the lines out of any snap in clips.
Take care not to damage any other lines that are mounted near the brake line.
Brake fluid will be coming out of the ends of the line. Make sure to clean up any drips on the paint as brake fluid is corrosive.
Part 2 of 3: Making a new brake line
Materials Needed
- Brake line
- Brake line fittings
- Flaring tool kit
- Flat metal file
- Gloves
- Safety glasses
- Tubing bender
- Tubing cutter
- Vice
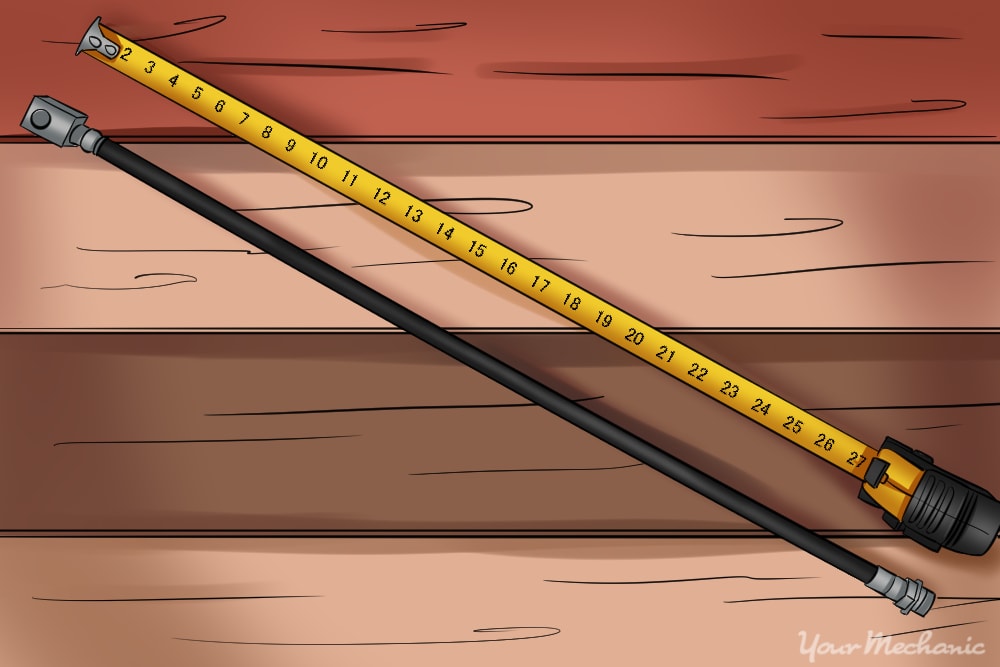
Step 1: Measure the length of the brake line. There will likely be a few bends so use some string to get the length and then measure the string.
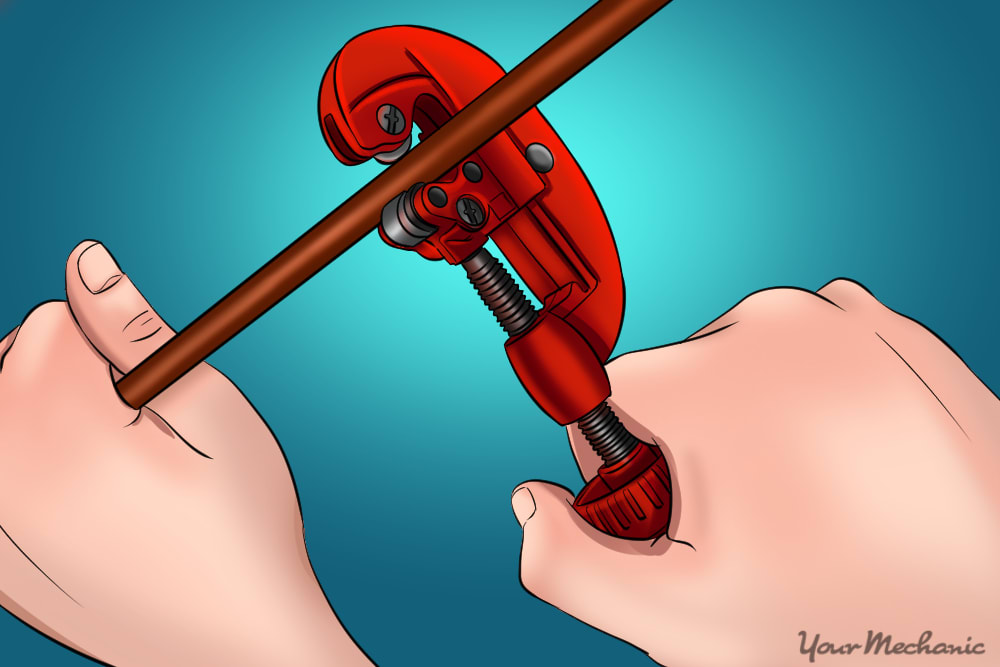
Step 2: Cut the tubing to the correct length. Give yourself an extra inch or so as it is hard to bend the lines as tightly as the factory.
Step 3: Mount the tube into the flare tool. We want to file the end of the tube to make it smooth, so have it slightly raised in the mount.

Step 4: File the end of the tubing flat. Prepping the tubing before flaring it will ensure a good, long lasting seal.
Remove any burrs left on the inside with a razor blade.
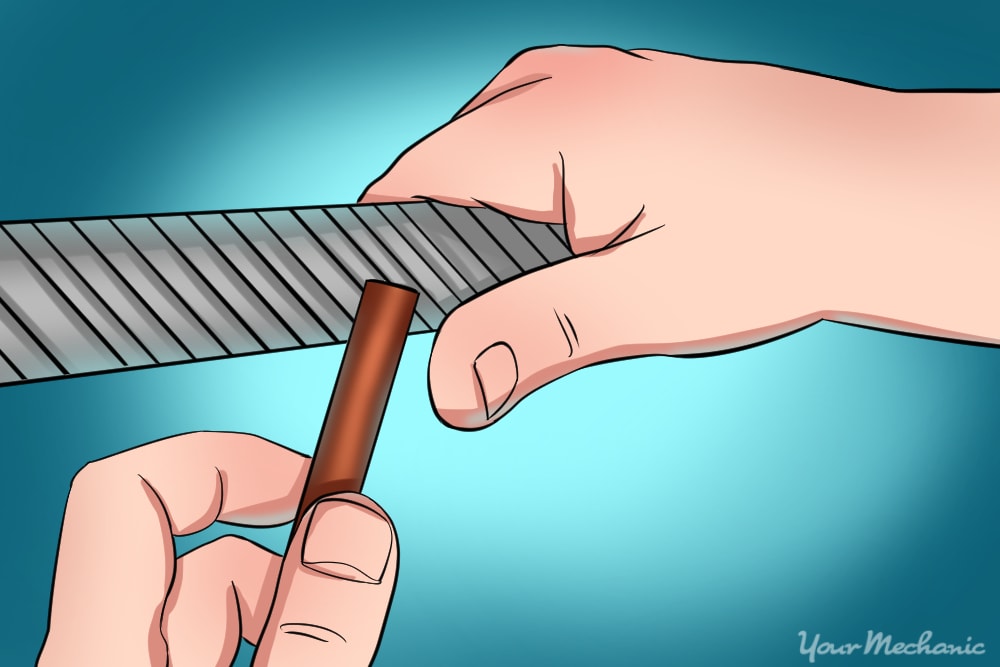
Step 5: File the outside edge of the tubing for fitting. Now the end should be smooth and free of any burrs, placing a fitting on.
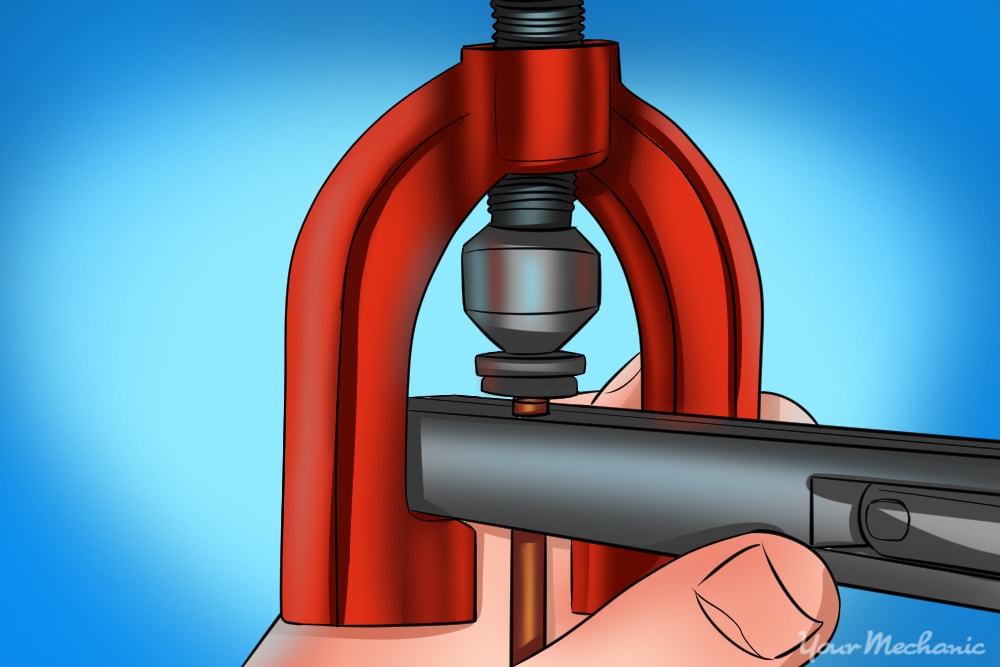
Step 6: Flare the end of the brake line. Mount the tube back into the flare tool and follow the instructions for your set to create the flare.
For brake lines, you’ll need a double flare or a bubble flare depending on the model of vehicle. Do not use a single flare for brake lines as they can’t handle the higher pressure of the brake system.
- Tip: Use some brake fluid as lubricant when forming the end of the tube into a flare. That way you don’t have to worry about any contaminants getting into your brake system.
Step 7: Repeat steps 3 to 6 on the other side of tubing. Don’t forget the fitting or you’ll have to start over.
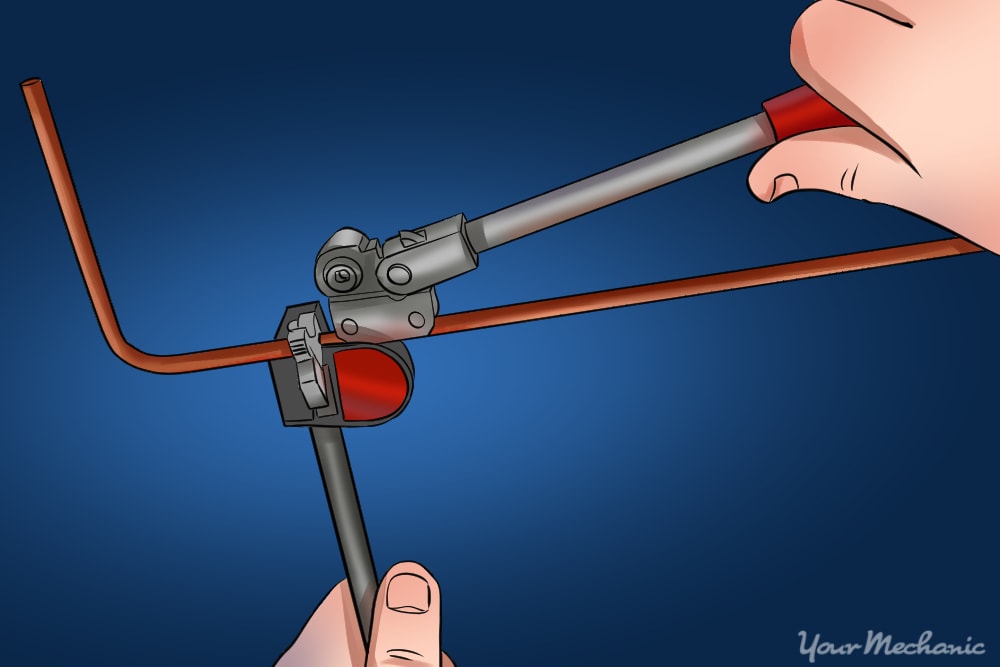
Step 8: Use the tube bender to form the line into the correct shape. It doesn’t have to be exactly the same as the original, but get it as close as possible.
This is so you can still secure the line with any clips. The tubing is malleable so you will be able to make small adjustments when it’s on the car. Now our brake line is ready to install.
Part 3 of 3: Installing your new line
Step 1: Get the new brake line in place. Check to make sure that it reaches both ends and will still go back into any clips or mounts.
Leaving the line out of any mounts may cause flexing while driving the vehicle. Flexing in the line will eventually make another leak and you’ll have to replace it again. You can use your hands to bend the line to make small adjustments.

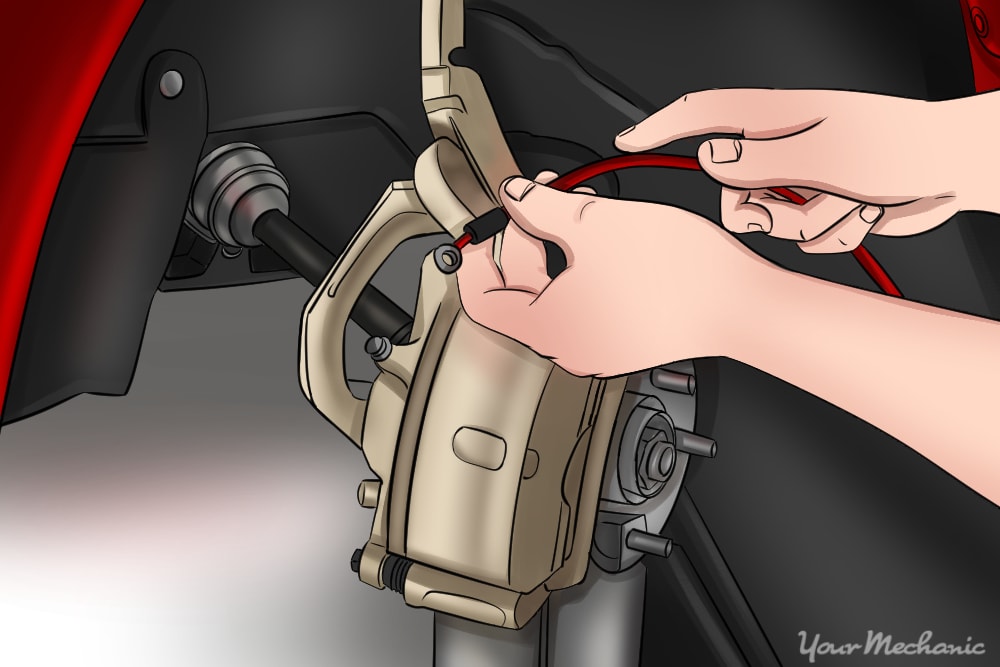
Step 2: Screw in both sides. Start them by hand so you don’t cross thread anything and then use your line wrench to tighten it.
Snug them down with one hand so you don’t over tighten them.
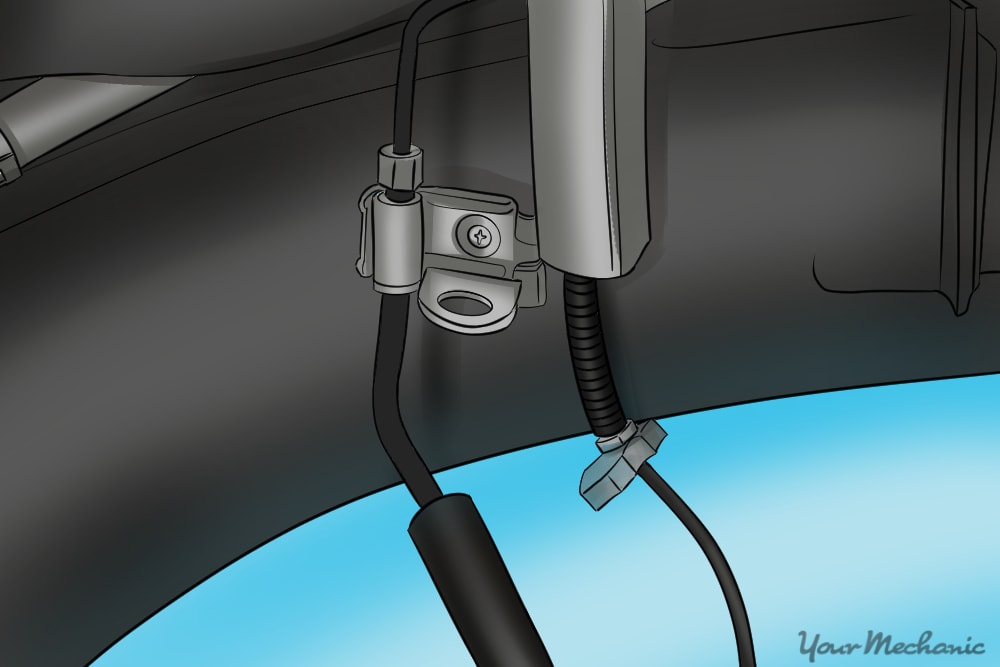
Step 3: Re-secure the brake line with the mounts. As mentioned before, these mounts keep the line from bending and flexing so use all of them.
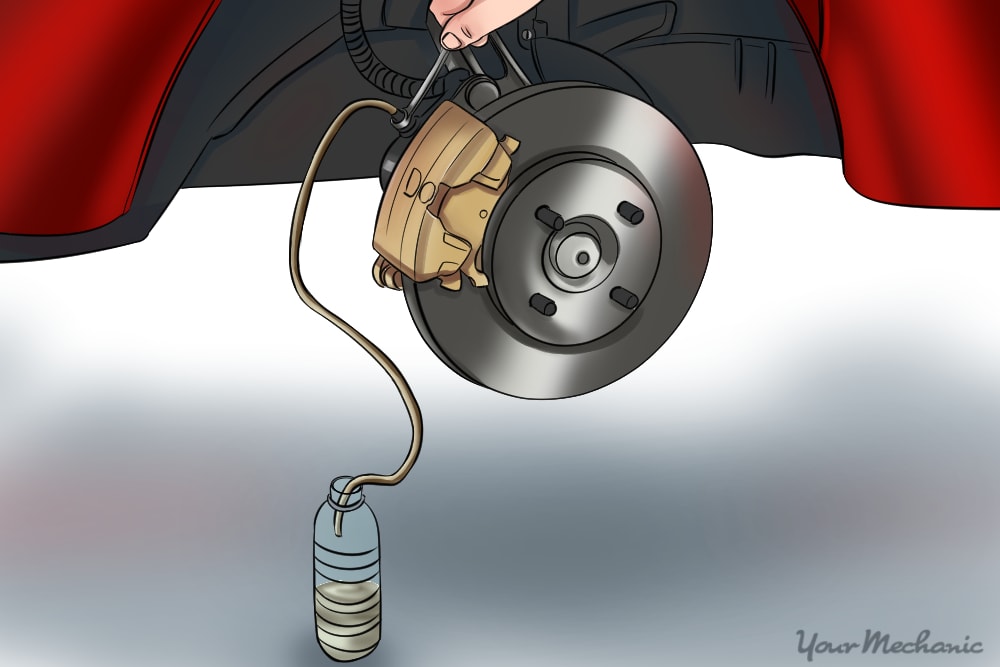
Step 4: Bleed the brakes. You should only need to bleed the line or lines that you replaced, but if the brakes are still spongy, bleed at all 4 wheels to be safe.
Never let the master cylinder run dry or you’ll have to start over. Check the connections that you’ve made for leaks while the brakes are being pumped.
- Note: Having someone pump the brakes while you open and close the bleeder valve makes this job much easier.
Step 5: Reassemble everything and put the car back on the ground. Make sure everything is properly in place and the car is securely on the ground.
Step 6: Test drive the vehicle. Before you start moving, do one last leak check with the engine running.
Pump hard on the brakes a few times and check for any puddles underneath the car. If everything looks good, test the brakes at a low speed in an empty area before going into traffic.
With your brake line replaced, you won’t have to worry about any leaks for a while. Doing this at home can save you money but if you need any assistance, Ask a Mechanic for some helpful advice on the process, and if you notice your brakes are hard to push, one of YourMechanic’s certified technicians perform an inspection.