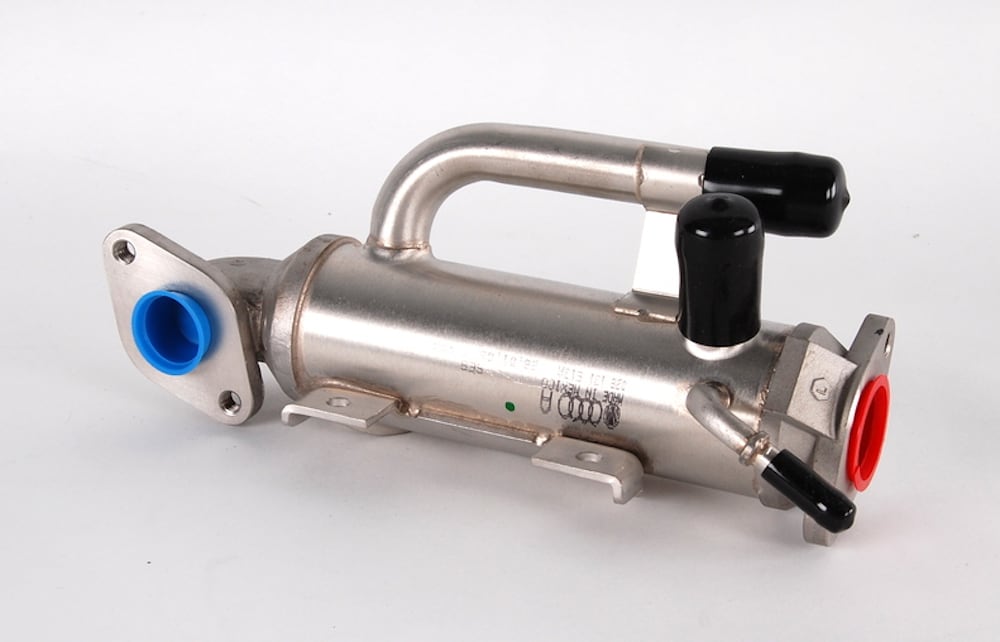

The exhaust gas recirculation (EGR) system is used to lower combustion temperatures and reduce oxides of nitrogen emissions (NOx). This is accomplished by re-introducing exhaust gases into the engine combustion chamber to cool the combustion flame. In some cases, an EGR cooler is used to cool the temperature of the exhaust gas before it enters the engine. Engine coolant flows through the EGR cooler to absorb heat. Generally, EGR coolers are found on diesel engines.
Common signs of a bad or failed EGR cooler include engine overheating, exhaust leaks, and the Check Engine Light coming on due to insufficient flow or exhaust. If you suspect that your EGR cooler may be having an issue, you may need to replace it.
- Note: The following process varies between vehicles. Depending on your vehicle’s design, you may need to remove some other parts first, before you can access the EGR cooler.
Part 1 of 3: Locate the EGR cooler
In order to safely and efficiently replace your EGR control solenoid, you will need a couple of basic tools:
Materials Needed
- Air compressor (optional)
- Cooling system vacuum fill tool (optional) ntxtools
- Drain pan
- Free repair manuals from Autozone
- Protective gloves
- Repair manuals (optional) Chilton
- Safety glasses
Step 1: Locate the EGR cooler. The EGR cooler is mounted to the engine. Some vehicles also use more than one cooler.
Refer to the owner’s manual of your vehicle to determine the location of the EGR cooler in your vehicle.
Part 2 of 3: Remove the EGR cooler
Step 1: Disconnect the negative battery cable. Disconnect the negative battery cable and set it aside.
Step 2: Drain the coolant from the radiator. Place a drain pan below the vehicle. Drain the coolant from the radiator by opening the petcock valve or removing the lower radiator hose.
Step 3: Remove the EGR cooler fasteners and gasket. Remove the EGR cooler fasteners and gasket.
Discard the old gasket.
Step 4: Disconnect the EGR cooler clamps and brackets, if equipped. Disconnect the cooler clamps and brackets by removing the bolts.
Step 5: Disconnect the EGR cooler inlet and outlet hoses. Loosen the clamps and remove the cooler inlet and outlet hoses.
Step 6: Discard the old parts carefully. Remove the EGR cooler and discard the gaskets.
Part 3 of 3: Install the EGR cooler
Step 1: Position the new cooler. Position the new cooler in your car’s engine bay.
Step 2: Connect the EGR cooler inlet and outlet hoses. Slide the inlet and outlet houses into place and tighten down the clamps.
Step 3: Put in new gaskets. Slide the new gaskets into place.
Step 4: Connect the EGR cooler clamps and brackets. Connect the cooler clamps and brackets, then tighten down the bolts.
Step 5: Install the the EGR cooler fasteners. Put in the new EGR cooler fasteners and gasket.
Step 6: Fill the radiator with coolant. Reinstall the lower radiator hose or close the drain petcock.
Fill the radiator with coolant and bleed the system of air. This can be done either by opening the bleeder valve, if your car is equipped with it, or by using a cooling system vacuum fill tool attached to shop air.
Step 7: Reconnect the negative battery cable. Reconnect the negative battery cable and tighten it down.
Replacing an EGR cooler can be a big job. If this seems like something you’d rather leave to the professionals, the team at YourMechanic offers expert EGR cooler replacement services.


