The air suspension dryer assembly plays an important role in the suspension system. It keeps the air in the system dry to prevent corrosion and rust from developing on the suspension parts. If the air suspension dryer assembly is going bad, it will show in problems with the suspension itself, such as sagging or excessive bounciness while driving.
Part 1 of 2: Removal of the air dryer
Materials Needed
- Basic hand tools
- Scan tool
Step 1: Turn the ignition switch to the on position.
Step 2: Release the air pressure. Using the scan tool, open the vent valve and relieve all of the air pressure from the air lines. After the air lines have been depressurized, close the vent valve. You do not have to deflate the air springs.
- Warning: Vent all air pressure from the air suspension system prior to disconnecting or removing any air suspension components. Failure to do so may result in serious personal injury.
Step 3: Turn the ignition switch to the off position.

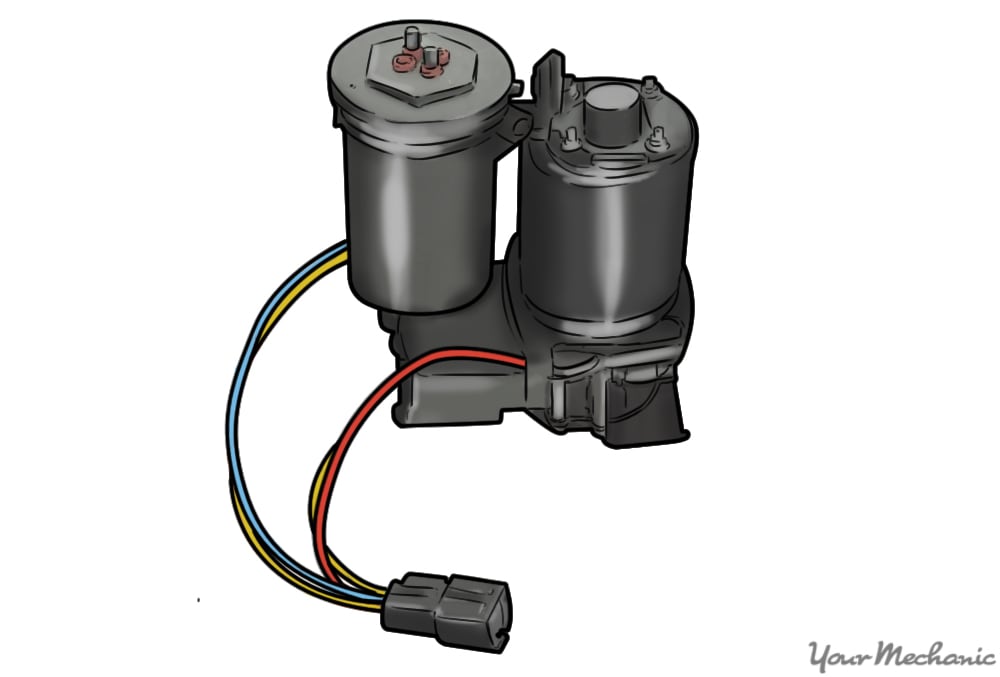
Step 4: Disconnect the air line from the compressor dryer. Press the quick disconnect lock ring down (noted by the red circle above), then pull the plastic air line out from the air dryer.
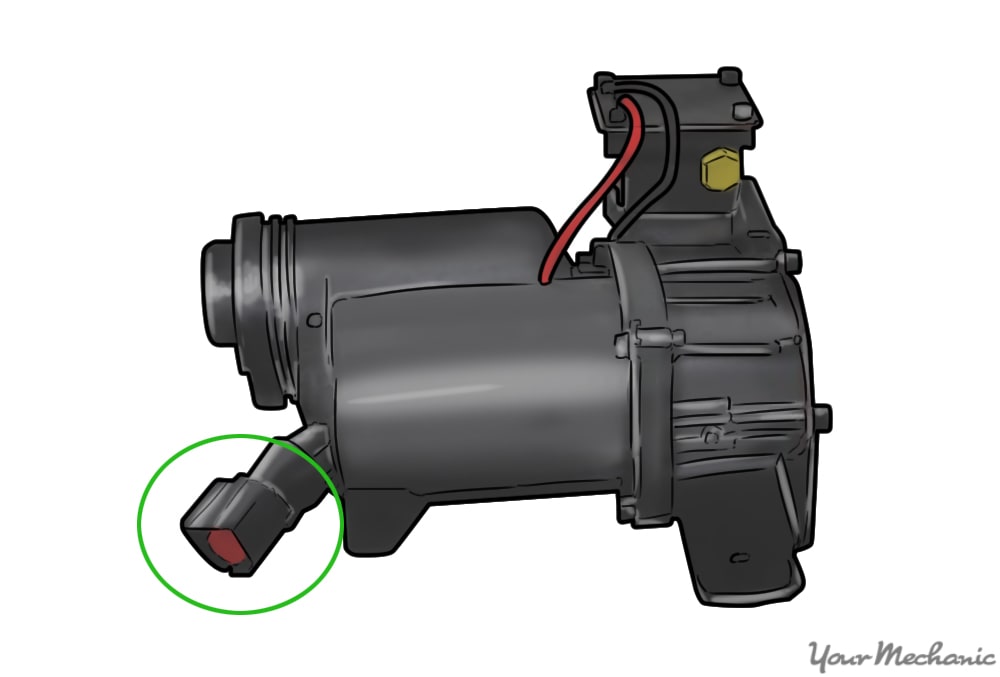
Step 5: Disconnect the electrical connector. Disconnect the electrical connector from the air compressor (noted by the green circle above).
Look for the lock release tab on the connector. Depress the tab and pull the two halves of the connector apart.
Step 6: Remove the compressor. Remove the bracket bolts that secure the air compressor to the vehicle, then remove the air compressor and bracket assembly from the vehicle.
Using the appropriate size socket and ratchet, loosen and remove the bolts that hold the compressor to the vehicle body.
Step 7: Remove the screws. Remove the screws that attach the air dryer to the compressor.
Step 8: Remove the air dryer. Pull the air dryer outward from the air compressor to remove it.
You may need to rotate the air dryer counter-clockwise while pulling in order to release it from its locking tabs.
- Note: Make sure that the o-ring seal has been removed with the air dryer and has not been left inside the air compressor assembly.
Part 2 of 2: Installation of the air dryer
Step 1: Install the air dryer onto the air compressor. If you are installing a new air dryer, make sure that it comes with a new o-ring.
If the old air dryer is being re-installed, install a new o-ring onto the air dryer.
Step 2: Tighten the screws. Install and tighten all of the air dryer attachment screws.
Step 3: Install the air compressor and bracket assembly into the vehicle. Bolt the compressor in place and torque all fasteners to their specified amount (approximately 10 - 12 lb-ft).
- Note: When the air compressor is installed, make sure that the air compressor moves freely in the rubber isolators. This prevents noise from being transmitted from the air compressor to the body of the vehicle when the air compressor is operating.
Step 4: Reconnect the electrical connector to the compressor. The connector has an alignment key or a specific shape that prevents the connector from being improperly connected.
This connector goes in one way only. Slide the two mating halves of the connector together until the connector lock clicks.
- Note: To ensure that no noise or vibration issues arise, make sure that there are no objects trapped under or on the bracket and that the air compressor is not in contact with any of the surrounding components. Make sure that the compressor bracket has no deformations that could cause the rubber isolators to load against each other.
Step 5: Install the air line into the air dryer. Insert the white plastic air line into the air dryer port until it bottoms out. No additional tools are needed.
- Note: When installing the air lines, make sure the white inner air line is fully inserted into the fitting for correct installation.
If you’re having trouble completing the installation, the trained professionals at YourMechanic can replace the air suspension dryer assembly for you. Give them a call to schedule a convenient appointment at your home or work.