
Older vehicles manufactured prior to the introduction of electronic control modules relied on mechanically engineered components to perform the functions now controlled by electronics and super computers. One of the best examples of older technology providing luxury features was the use of vacuum controls that activated and deactivated cruise control function.
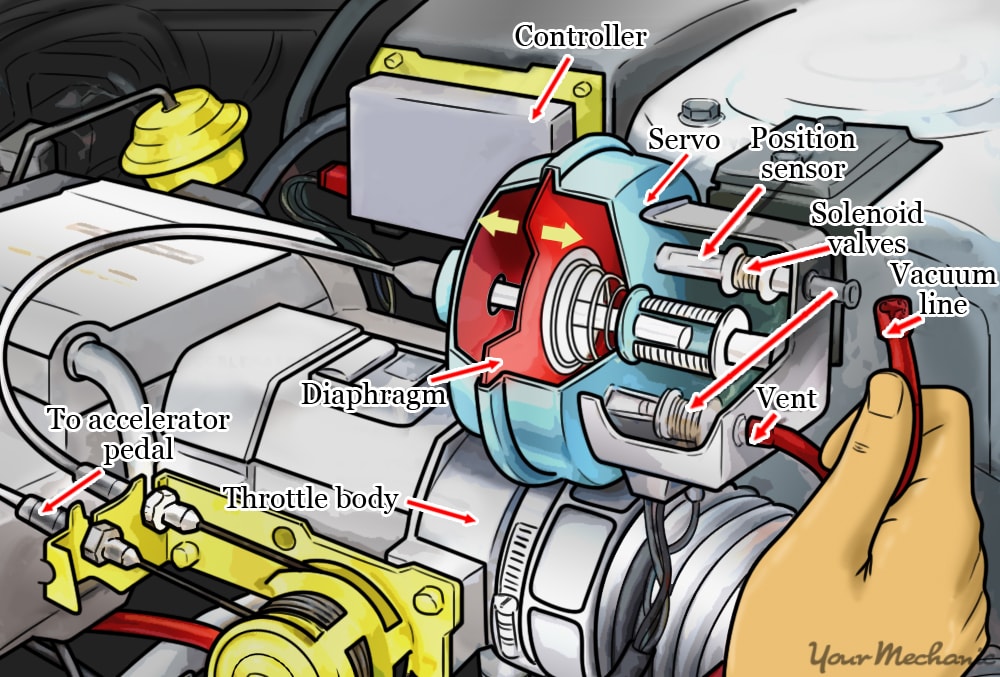
A few decades ago, the cruise control vacuum bleed switch was an essential part of the cruise control system. Once the cruise control set, negative pressure supplied by a vacuum system opened and closed the mechanical switches that controlled the cruise control system. The primary vacuum switch was located on the cruise control servo and maintained steady pressure of vacuum once the cruise control was engaged. This action froze the throttle linkage at a predetermined position to set a "cruising speed.”
When the driver wanted to slow the vehicle down, they would either press a deceleration button on the steering wheel or press the brake pedal, which would release the vacuum in the servo. The switch that released the vacuum is known as the cruise control vacuum bleed switch. Although it is a secondary backup system for shutting off a cruise control, it is an incredibly important safety component and should be replaced if it is damaged.
The cruise control vacuum bleed switch is designed to maintain vacuum pressure until the brake pedal is depressed. Sometimes this switch will wear out and leak, which does not allow the cruise control to maintain vacuum pressure and renders the cruise control ineffective or inoperative. Typically, when there is a problem with the vacuum bleed switch, a hissing sound is heard from under the dashboard near the brake pedal or under the hood. Due to the fact that each vehicle manufacturer designed their cruise control systems differently, the location of the cruise control vacuum bleed switch or secondary shut off devices varies.
- Note: We will discuss the steps for removing and replacing the cruise control vacuum bleed switch that is most common, the one located inside the servo. If the vehicle has the vacuum bleed switch on the servo, it is recommended to replace the entire servo unit, as the process of rebuilding a servo is incredibly complex, time consuming, and more expensive than simply replacing the older unit with a new system.
Part 1 of 3: Determining the symptoms of a bad cruise control vacuum bleed switch
Older cruise control systems have multiple components that must all work together in order for the system to activate and deactivate. The cruise control on vehicles manufactured prior to 1996 contains redundant backups that ensured the system could be deactivated if one system failed. The cruise control vacuum bleed switch is one of these redundant systems.
If the cruise control vacuum bleed switch is not functioning, it may be very difficult to determine that this component is failing. However, when this component is not working right, you may hear a hissing noise near the pedals. A malfunctioning vacuum bleed switch will also display the following warning signs:
Cruise control does not hold its speed: If the vacuum bleed switch is broken, it will be unable to maintain vacuum pressure inside the servo that holds the throttle in a set position. When the driver sets the cruise control, it will hold the speed for a very short time, but the vacuum will leak, causing the throttle to slowly close. On older vehicles, this symptom is typically caused by a leak in the vacuum system.
Cruise control will not deactivate: When the vacuum bleed switch is plugged or broken, it may also impact the cruise control's ability to release the cruise control once it has been set. Although the cruise control can be shut off by turning the system "OFF" (which releases vacuum pressure though the primary line), most drivers shut off the cruise control by tapping the brake (which triggers the vacuum bleed switch). If this is a symptom, you should replace the servo and trace all vacuum lines as it will cause a serious safety condition.
Cruise control shuts off automatically while driving: If you're driving down the road with the cruise control activated and the cruise control shuts off without pressing the pedal, this could also be a malfunction caused by a vacuum bleed switch that is constantly open.
Part 2 of 3: Replacing the cruise control brake switch
Replacing a cruise control servo is the best option if a problem with the vacuum bleed switch exists as it's virtually impossible to find the components by themselves and very time consuming and frustrating to rebuild a servo.
Materials Needed
- Boxed end wrench or ratchet wrench
- Flashlight
- Flat blade screwdriver
- Replacement cruise control servo
- Replacement vacuum lines
- Safety glasses
Step 1: Disconnect the vehicle's battery. The first thing that should be done before replacing any electrical component is to disconnect the power supply. Locate the vehicle's battery and disconnect the positive and negative battery cables before proceeding.
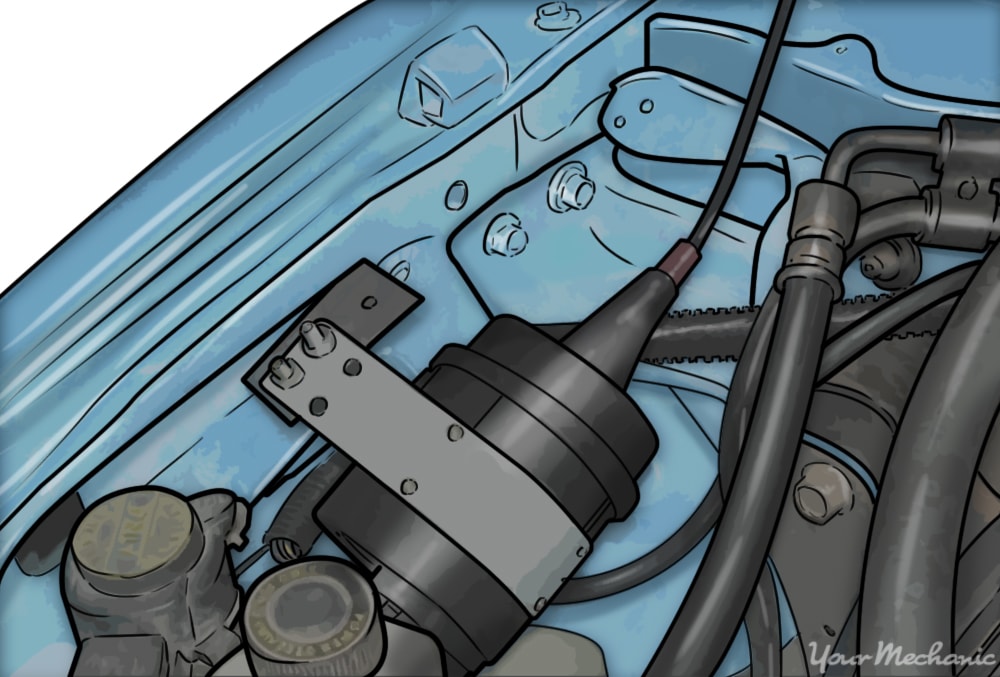
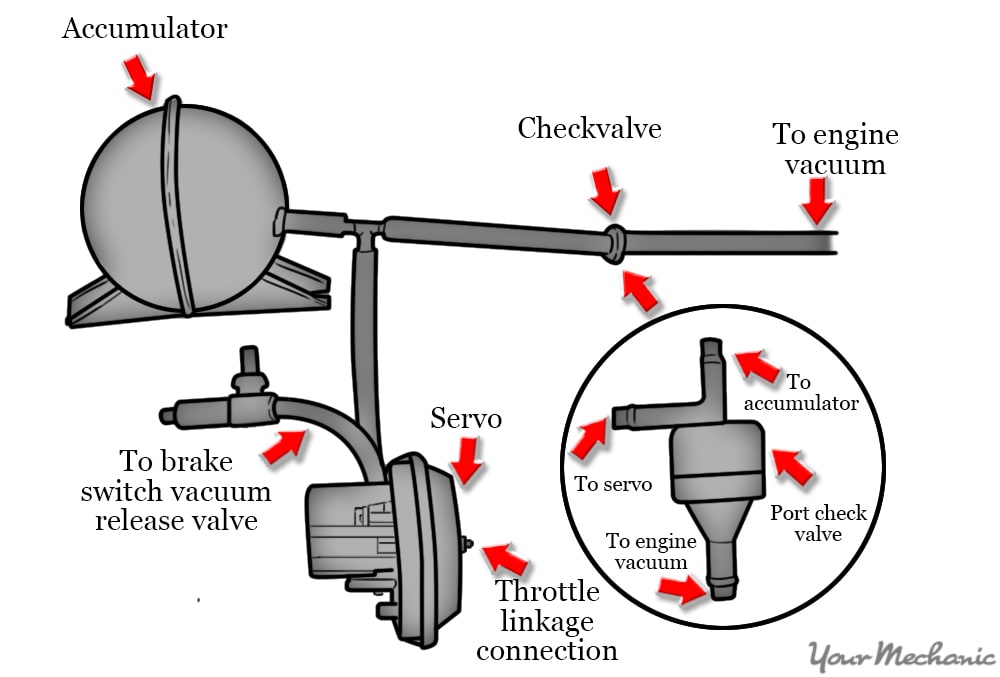
Step 2: Locate the servo. Vacuum style cruise control systems utilize a servo connected to a vacuum tank.
The servo itself is usually attached to either the firewall or the driver or passenger side inner fender. If the vacuum bleed switch inside the servo is broken or damaged, it's easier and more cost effective to replace the servo instead of trying to rebuild it.
Step 3: Visually inspect vacuum lines attached to servo. In many cases, the problem with a vacuum style cruise control is that a vacuum line has a hole, fray, or is disconnected. Before you take time to replace the servo, visually inspect all of the vacuum lines attached to the servo and run them to the components they are attached to on the vehicle. If the vacuum line is damaged or disconnected, fix that issue first and test the cruise control to see if the problem has been solved.
Step 4: Remove any dash covers or other covers that are in the way. Sometimes the servo is located under the dashboard and attached to the firewall. In order to clear room, remove the plastic or metal cover that is on top of the engine compartment. Refer to your vehicle's service manual for specific instructions.
Step 5: Remove bolt that holds servo onto bracket. Once you've completed the visual inspection of the vacuum lines, remove the servo. Do this by first removing the bolt that attaches the servo to a support bracket or the firewall of the vehicle. This bolt is usually an 8mm, so using a socket, extension, and ratchet, remove the bolt.
Step 6: Slide the servo off support tabs. Most servos are held on by a bolt and studs that are attached to the servo slide into two holes or tabs on the bracket or firewall. Carefully slide the servo from these tabs and move onto the next step if applicable.
Step 7: Removing wiring harness. Some vacuum operated cruise control systems are hybrids, meaning they are also powered by electrical lines. In this case, the servo has a wiring harness attached to the bottom of the servo. Remove this harness if applicable and move onto the next step.
Step 8: Mark all vacuum lines attached to the servo. On the servo there are two vacuum lines: one is attached to the vacuum tank while the other is attached to the brake switch. Make sure to mark each one clearly before removing the vacuum lines.
Step 9: Remove vacuum lines.
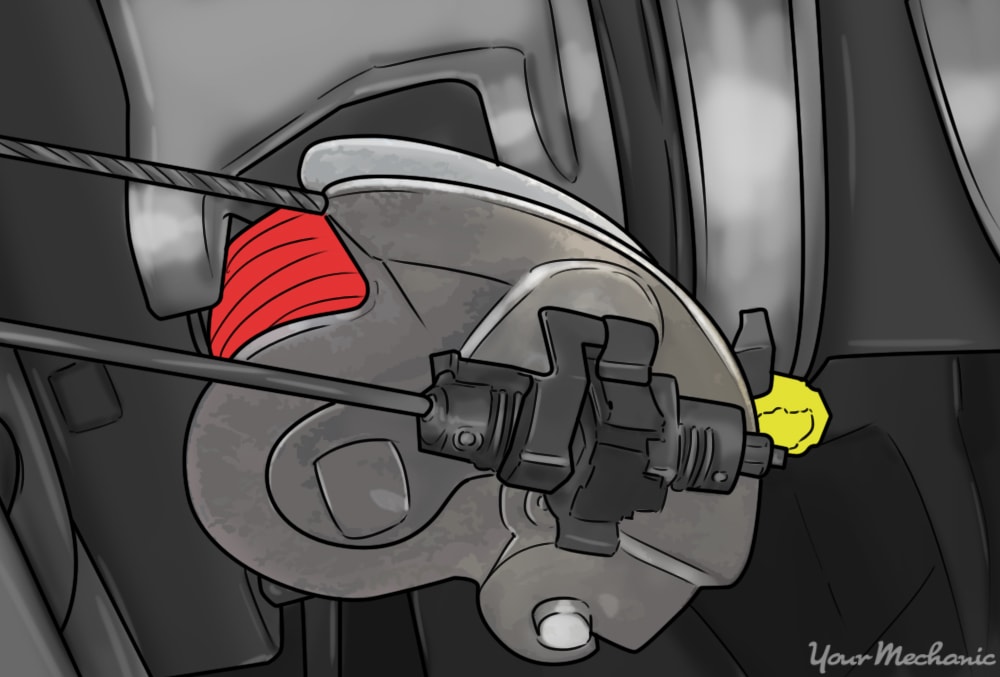
Step 10: Remove throttle linkage. On the servo there is a throttle cable attached to a nipple on the front of the servo. Remove this cable.
Step 11: Remove the servo from the vehicle. After all lines have been disconnected and set aside, remove the old servo from the vehicle.
Step 12: Reinstall vacuum lines on the new servo. Once you've removed the old servo, reinstall the vacuum lines as marked onto the same connections they were located on the old servo.
Step 13: Reattach electrical wiring harness.
Step 14: Slide new servo into tabs.
Step 15: Reattach bolt that secures servo onto the firewall or bracket. Make sure the bolt is fully secured.
Step 16: Replace any covers. Be sure to replace any you removed in order to gain access to the servo.
Step 17: Replace battery cables. Reattach the cables properly.
Part 3 of 3: Test drive the vehicle
Once the servo is replaced, test if your vacuum bleed switch repair was successful during a test drive. If you were having problems with the cruise control shutting off after a certain period of time, test the vehicle for at least that same time period. Here are a few tips on how to complete the test drive.
Step 1: Start the vehicle. Let it warm up to operating temperature.
Step 2: Turn the cruise control button to the "on" position. See if it lights up on the dashboard before you drive. Once the cruise control light comes on, you're ready to test drive the vehicle.
Step 3: Drive your vehicle to the test highway. Accelerate to highway speeds.
Step 4: Set your cruise control at 55 or 65 mph. After the cruise control is set, slightly tap your brake pedal to verify the cruise control shuts off. This tests the vacuum bleed switch.
Step 5: Reset the cruise control again and drive for 10 to 15 miles. Verify that the cruise control does not shut off automatically.
If you've read these instructions and still don't feel 100% confident in completing this repair, please contact one of YourMechanic’s local, ASE certified mechanics to come to your home or place of business to complete the cruise control brake switch replacement for you.


