
A properly functioning brake system is crucial to your vehicle’s overall health, as well as the safety of yourself and your passengers. Although replacing worn brake parts such as brake pads is extremely important, there are many components which tend to be ignored during inspections. One of the most important components to check is the brake fluid, which plays a key role in keeping your brakes operational.
Here is how to add brake fluid to your car:
How to add brake fluid
Park the vehicle in a level area - Make sure the vehicle is stationary and on a level surface. Allowing the vehicle to move or having it at a steep pitch can make the fluid levels read incorrectly.
-
Depress the brake pedal 20 to 30 times - Some manufacturers specify that this be done if the vehicle has anti-lock brakes (ABS).
Tip: If your vehicle doesn’t have ABS, you can skip this step. If you’re not sure if you have ABS, do it anyway.
Warning: The brake pedal may get hard when you do this with the engine off, which is a normal condition. The normal pedal feel will return when the engine is started again.
-
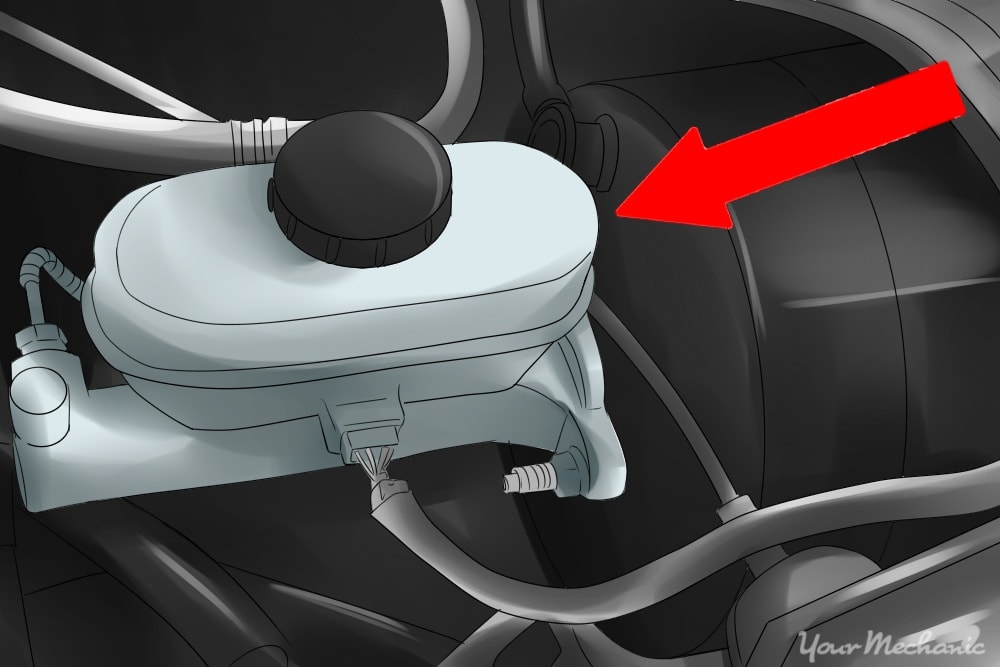
Locate the brake fluid reservoir - The brake fluid reservoir is normally located under the hood, on the driver’s side of the vehicle, against the back of the engine compartment or near the base of the windshield.
Tip: Some vehicles have the brake fluid reservoir under a plastic access panel.
Tip: Some vehicles require significant disassembly of panels underneath the hood in order to access the brake fluid reservoir. If this is the case on your vehicle, it may be best to have a professional perform this service for you.
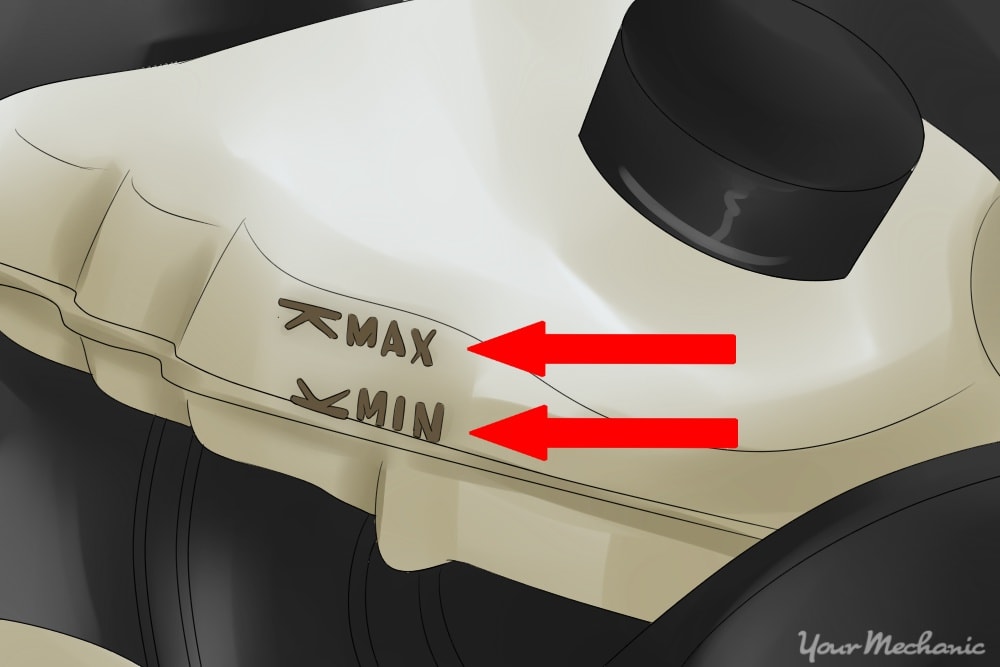
Examine the brake fluid level - Most modern vehicles use a plastic reservoir that is transparent and has MAX and MIN marks on it. If yours is this type, you should be able to see if the brake fluid is between these marks.
-
Inspect the color of the fluid - Brake fluid becomes contaminated with normal use. Clean fluid is a light golden yellow color, dirty fluid becomes dark amber in color. If yours is dark, you should contact a professional about having the brake fluid flushed. Some older vehicles have a metal reservoir with a metal cap that needs to be removed to see the level. If yours is this style, proceed to the next step. If your brake fluid level is between the marks and the fluid looks clean, then you are finished. Good job!
Tip: Shining a flashlight into the reservoir will help you see the fluid level if the reservoir is dirty or otherwise difficult to see through.
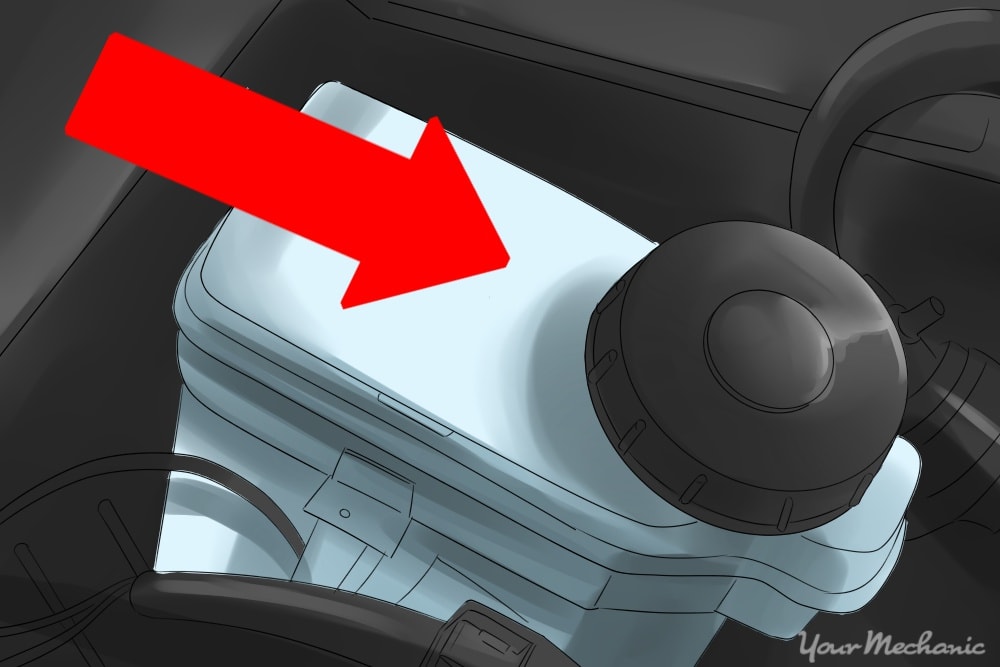
Open the fluid reservoir by removing the cap - If your fluid level is below the minimum mark, or you cannot see your brake fluid level with the cap on, you need to carefully remove the cap.
Clean the reservoir - Take a clean rag and wipe all the dirt and grease away from the cap and the top of the reservoir. You may need to unplug the level sensor if there is one built into the cap.
-
Remove the cap - Remove the cap by pulling it straight up, unscrewing it, or releasing the metal spring clip, whichever is applicable.
-
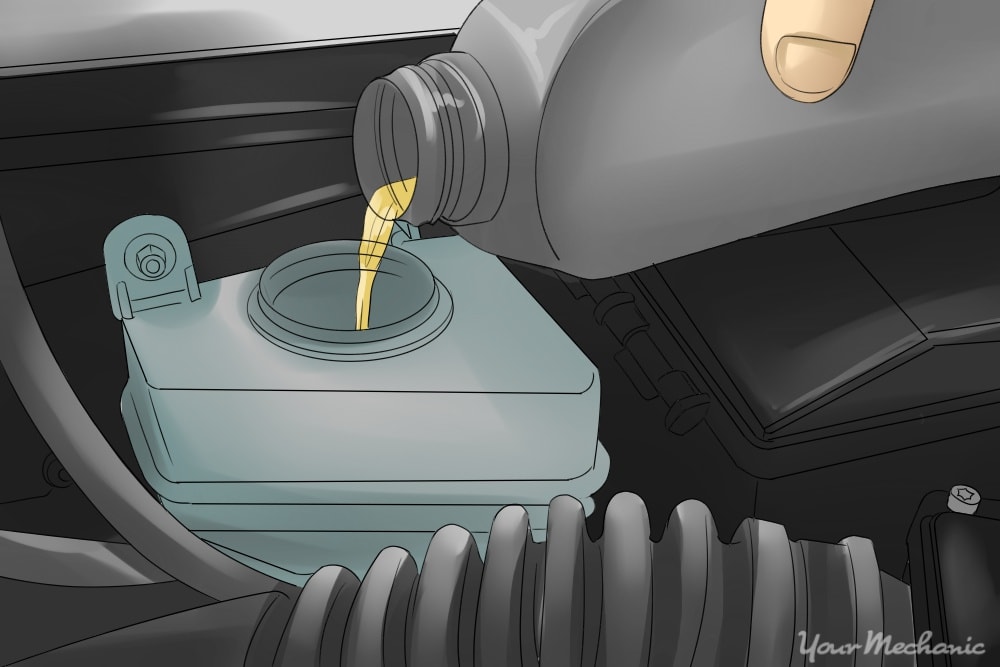
Add brake fluid to the reservoir - Slowly add brake fluid to the reservoir until it’s at the desired level. Be sure to use the correct brake fluid for your car. Reference your owner’s manual or a professional to determine the correct fluid.
Warning: Do not fill above the maximum line, the fluid needs extra room in the reservoir to expand as conditions change.
Warning: Careful not to spill. If you do, clean it up quickly.
-
Cap the reservoir - Re-install the fluid reservoir cap. Put the cap back on the same way it came off.
Tip: Don’t forget to plug in the sensor if you had to unplug one.
Congratulations! You’ve done it! Your brake fluid is now at the correct level. If the fluid was low, there could be a problem in the system, such as worn brake components.
The Braking System
Let’s start with a basic explanation of a vehicle braking system, as understanding the system is critical to understanding why brake fluid is so important. A basic hydraulic brake system is made up of a master cylinder, brake fluid and a fluid reservoir, brake lines, and brake calipers (disc brakes) or wheel cylinders (drum brakes) which apply force to the brake pads or shoes at each of the four wheels.
The brake pedal is directly attached to the master cylinder, which is where the brake fluid is distributed to each wheel through separate brake lines. Mounted above the master cylinder is the brake fluid reservoir, which uses gravity to feed fluid into the master cylinder. When the pedal is pressed, the master cylinder starts to put pressure on the fluid. Since fluids cannot be compressed, this pressure becomes movement. The fluid moves through the brake lines and down into each brake caliper or wheel cylinder. There the fluid pressure applies force to the brake pads or shoes which causes the wheels to stop.
Why is it important?
This tutorial applies to most vehicles, but depending on your specific model, there may be variations that could require additional work or service by a professional.
Brake fluid is hygroscopic, meaning it absorbs moisture, including moisture in the air. Don’t leave the reservoir or any bottle of fluid open any longer than necessary. Because it is hygroscopic, the fluid should be flushed every 2 years regardless of color or condition of fluid. This ensures there is no moisture in the fluid to corrode parts internally.
Brake fluid is damaging to painted surfaces - even a drop can cause damage. Immediately clean up any spills with a household cleaner or degreaser and a clean rag.
If the brake pedal is low or spongy, it’s a good idea to enlist the help of a qualified technician, as those could be signs of a more serious issue.
If you had to add any fluid, you should have the brake system inspected by a qualified professional, such as one of the many available through YourMechanic, who can come to your home or workplace to service your car.


