The parking brake in a vehicle is to keep the vehicle from moving when it is parked. Parking brakes have a ratchet locking mechanism that will keep them engaged until a release button is pressed.
The parking pawl, which is the parking lock inside an automatic transmission, is designed to keep the vehicle from moving while the transmission lever is put into park. However, when the vehicle is on an incline, the park pawl is not strong enough to hold the vehicle, so the parking brake must be set to keep the vehicle from moving.
For a vehicle with a manual transmission, the parking brake must be set to hold the vehicle. Too many people rely on the gears to hold the vehicle, but the engine is what really holds the vehicle.
- Note: If a vehicle with a manual transmission is in gear to hold the vehicle with the key on and if the vehicle was to move in motion, then the engine will start up and make the vehicle a run away with no operator. So, the parking brake is a must use item.
If the parking brakes won’t engage, then you need to check the following:
- Parking brake lever/pedal out of adjustment
- Parking brake cable broken
- Rear brake shoes/pads worn out
Part 1 of 3: Diagnosing the parking brake lever or pedal that is out of adjustment
Preparing the vehicle to check the parking brake lever or pedal
Materials Needed
- Channel locks
- Flashlight
- Safety glasses
- Wheel chocks
Step 1: Park your vehicle on a flat, hard surface. Make sure that the transmission is in park (for automatics) or in first gear (for manuals).
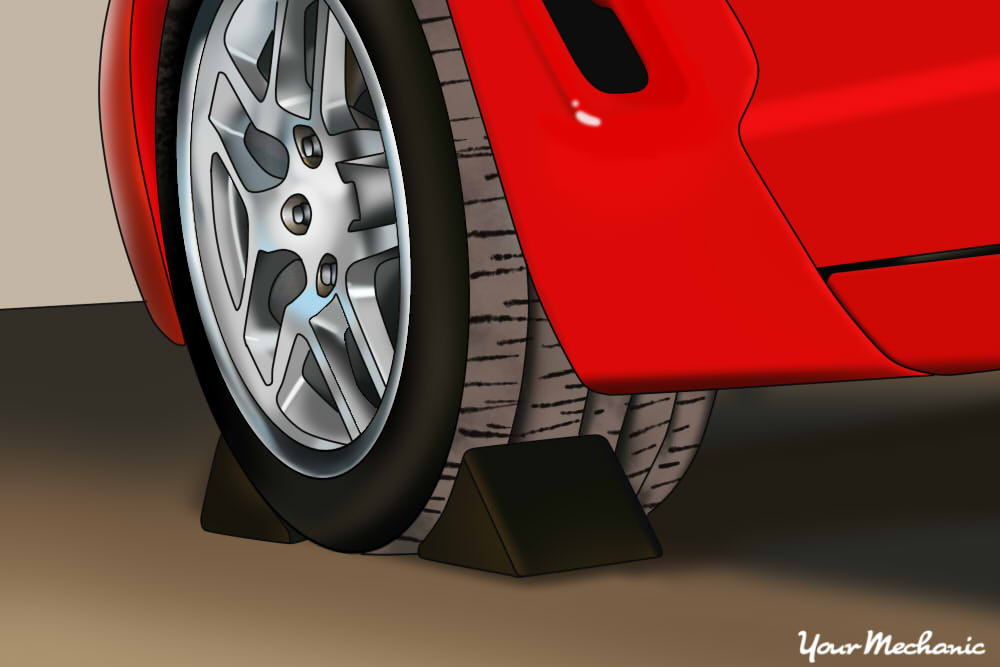
Step 2: Place wheel chocks around the rear tires that will be remaining on the ground. Engage the parking brake to the lock the rear tires from moving.
Checking the condition of the parking brake lever or pedal
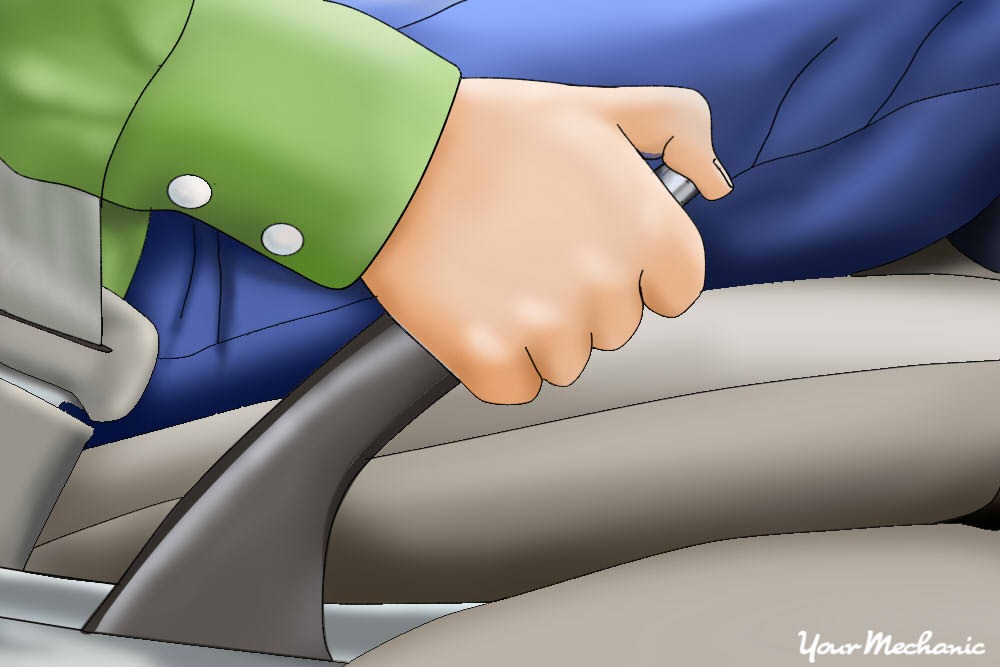
Step 1: Put on your safety glasses and grab your flashlight Locate the parking brake lever or pedal.
Step 2: Check to see if the lever or pedal is bent or broken. Make sure that the pin and cotter pin is in place holding the lever or pedal in position.
Step 3: The the back of the lever or pedal for the parking brake cable attachment. Check to see if the cable is broken or frayed. If you have a cable with a bolt attached, check to see if the nut came loose.
Step 4: Set and reset the parking lever or pedal. Check for tension as you set the parking brake. Also, check to see if there is an adjuster on the lever. If there is, check to see if it can be turned.
If the lever adjuster cannot be turned by hand, you can put a pair of channel locks onto the adjuster and try to free it up. Sometime overtime the adjuster becomes rusty and the threads get frozen.
Cleaning up after performing the diagnosis
Step 1: Collect all tools and place them out of the way. Remove the wheel chocks from the rear wheels and put the aside.
If you need a professional's help, contact a mechanic to investigate why your parking brake lever/pedal is out of adjustment.
Part 2 of 3: Diagnose the parking brake cable if it is broken
Preparing the vehicle to check the parking brake cable
Materials Needed
- Flashlight
- Jack
- Jack stands
- Safety glasses
- Wheel chocks
Step 1: Park your vehicle on a flat, hard surface. Make sure that the transmission is in park (for automatics) or in first gear (for manuals).
Step 2: Place wheel chocks around the rear tires that will be remaining on the ground. Engage the parking brake to the lock the rear tires from moving.
Step 3: Raise the vehicle. Using a floor jack that is recommended for the weight of the vehicle, lift under the vehicle at its specified jacking points until the wheels are completely off the ground.
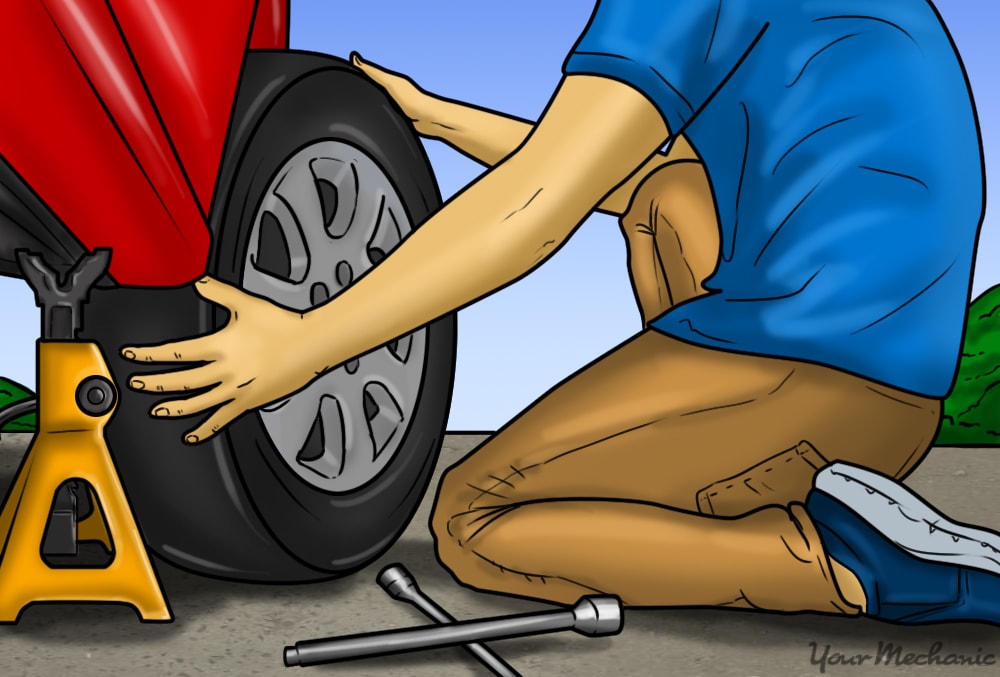
Step 4: Place the jack stands. The jack stands should go under the jacking point locations. Then lower the vehicle onto the jack stands. For most modern cars, the jacking points for jack stands will be on the pinch weld just under the doors along the bottom of the car.
Checking the condition of the parking brake cable
Step 1: Put on your safety glasses and grab your flashlight Locate the parking brake cable in the cab of the vehicle.
Step 2: Check to see if the cable is broken or frayed. If you have a cable with a bolt attached, check to see if the nut came loose.
Step 3: Go under the vehicle and check the cable along the undercarriage of the vehicle. Use your flashlight and check to see if the cable has any breaking points in it.
**Step 4: Look at the connections to where the parking brake cable attaches to the rear brakes. Check to see if the cable is broken where it attaches to the rear brakes.
Lowering the vehicle after performing the diagnosis
Step 1: Collect all tools and your creeper and place them out of the way.
Step 2: Raise the vehicle. Using a floor jack that is recommended for the weight of the vehicle, lift under the vehicle at its specified jacking points until the wheels are completely off the ground.
Step 3: Remove the jack stands and keep them far away from the vehicle.
Step 4: Lower the vehicle to where all four wheels are on the ground. Pull out the jack and put it aside.
Step 5: Remove the wheel chocks from the rear wheels and put the aside.
If the problem needs immediate attention, ask a technician to repair the broken parking brake cable.
Part 3 of 3: Diagnose the condition of the parking brake shoes or pads
Preparing the vehicle to check the parking brake shoes or pads
Materials Needed
- Flashlight
- Flat tip screwdriver
- Jack
- Jack stands
- SAE/metric socket set
- SAE/metric wrench set
- Safety glasses
- Sledge hammer 10 pounds
- Tire iron
- Torque wrench
- Wheel chocks
Step 1: Park your vehicle on a flat, hard surface. Make sure that the transmission is in park (for automatics) or in first gear (for manuals).
Step 2: Place wheel chocks around the rear tires that will be remaining on the ground. Engage the parking brake to the lock the rear tires from moving.
Step 3: Use a tire iron to loosen the lug nuts on the rear wheels.
- Note: Do not remove the lug nuts until the wheels are off the ground
Step 4: Raise the vehicle. Using a floor jack that is recommended for the weight of the vehicle, lift under the vehicle at its specified jacking points until the wheels are completely off the ground.
Step 5: Place the jack stands. The jack stands should go under the jacking point locations.
Then lower the vehicle onto the jack stands. For most modern cars, the jacking points for jack stands will be on the pinch weld just under the doors along the bottom of the car.
Checking the condition of the parking brake shoes or pads
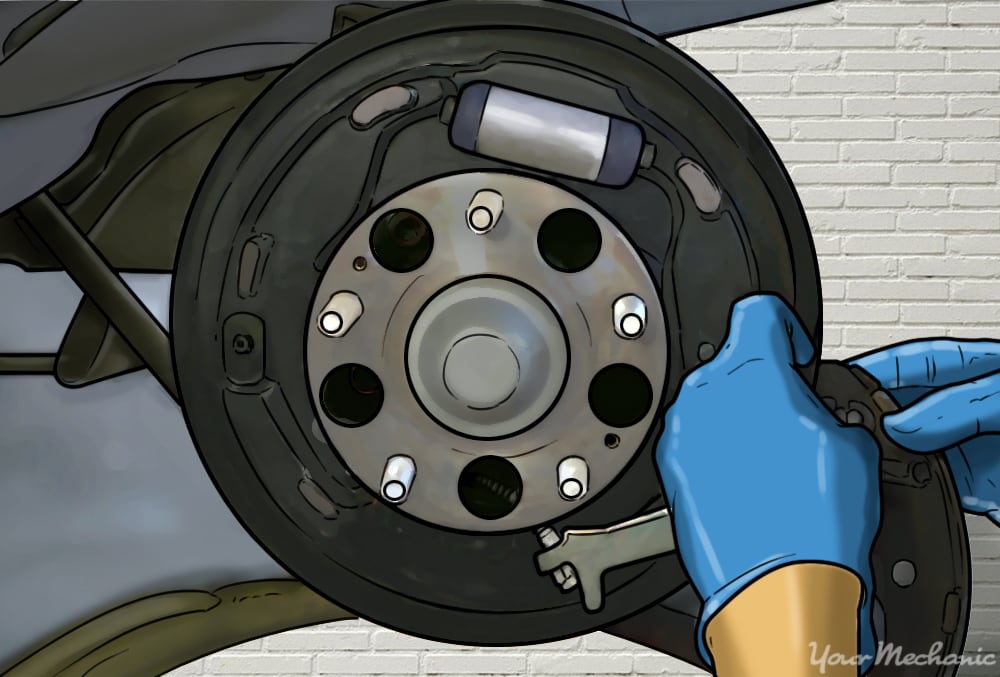
Step 1: Put on your safety glasses and grab your flashlight. Go to the rear wheels and remove the lug nuts. Take off the rear wheels.
- Note: If your vehicle has a hub cap, you will need to remove it first before removing the wheels. Most hub caps can be removed by a large flat tip screwdriver where others need to be removed by the tire iron.
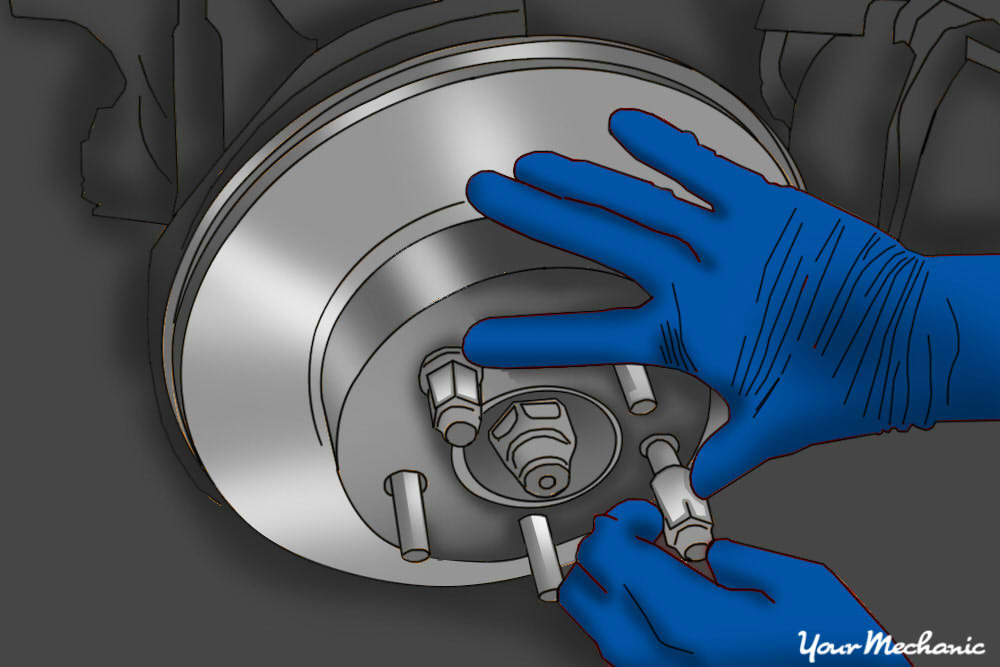
Step 2: If your vehicle has drum brakes, grab a sledge hammer. Hit the side of the drum to free it up from the wheel studs and centering hub.
- Warning: Do not hit the wheel studs. If you do, you will need replace damaged wheel studs, which can take some time.
Step 3: Remove the drums. If you cannot remove the drums, you may need to use your large screwdriver to loosen the rear brake shoes.
- Note: Do not pry off the drums for you can damage the backing plate.
Step 4: When the drums are off, check the condition of the rear brake shoes. If the brake shoes are broken, you will need to take repairing action at this point.
If the brake shoes are worn out, but there is still linings left to help stop the vehicle then take a tape measure and measure the amount of linings that are left. The minimum amount of linings should not be any thinner than 2.5 millimeters or 1/16 of an inch.
If you have rear disk brakes, then you will need to remove the wheels and check the pads for wear. Pads cannot be any thinner than 2.5 millimeters or 1/16 of an inch. If you have disk rear brakes but have a drum parking brake, then you will need to remove the disk brakes and rotor. Some rotors have hubs in them, so you will need to remove the hub locking nut or cotter pin and lock nut to take the hub off. When you are done inspecting the drum brakes, then you can put the rotor back on and reassemble the rear disk brakes.
- Note: When you have the rotor off and it has a hub in it, you will want to check the bearings for wear and condition and it is suggested to replace the wheel seal before putting the rotor back on the vehicle.
Step 5: Put the drums back on. When you are done diagnosing the vehicle, if you plan on working on the rear brakes later, you will need to put the drums back on.
Adjust the brake shoes tighter if you had to back them off. Put on the drum and wheel. Put on the lug nut and tighten them up with the tire iron.
Lowering the vehicle after performing the diagnosis
Step 1: Collect all tools and your creeper and place them out of the way.
Step 2: Raise the vehicle. Using a floor jack that is recommended for the weight of the vehicle, lift under the vehicle at its specified jacking points until the wheels are completely off the ground.
Step 3: Remove the jack stands and keep them far away from the vehicle.
Step 4: Lower the vehicle to where all four wheels are on the ground. Pull out the jack and put it aside.
Step 5: Get a torque wrench and torque the lug nuts. Make sure that you use a star pattern to ensure that wheels are torqued properly with no runout or wobble effect. Put on the hubcap. Make sure that the valve stem is visible and free from contacting the hubcap.
Wheel lug nut torque values
- 4 cylinder and V6 engine vehicles 80 to 90 foot pounds
- V8 engines on cars and vans 90 to 110 foot pounds
- Large vans, trucks, and trailers 100 to 120 foot pounds
- One ton and 3/4 ton vehicles 120 to 135 foot pounds
Step 5: Remove the wheel chocks from the rear wheels and put the aside.
Contact a mechanic to replace worn out rear brake shoes or brake pads.
Fixing the parking brake that won’t engage can help improve the braking of the vehicle and prevent any damage to the brake system and transmission.