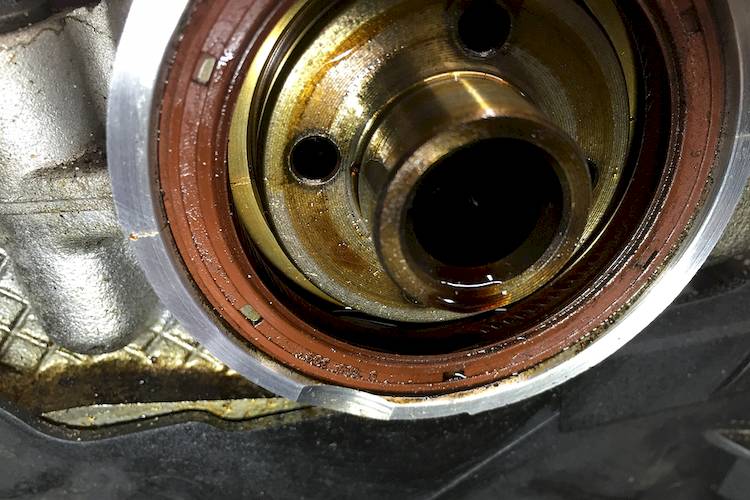

The camshaft seal is designed to seal the end of the camshaft. Over time, seals harden and begin to leak. Seals can also fail from excess crankcase pressure, but that happens much less frequently. A failed camshaft seal can result in oil loss and potential timing belt contamination. On most vehicles, a timing belt replacement is a big job that requires the removal of the timing belt and camshaft sprocket(s).
Part 1 of 6: Prepare the vehicle
Materials Needed
- Brake clean
- Breaker bar (optional)
- Coolant drain pan
- Camshaft sprocket holding tool
- Free repair manuals provides free online repair manuals for certain makes and models
- Jack and jack stands
- Lint free rags
- Multi-purpose grease
- Oil drain pan
- Oil seal puller (optional)
- Piece of wood
- Power tools (including ½ drive electric impact, ⅜ and ¼ electric ratchets, ⅜ mini impact, ¾ drive impact, air filler gauge for tires, and coolant vacuum filler)
- Protective gloves
- Wrenches, ratchets and sockets of the appropriate size
- Reel of air hose
- Repair manuals (optional)
- Safety glasses
- Tarp to lay under the car
- The Right Stuff Gasket Maker
- Threadlocker
- Torque wrench
Step 1: Jack up the vehicle. Use a hydraulic jack to raise the vehicle and support it with jack stands. Chock the wheels and set the parking brake.
Step 2: Drain the engine oil. Place an oil drain pan on under the vehicle and remove the oil drain plug using a wrench or ratchet and socket of the appropriate size.
Part 2 of 6: Remove the timing belt and associated components
Step 1: Remove the timing belt and associated components. Remove the timing belt and all components needed to access it as outline in this article:
Step 2: Remove the camshaft sprockets(s). Use a camshaft sprocket holding tool to hold the sprocket in place. Then, remove the sprocket bolt using a long ratchet and socket or a breaker bar.
- Note: If the camshaft sprocket is not held properly, the camshaft may spin causing, engine damage.
Part 3 of 6: Remove the camshaft seal
Step 1: Remove the camshaft seal. Pry the camshaft seal out using a screwdriver or dedicated oil seal puller (there are a variety available).
- Note: Be careful not to scratch the camshaft during this step of the seal will leak.
Part 4 of 6: Install the new camshaft seal
Step 1: Prepare the sealing area. Spray brake clean into the sealing area and wipe it clean with a paper towel or lint free rag.
Step 2: Prepare the new seal. Apply a light coat of the Right Stuff Gasket Maker to the outer diameter of the seal. Then, put some multi-purpose grease inside the seal to keep the spring in place.
Step 3: mount the new seal in place. Mount the new seal in place around the camshaft and push it in by hand as much as you can.
Step 4: Drive the new seal into place. Find a socket that fits over the camshaft and is about the same diameter as we the seal. Then, using a hammer to hit the socket and drive the seal into place.
Part 5 of 6: Reinstall the timing belt and associated components
Step 1: Reinstall the camshaft sprockets(s). Apply threadlocker to the sprocket bolt threads. Them, use a camshaft sprocket holding tool to hold the sprocket in place. Finally, install the sprocket bolt using a long ratchet and socket or a breaker bar. Torque the bolt to the specification listed in the vehicle repair manual.
- Note: If the camshaft sprocket is not held properly, the camshaft may spin causing, engine damage.
Step 2: Reinstall the timing belt and associated components. Reinstall the timing belt and all components needed to access it.
Part 6 of 6: Finish the job
Step 1: Refill the engine will oil. Refill the engine with the correct type and amount of oil as listed in the vehicle repair manual.
Step 2: Lower the vehicle. Use a hydraulic jack to raise the vehicle and remove the jack stands. Then, lower the vehicle and remove the wheel chocks.
This is clearly a big job that’s best left to a professional. If you decide you’d rather kick back with a cold drink and let someone else take on this endeavor, YourMechanic offers expert camshaft seal replacement.


