The vast majority of passenger vehicles on the road today use hydraulic brake systems to operate their brakes. Most braking systems use brake fluid, pressurized through a sealed system, to operate the vehicle’s disc or drum brakes.
As brakes may be operated at high pressures and harsh conditions, they can be susceptible to various problems like leaks in the hydraulic system.
Leaks in a braking system not only cause a loss of brake fluid but also compromise the effectiveness of the brakes, which in turn can compromise the safety of the vehicle. Small leaks may only reduce braking performance but more severe leaks can sometimes even result in complete failure of the brakes, rendering the vehicle undriveable.
Brake fluid leaks can present themselves in a number of ways ranging from reduced brake performance to mushy or sinking brake pedals, an illuminated brake light or a puddle of brake fluid visible underneath the vehicle.
The following steps show how to locate a brake fluid leak and mentions a few different methods of repair for different types of leaks.
Part 1 of 4: Identify and locate the brake fluid leak
Materials Needed
- Brake fluid - DOT (Department of Transportation) 3 or higher
- Flashlight (optional)
Screwdriver
Note: Refer to the owner's manual of your car to find the correct type of brake fluid to use.
Step 1: Check the brake fluid reservoir. If you suspect you may have a brake fluid leak, begin by checking the brake fluid reservoir under the hood of the vehicle; if the fluid level is low, a leak may be the cause.
Step 2: Look for any visual cues indicating a leak. Locating a brake fluid leak is usually just a simple matter of looking for visual cues around the vehicle. Sometimes, the leaks will be obvious and will show up as a puddle or as drips of some sort along the underside of the vehicle near one of the vehicle’s four corners.
Look for any signs of splashing or staining along the undersides of the vehicle.
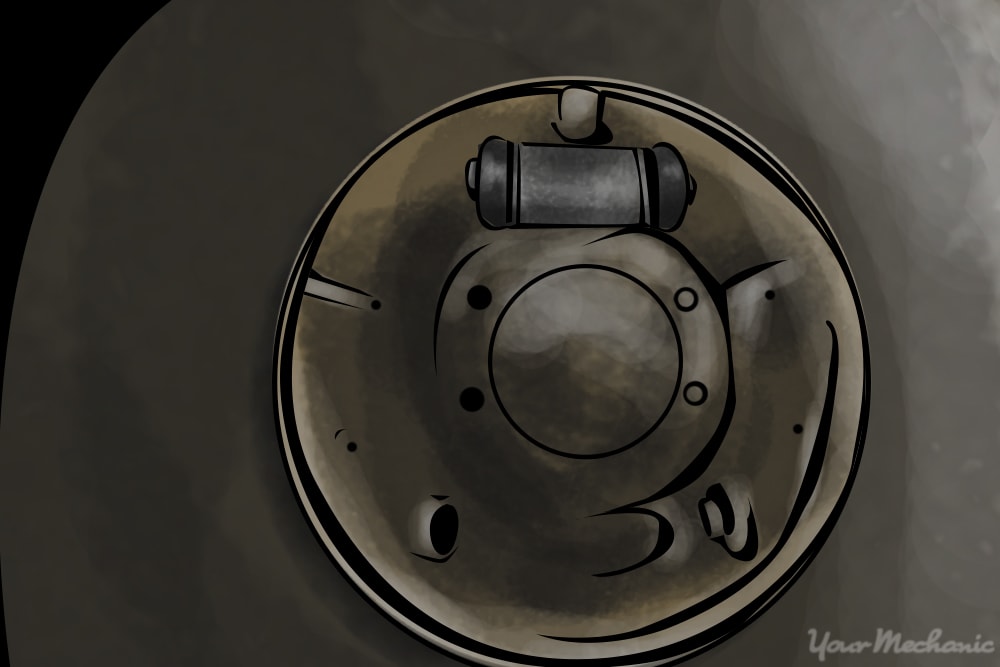
Step 3: Remove the wheels or drums to locate the leak. Sometimes the leaks may not be so obvious and may require the removal of the wheels, and sometimes even the drums, before they can be found.
Some leaks can be small enough that they seep and leak slowly, such as when a caliper or wheel cylinder seal has begun to fail, or when a brake hose has collapsed internally.
- Tip: If necessary, use a flashlight for increased visibility when searching for leaks. If you find signs of leakage but cannot pinpoint the exact location of the leak, try stepping on the brake pedal a few times to see if that drives some of the fluid through the leak.
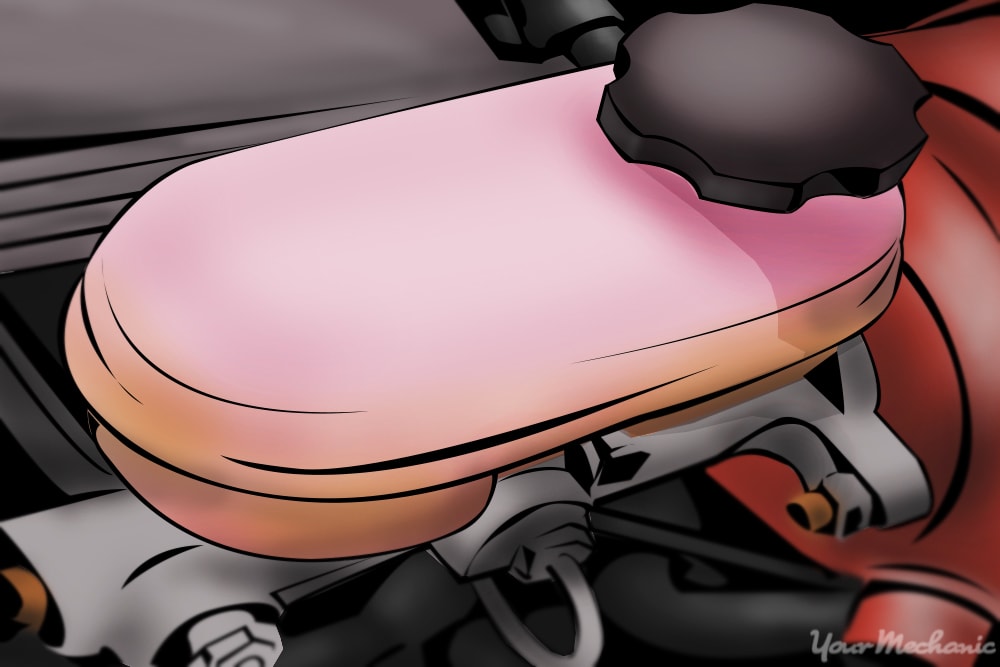
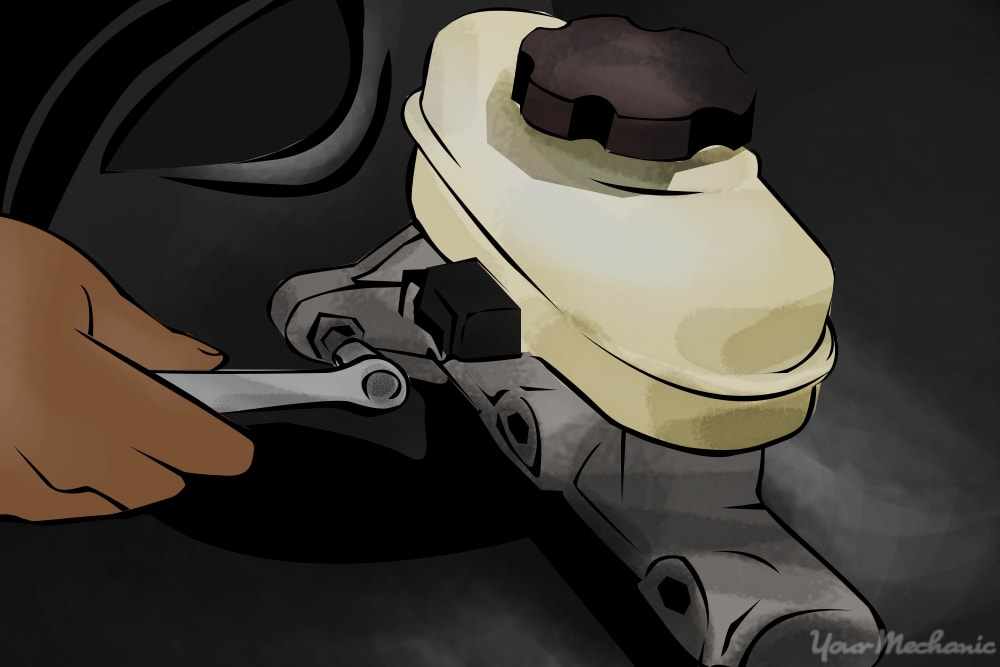
Step 4: Check the brake master cylinder. Remember to check the brake master cylinder for possible leaks as well.
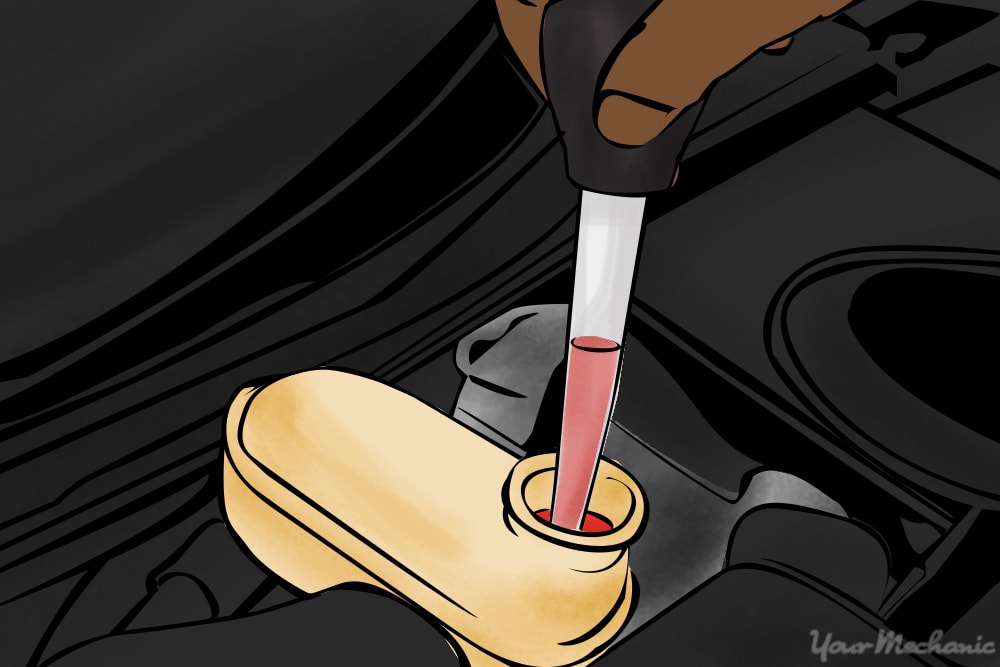
Open the brake fluid reservoir on top of your master cylinder. Unscrew the reservoir cap or use a screwdriver to pry the retaining clamp off the top (for metal reservoirs).
Check if the brake fluid level is low, or if the diaphragm cups are in the descended position when you remove the lid. Push the cups back up before you replace the lid.
The brake fluid should come up to the “Full” line on the side of the cylinder or within 1⁄2 inch of the top of each chamber. If the brake fluid is not at the right level, buy the correct brake fluid for your vehicle and pour it till it reaches the “Full” line.
Close the brake fluid reservoir as quickly as possible to avoid contaminating the fluid with excess moisture or dust.
- Warning: Be careful when you pour in the brake fluid. If it spills onto your car, it can corrode the paint.
If both chambers of your master cylinder are filled with brake fluid to the proper level, carefully close the master cylinder’s lid and make sure that dirt does not enter the chamber.
- Note: It is also important to be aware that some leaks may not be external leaks, but internal leaks within the system. Internal failure of the brake master cylinder — the component that distributes the brake pedal pressure to the wheels — is another type of leak that can occur and will also cause problems with the braking system.
Once you have found the leak, it is usually only a matter of rebuilding or replacing the failed or leaking component.
In the next few steps, you will learn how to replace calipers, wheel cylinders, and the brake master cylinder— the three most commonly failed brake components that leak.
Part 2 of 4: Replace a leaking brake caliper
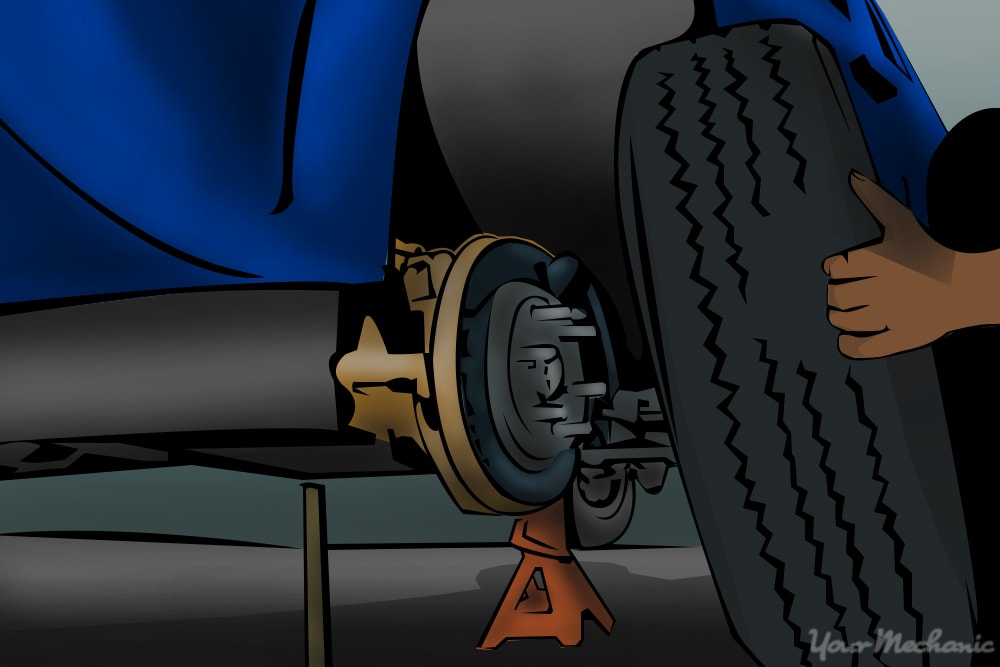
Step 1: Remove the wheel. Raise the vehicle using a jack and secure it on jack stands. Place wheel chocks on opposite wheels, and remove the wheel with the leaking brake caliper.
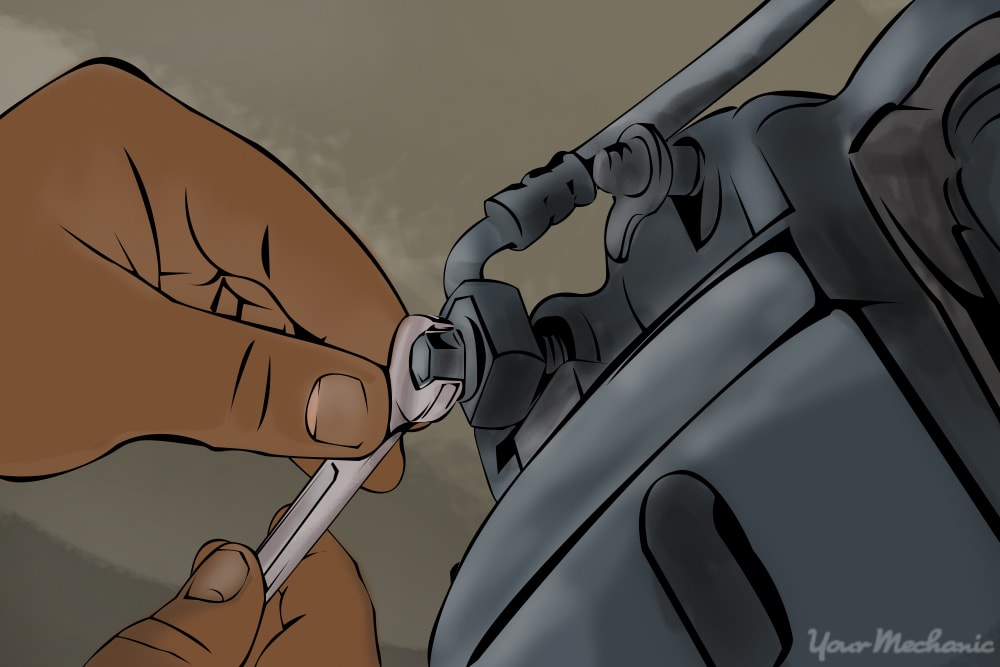
Step 2: Remove the brake hose bolt. Once the wheel is removed, place a drain pan underneath the brake assembly and start removing the brake hose.
Remove the brake hose banjo bolt, or bolts, and then disconnect the brake hose and maneuver it away from the brake assembly. If necessary, remove any bolts securing the hose to the vehicle.
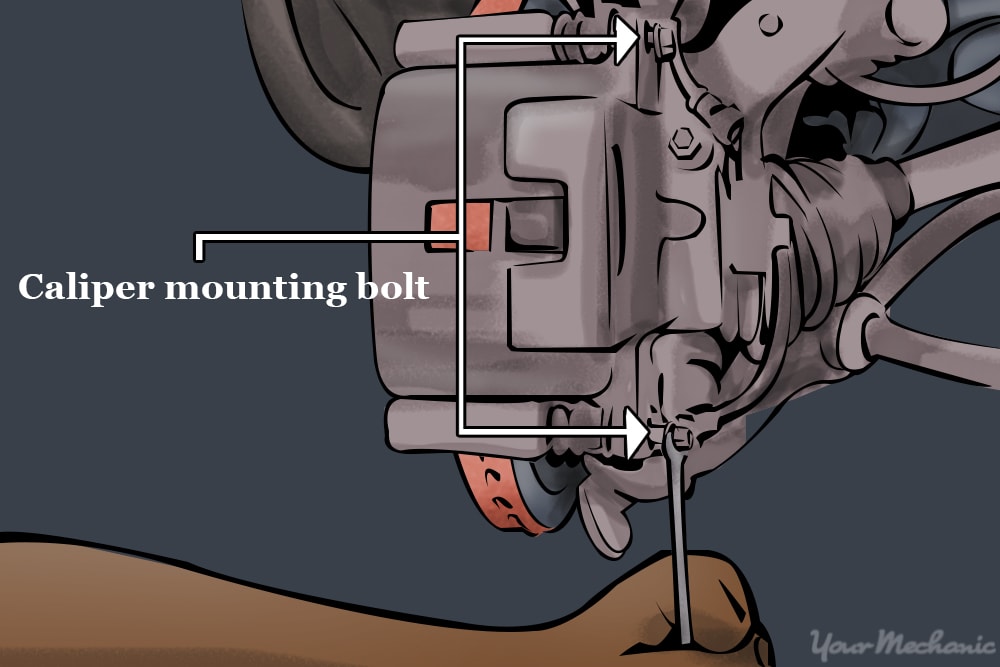
Step 3: Remove the caliper bolts. Once the brake hose is removed, remove the caliper retaining bolts using a ratchet and socket, and then remove the caliper from the vehicle.
- Tip: If the caliper is clamped to the rotor and is difficult to remove, use a flathead screwdriver or small pry bar and insert it in between the pad and caliper to push the caliper piston back in enough for the caliper to come loose.
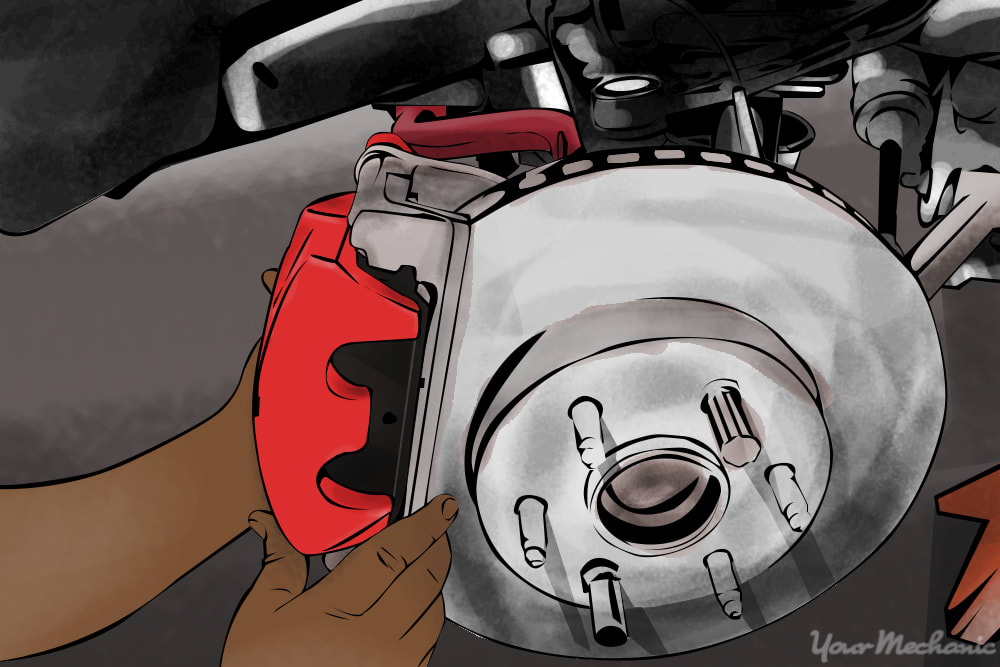
Step 4: Install the new caliper. Take the new brake caliper, and install it on the vehicle. If the caliper is not fully compressed, compress it using a caliper tool before installing it to ensure that it will go on easily.

Step 5: Install the brake hose onto the caliper. Once the caliper is installed, reinstall the brake hose onto the caliper, and replace any bolts that retain the hoses to the vehicle.
Step 6: Open the brake master cylinder. At this point, the installation is complete and the brakes only need to be bled. Begin by opening up your brake master cylinder. Make sure that the level is topped off.
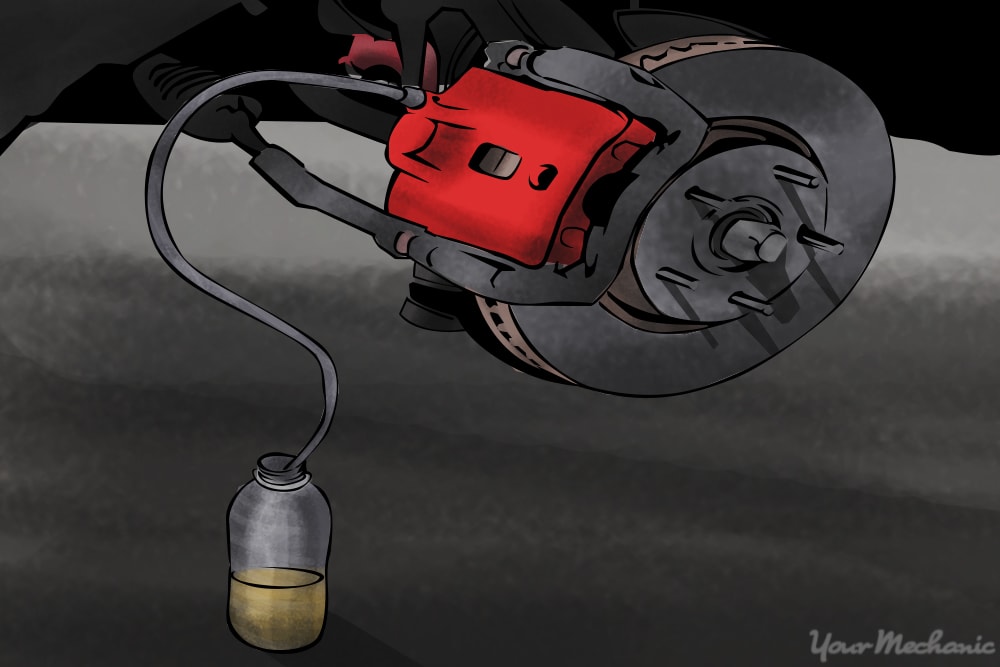
Step 7: Set up the container and tubing. Pour brake fluid into the small plastic container until it is about half full. Then put one end of the plastic tubing over the bleeder screw and the other end into the plastic bottle, submerging the end of the tubing below brake fluid level.
Step 8: Release air trapped in the system. Have your helper pump the brake pedal a few times until firm, and then hold the pedal down. With the pedal held down, break the bleeder screw loose to push out any air trapped in the system. After the air is pushed out, the pedal should sink to the floor.
Step 9: Tighten the bleeder screw. After all the air has been released, tighten the bleeder screw.
Repeat steps 6-9 until the brake pedal is firm, making sure that the brake master cylinder always has fluid in it. If the level begins to drop as you are bleeding the brakes, make sure to add fluid to the reservoir.
- Tip: For best results, it is recommended to repeat this process with the other three wheels of the vehicle to ensure that no air bubbles remain in the system.
Part 3 of 4: Replace a leaking wheel cylinder
Materials Needed
- A helper (for bleeding the brakes)
- Basic set of hand tools
- Brake fluid - DOT (Department of Transportation) 3 or higher.
- Brake pad and caliper tool
- Clear aquarium tubing - one to two feet
- Drain pan
- Jack
- Needle nose pliers (for removing the springs and retaining clips)
- Safety jack stand x 2
- Small plastic bottle (for bleeding brakes)

Step 1: Remove the wheel. Once the leaking wheel cylinder has been identified, if it has not been done already, raise the vehicle, secure it on jack stands, and remove the wheel with the leaking wheel cylinder.

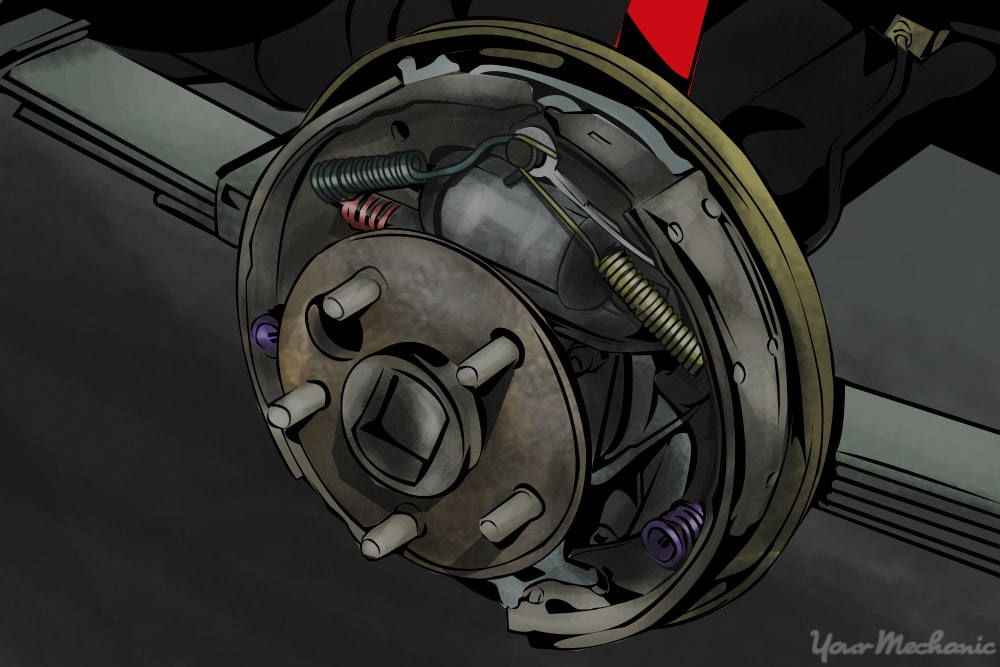
Step 2: Remove and dismantle the brake drum. Remove the brake drum, and dismantle the drum brake assembly.
- Tip: If the brake drum is difficult to remove, check and see if the parking brake is set. Disengage the parking brake and try to remove the drum.
Remove the springs, retaining clips, brake shoes, and, if necessary, the parking brake cable.
- Tip: Take this time to carefully inspect any components for excessive wear or the need for replacement.
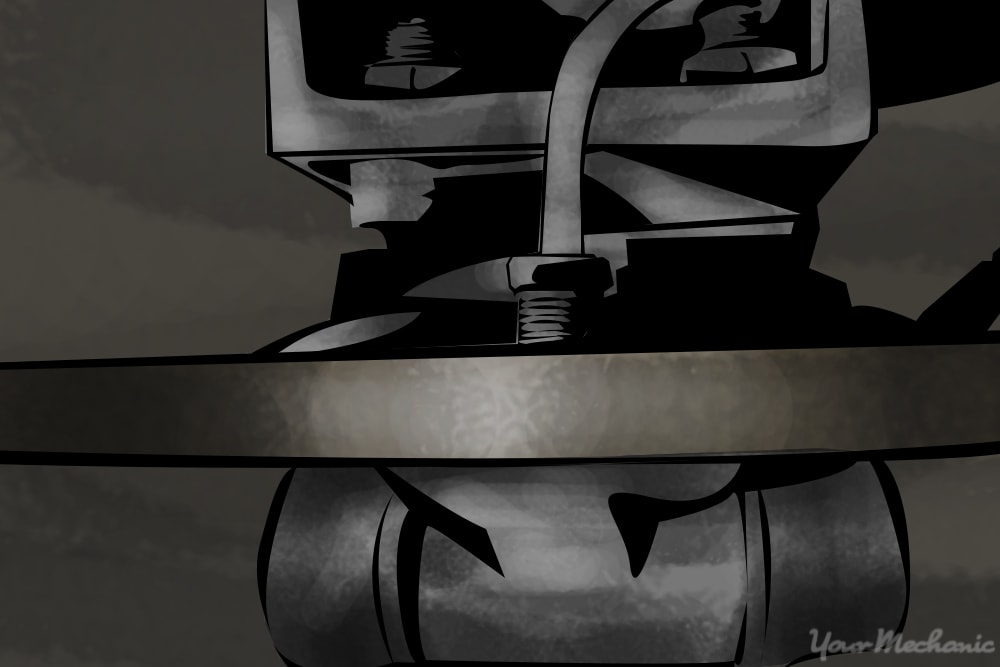
Step 3: Remove brake hose. The drum assembly should now be mostly bare with only the backing plate with the wheel cylinder remaining.
Place the drain pan underneath the brake assembly, and remove the brake hose or the banjo bolt using a socket and ratchet.
- Warning: Be aware that once the brake hose is broken loose, brake fluid may leak out.
With the banjo bolt removed, position the hose away from the wheel cylinder. If you need more room to maneuver, remove any bolts that may be retaining the brake hose to the vehicle.
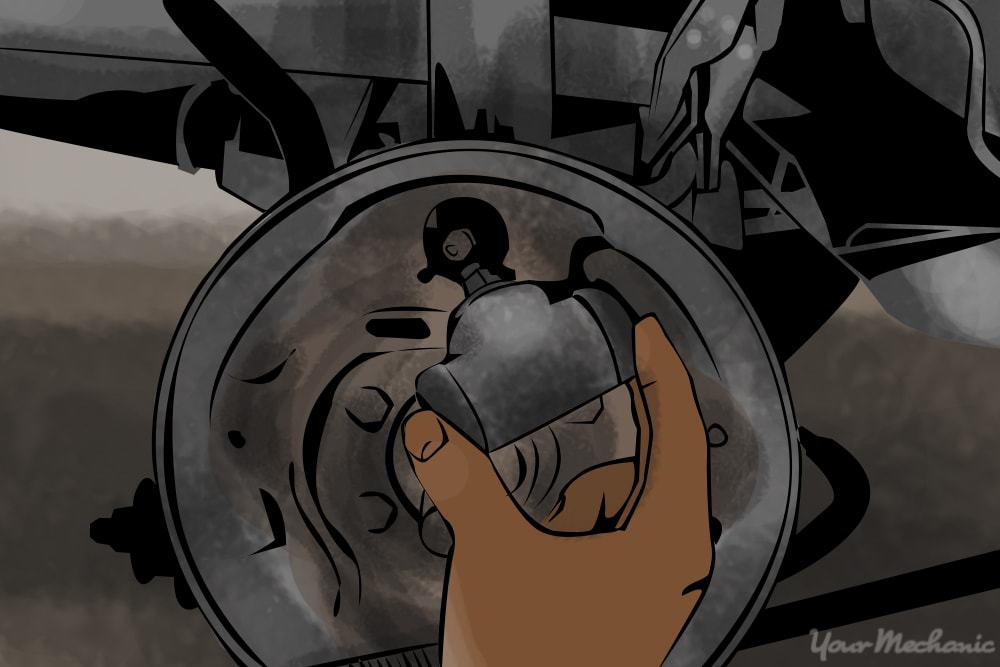
Step 4: Remove brake wheel cylinder. Remove the wheel cylinder using a ratchet and socket and install your new wheel cylinder, taking care to install it in the same manner as the one that was removed.
Step 5: Reinstall the brake hose. Once the new wheel cylinder has been installed, reinstall the brake hose and securing bolts.
Step 6: Reassemble the brake drum. Start to reassemble the brakes — reinstall the brake shoes, clips, and springs, and then finally the drum.
- Tip: Remember to attach the parking brake cable if it was disconnected.
Step 7: Open the brake master cylinder. The installation is complete and the brakes need to be bled. Open up the brake master cylinder and make sure that the level is topped off.
Step 8: Set up the plastic container and tubing. Pour brake fluid into the small plastic container until it is about half full. Put one end of the plastic tubing over the bleeder screw and the other end into the plastic bottle, submerging the end of the tubing below brake fluid level.
Step 9: Release air trapped in the system. Have your helper pump the brake pedal a few times until firm, and then hold the pedal down.
With the pedal held down, break the bleeder screw loose to push out any air that is trapped in the hydraulic brake system. All air should be pushed out and the brake pedal should sink to the floor.
Step 10: Tighten the bleeder screw. After all the air has been released, tighten the bleeder screw.
Repeat steps 7-10 a few times, or until the pedal is firm, making sure that the brake master cylinder always has fluid in it. If the level begins to drop as you are bleeding the brakes, make sure to add fluid to the reservoir.
- Tip: For best results, it is recommended to repeat this process with the other three wheels of the vehicle to ensure that no air bubbles remain in the system.
Part 4 of 4: Replace a leaking brake master cylinder
Materials Needed
- A helping hand (for bleeding the brakes)
- Basic set of hand tools
- Brake fluid
- Drain pan
- Jack and jack stands
- Plastic tubing (for bleeding the brakes)
- Rag
- Small plastic bottle (for bleeding brakes)
- Set of flare nut wrenches
- Turkey baster or suction pump
- Wheel chocks or blocks of wood
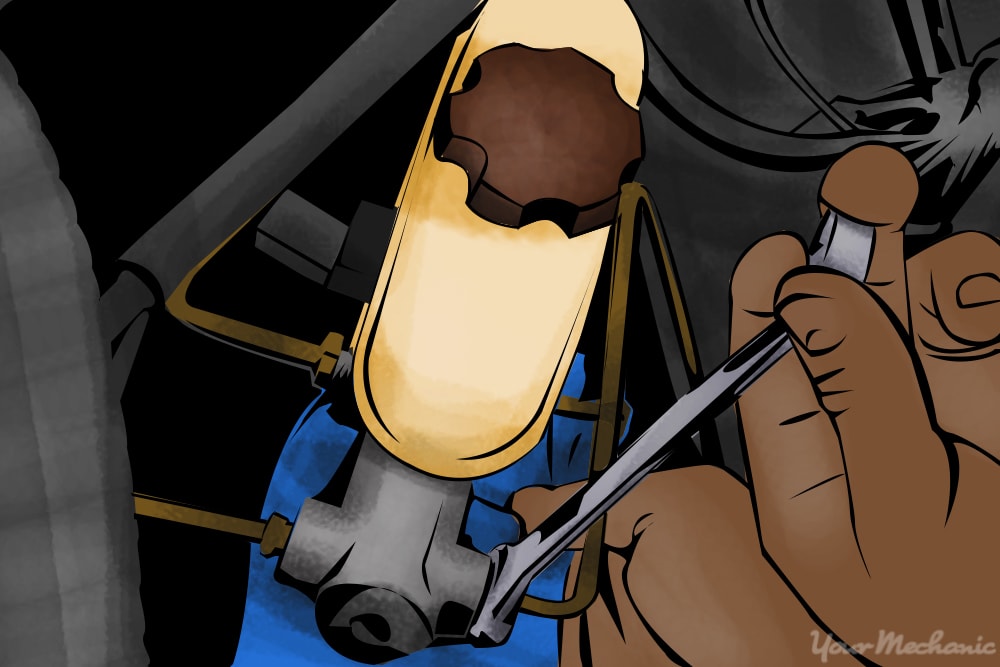
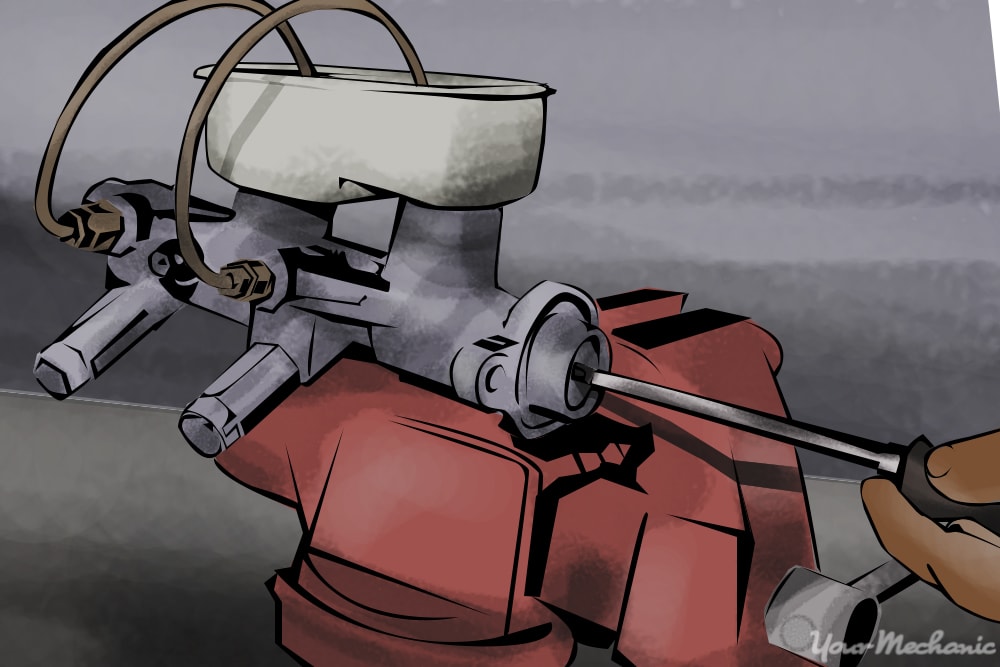
Step 1: Remove the old brake fluid. Locate the brake master cylinder, unscrew the cap, and use the turkey baster to remove the brake fluid from the reservoir. Remove as much of the fluid as you can, and make sure to store or dispose of it properly.

Step 2: Disconnect plugs from master cylinder. Unplug any connectors or sensors that may be plugged into the brake master cylinder.
Step 3: Remove the brake hard lines. Next, remove the brake master cylinder hard lines using the appropriate flare nut wrench.
Tip: Keep a rag nearby to clean up any brake fluid spills.
Warning: Clean up any brake fluid spills as quickly as you can as brake fluid can be harmful to some paint surfaces.
Step 4: Remove the brake master cylinder. Once the hard lines are removed, remove the nuts and bolts securing the master cylinder to the vehicle, and then remove the cylinder itself.
- Note: In certain vehicles, you will need to unbolt the master cylinder from the pedal on the inside of the vehicle before it can be removed.
Step 5: Prepare the new master cylinder. Once the old master cylinder is removed, prepare your new master cylinder for installation.
Carefully read the instructions and make any necessary preparations before installing it.
- Note: Certain master cylinders require that they be filled and bench bled before they are installed, and failure to do so will result in improper operation of the brake system.
Step 6: Install the new master cylinder. With the new master cylinder prepared, install it onto the vehicle in the reverse of the removal procedure, as shown in steps 2-4.
Step 7: Open up the brake master cylinder. At this point the installation is complete, and the brakes only need to be bled. Begin by opening up your brake master cylinder and making sure that the level is topped off.
Step 8: Set up the plastic container and tubing. Pour brake fluid into your small plastic container until it is about half full. Put one end of the plastic tubing over the bleeder screw and the other end into the plastic bottle, submerging the end of the tubing below brake fluid level.
Step 9: Release air trapped in the system. Have your helper pump the brake pedal a few times until firm, and then hold the pedal down. With the pedal held down, break the bleeder screw loose to allow any air trapped in the system to be pushed out. All air should be pushed out and the brake pedal should sink to the floor.
Step 10: Tighten the bleeder screw. After all the air has been released, tighten the bleeder screw.
Repeat steps 7-10 a few times, or until the pedal is firm, making sure that the brake master cylinder always has fluid in it.
If the level begins to drop as you are bleeding the brakes, make sure to add more fluid to the reservoir.
- Tip: For best results, it is recommended to repeat this process with the other three wheels of the vehicle to ensure that no air bubbles remain in the system.
In most cases, brake fluid leaks are a simple matter of replacing a failed component with a new one and can usually be repaired with few special tools. However, if you are not comfortable working on your vehicle’s braking system, have a professional technician, such as one from YourMechanic, inspect the leak and repair it.